This is a test of the Emergency email notice system. If this had been an actual news feed, it would be a hell of a lot more interesting!
To the Forge!
Finally made it back to the forge today. By the order of operations, The next steps should have been woodworking. However, it had been so long sense I fired up the forge, I wanted to grab a few hours when I could.
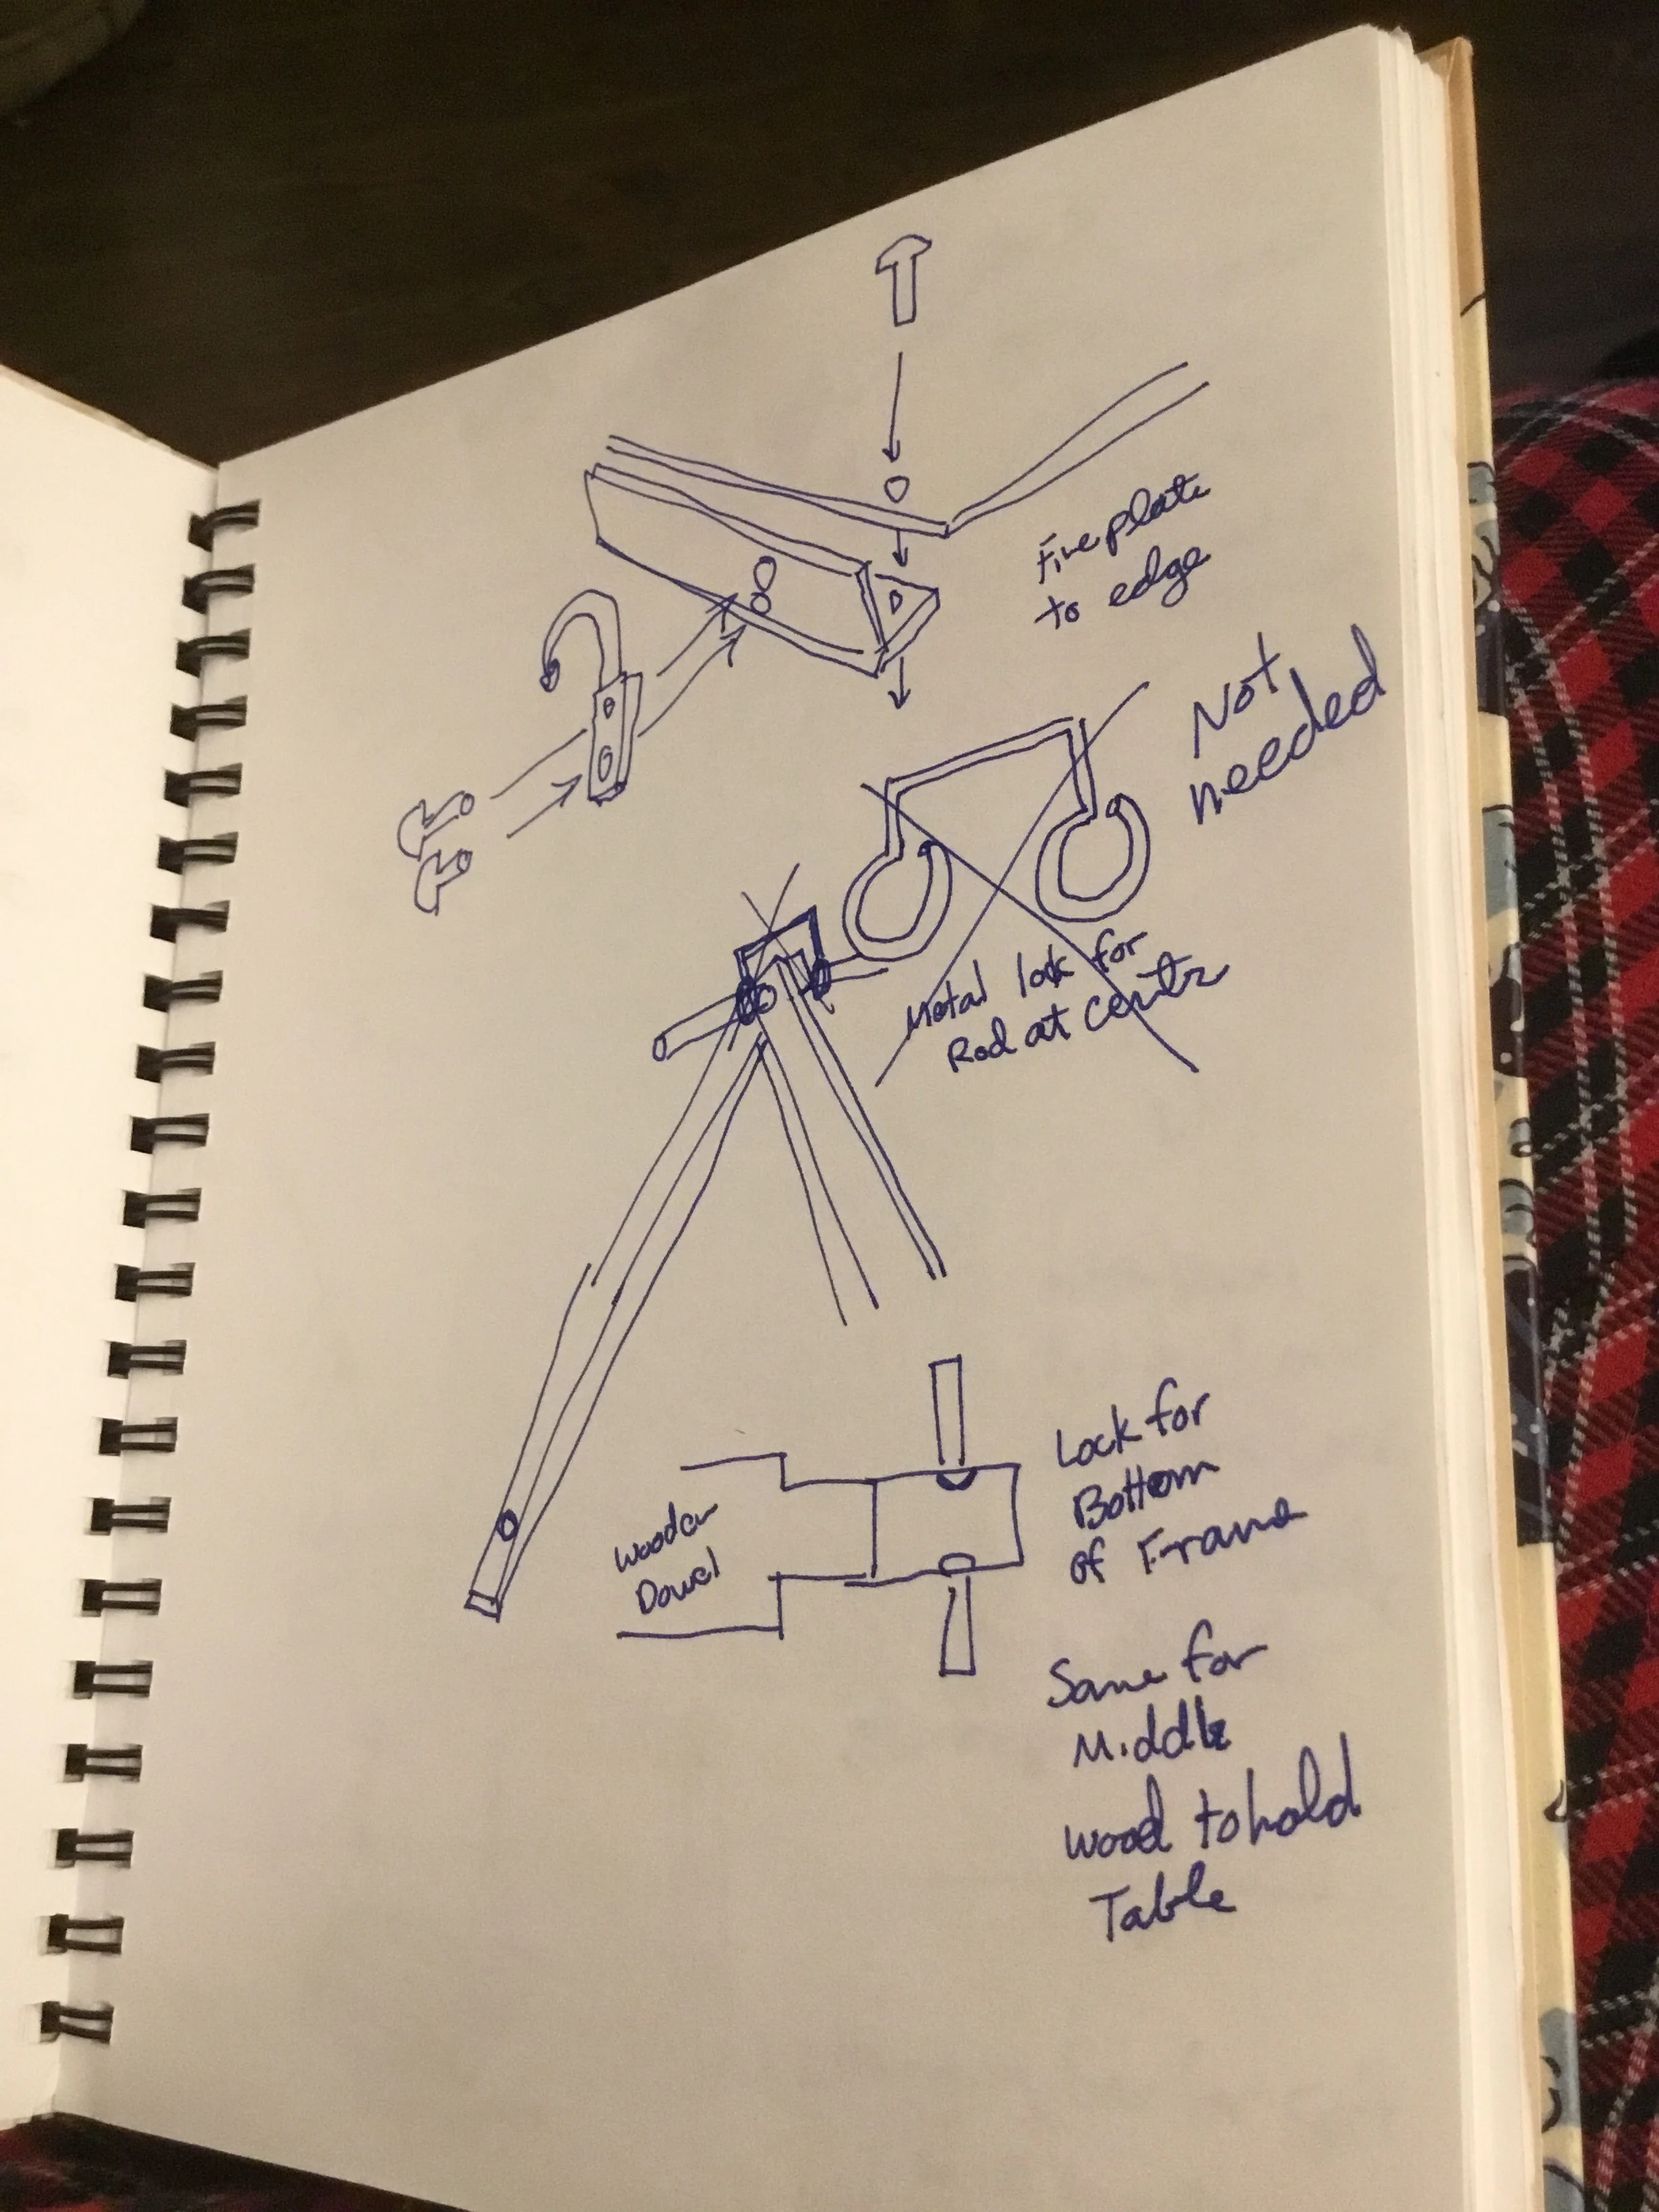
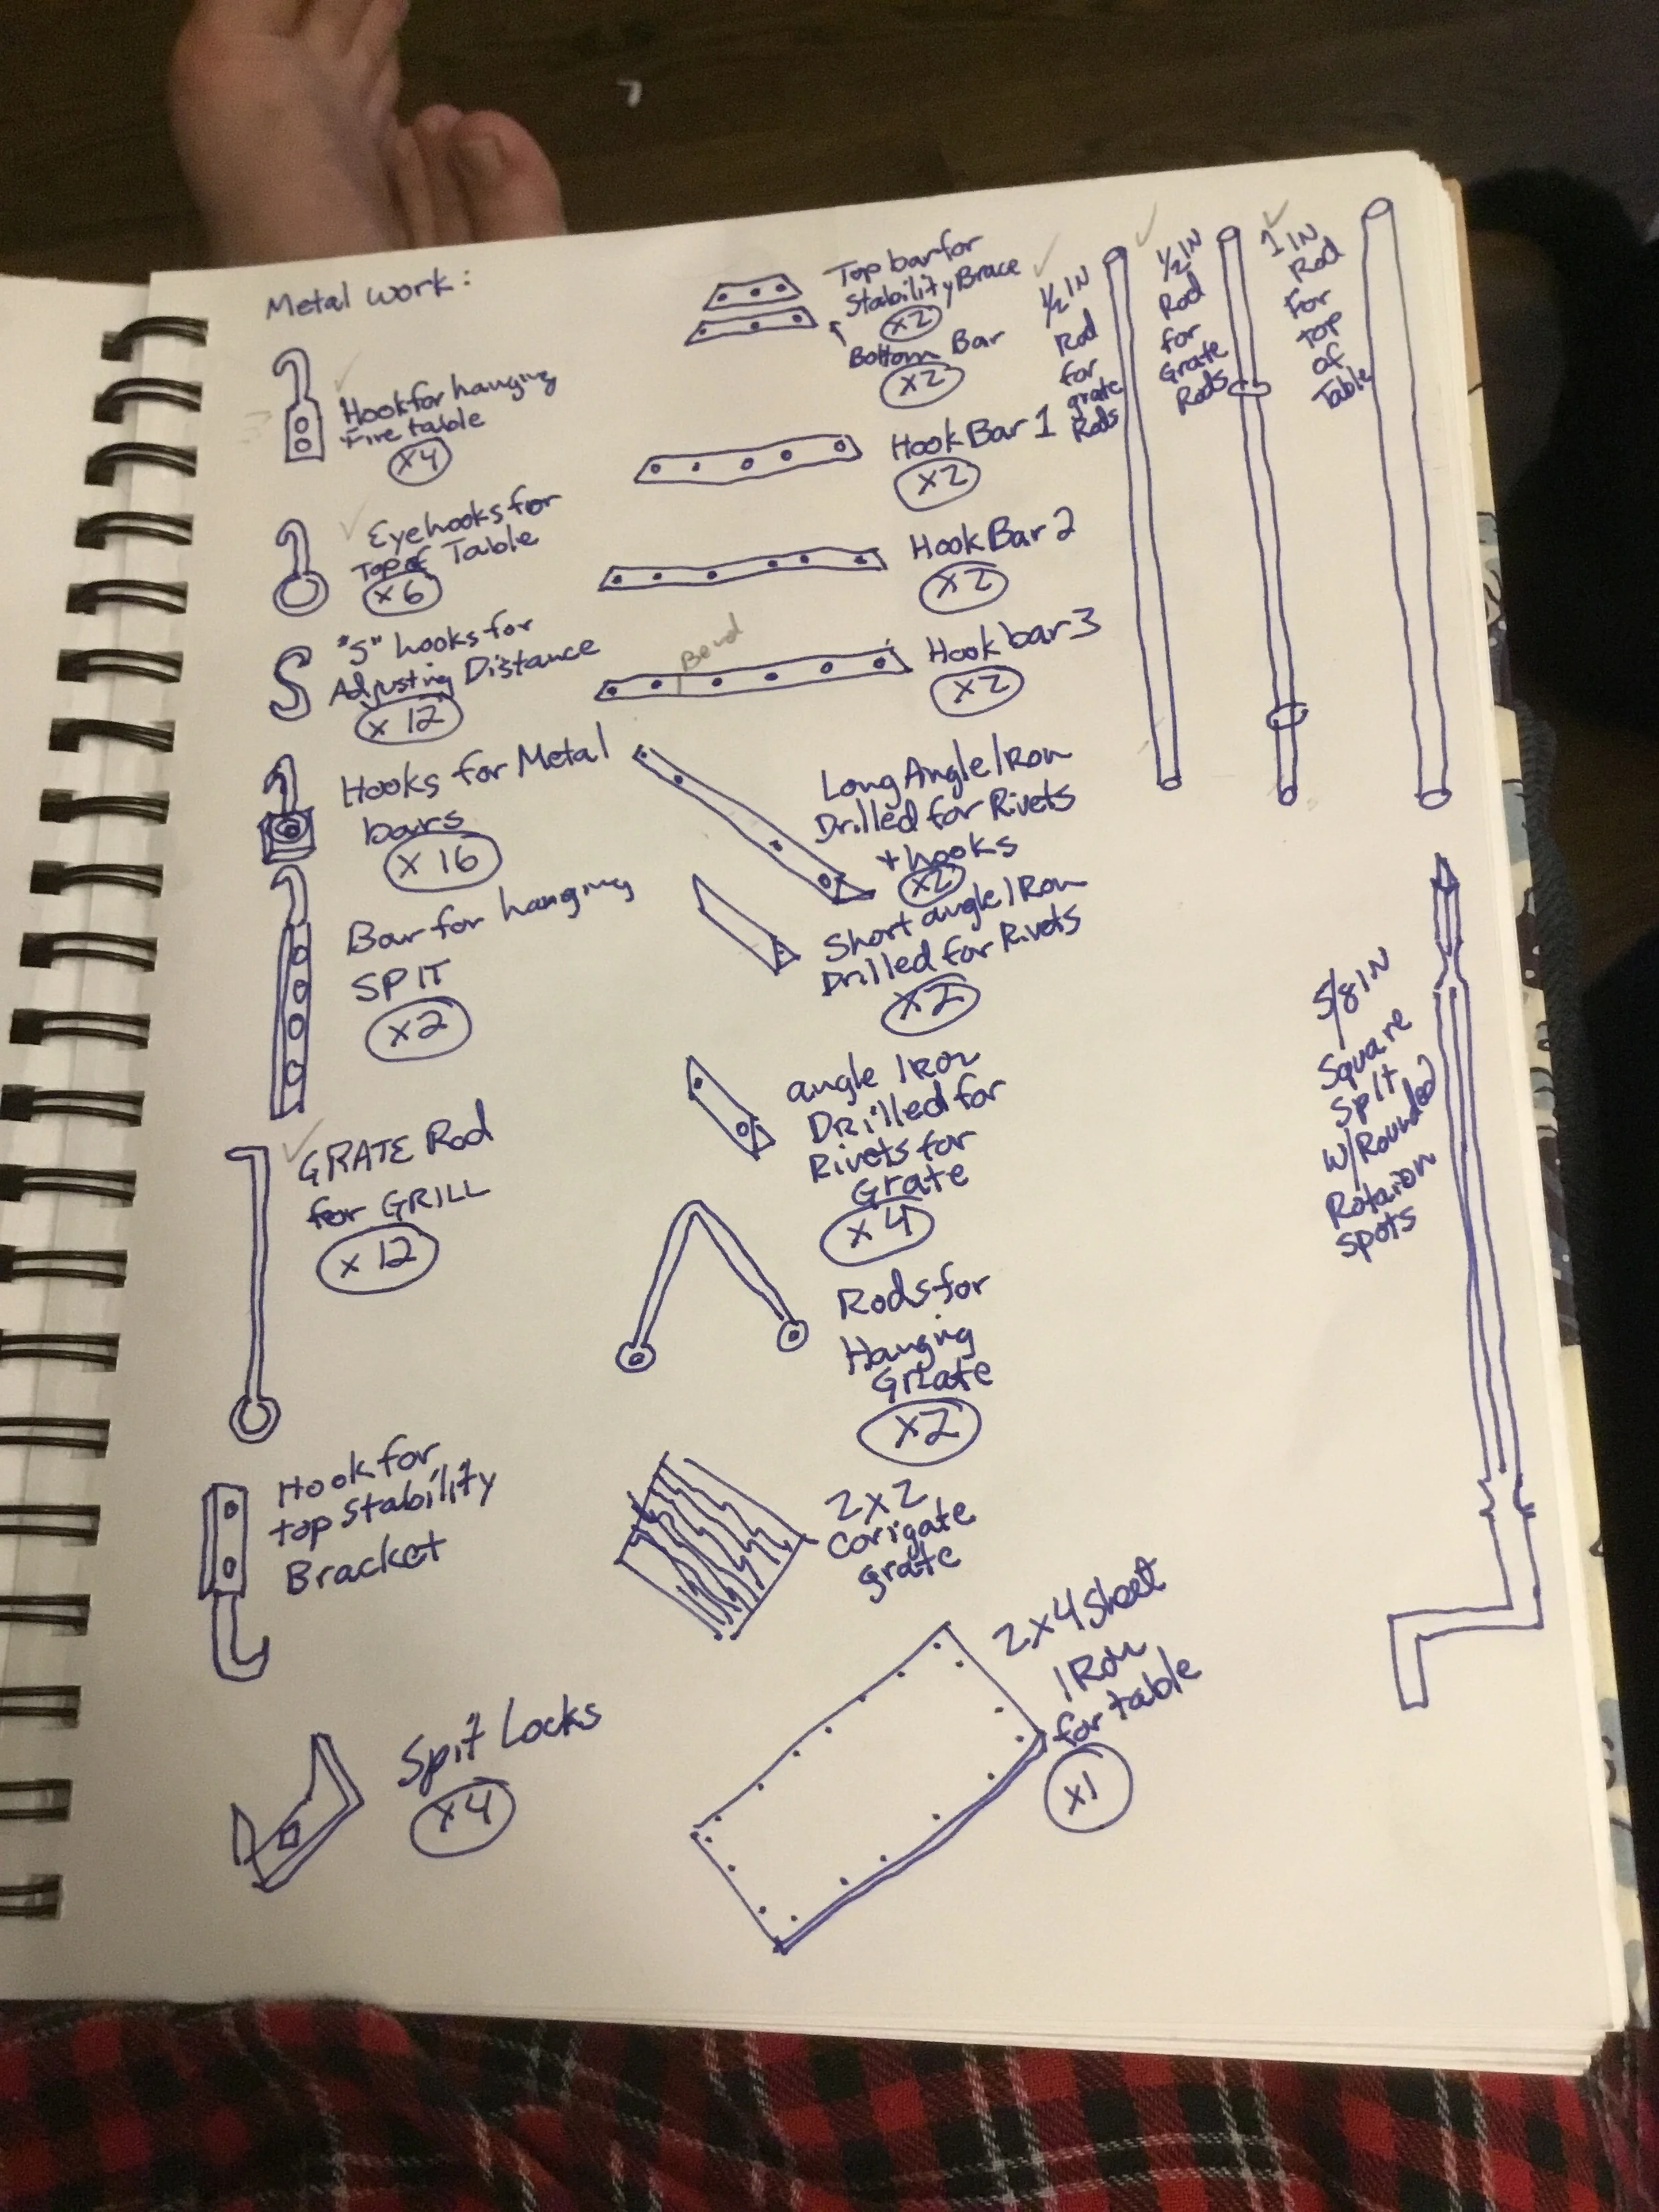
The first thing I worked on was attaching the hooks to the fire table. The hooks are attached with rivets and needed to be drilled to accept them. Each hook had to be aligned and tapped to fit the holes in the angle iron. These were then hammered down to form the joint. The ones closest to the angle will need a rivet setting tool, i could not get my hammer in close enough to set them.
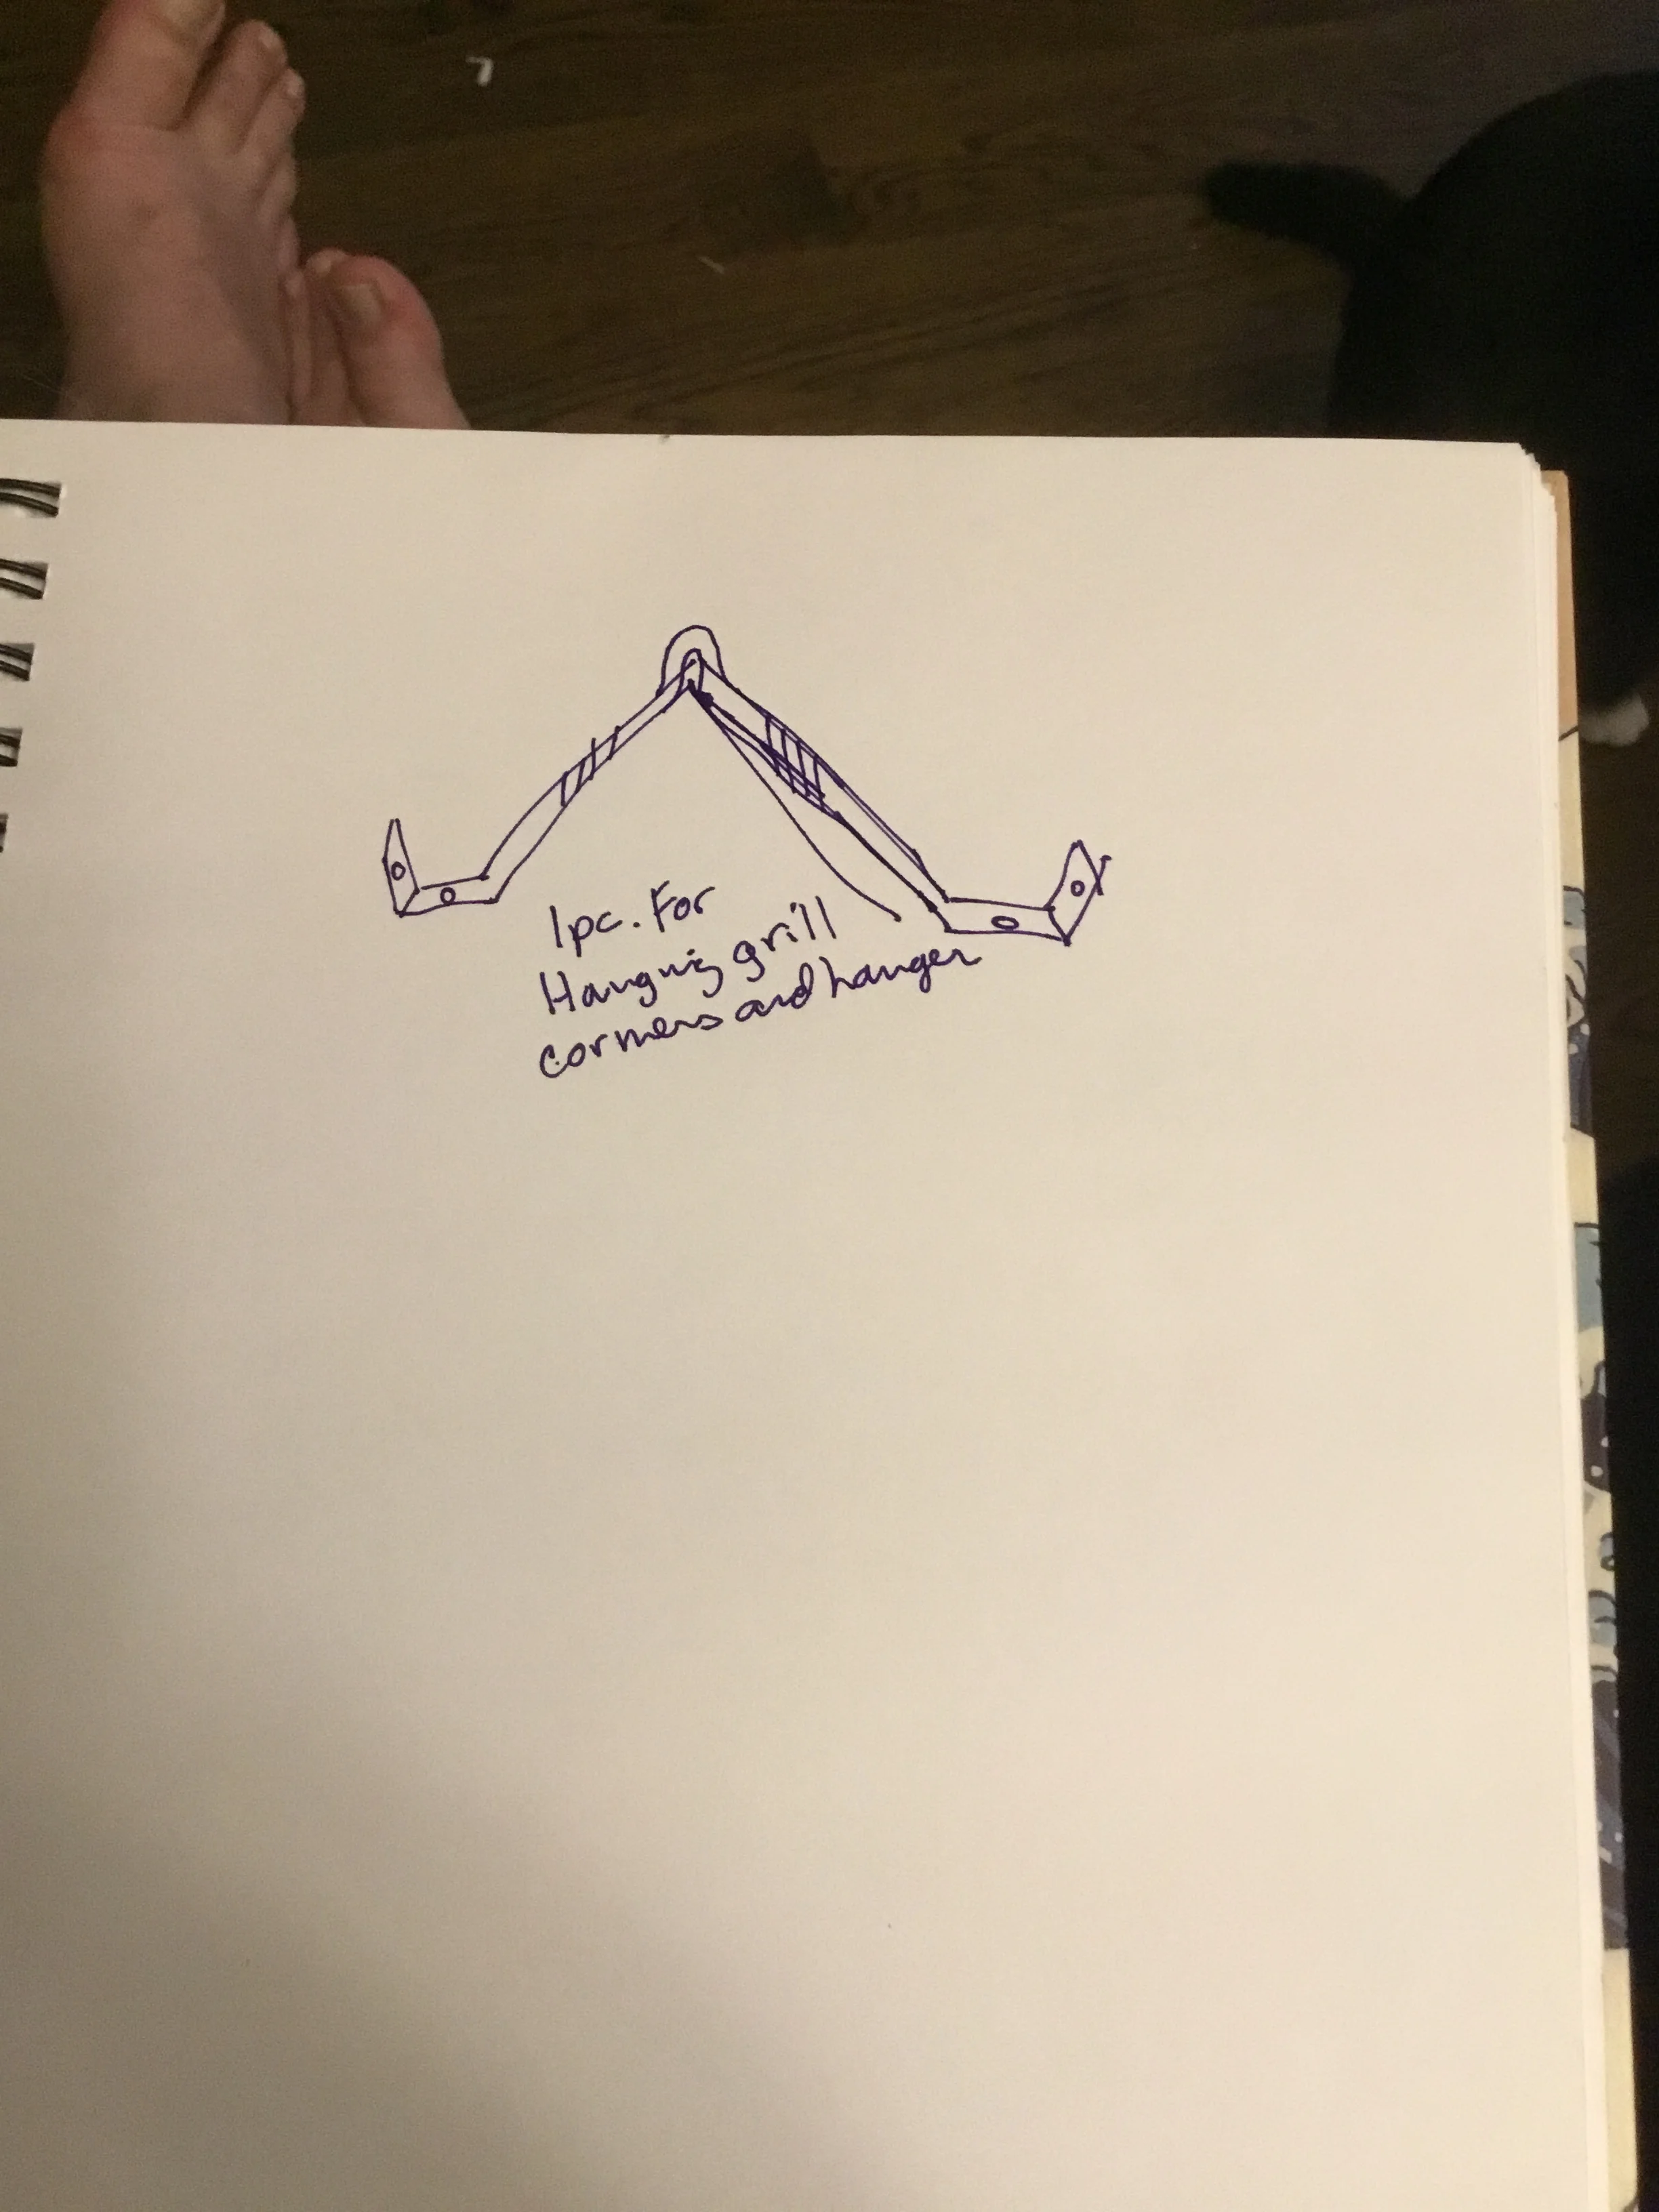
Because I had not been happy with the gaps at the corners of the table, I decided to make corners for the table. These will be riveted to the edges and will hide the gaps. I was able to get 2 done before moving on to something more fun.
Next it was time to work on something fun:
Forged 1 chicken roaster and 2 meat spits. These each will have their own documentation, so I will not go into details here. Just post the pictures of the finished work. First the chicken roaster:
I also created 2 skewers for use with meats cooked on a hearth fire:
Woodworking Begining (?)
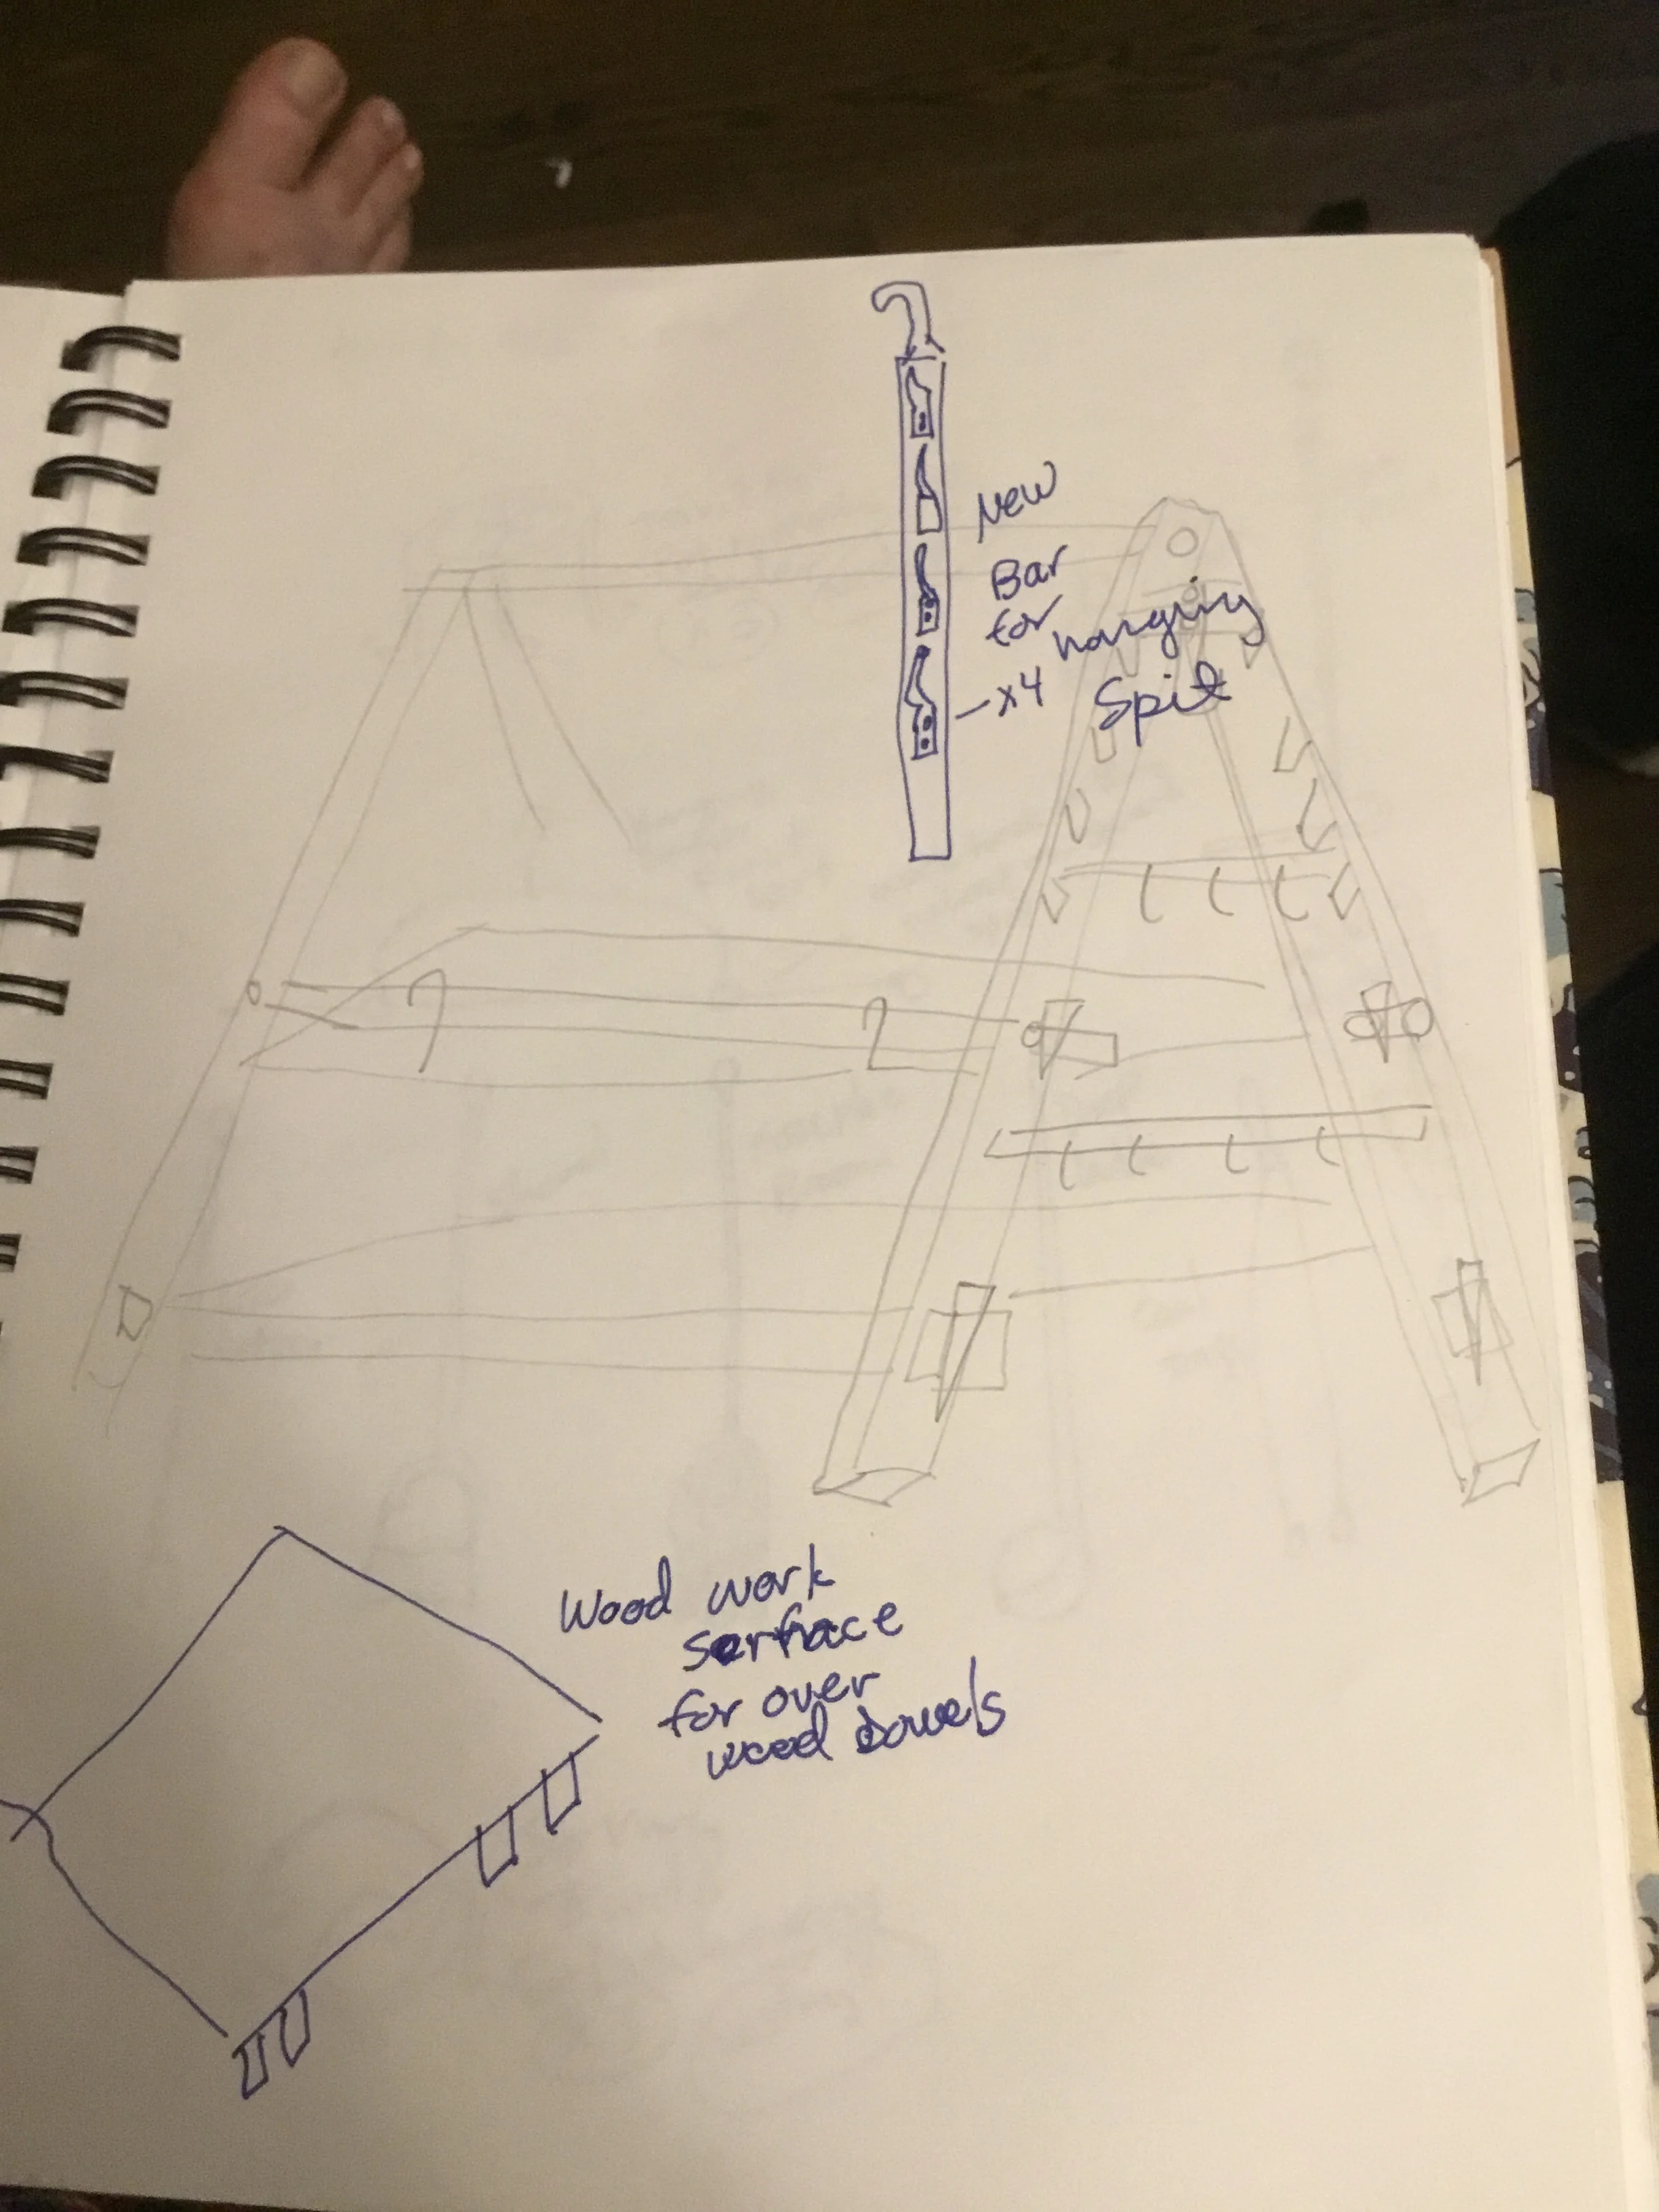
Well, the original plan for the table supports was to carve the ends down to create a shoulder to act as a stop for the uprights. After feeling the weight of the table, i grew worried about weakening the supports by thinning them. The solution that I think will work would be to the turks head knots on each end of the supports as a stop for the uprights. I know the turks head knot is not a strong stop, but i do not see it being under that much pressure.
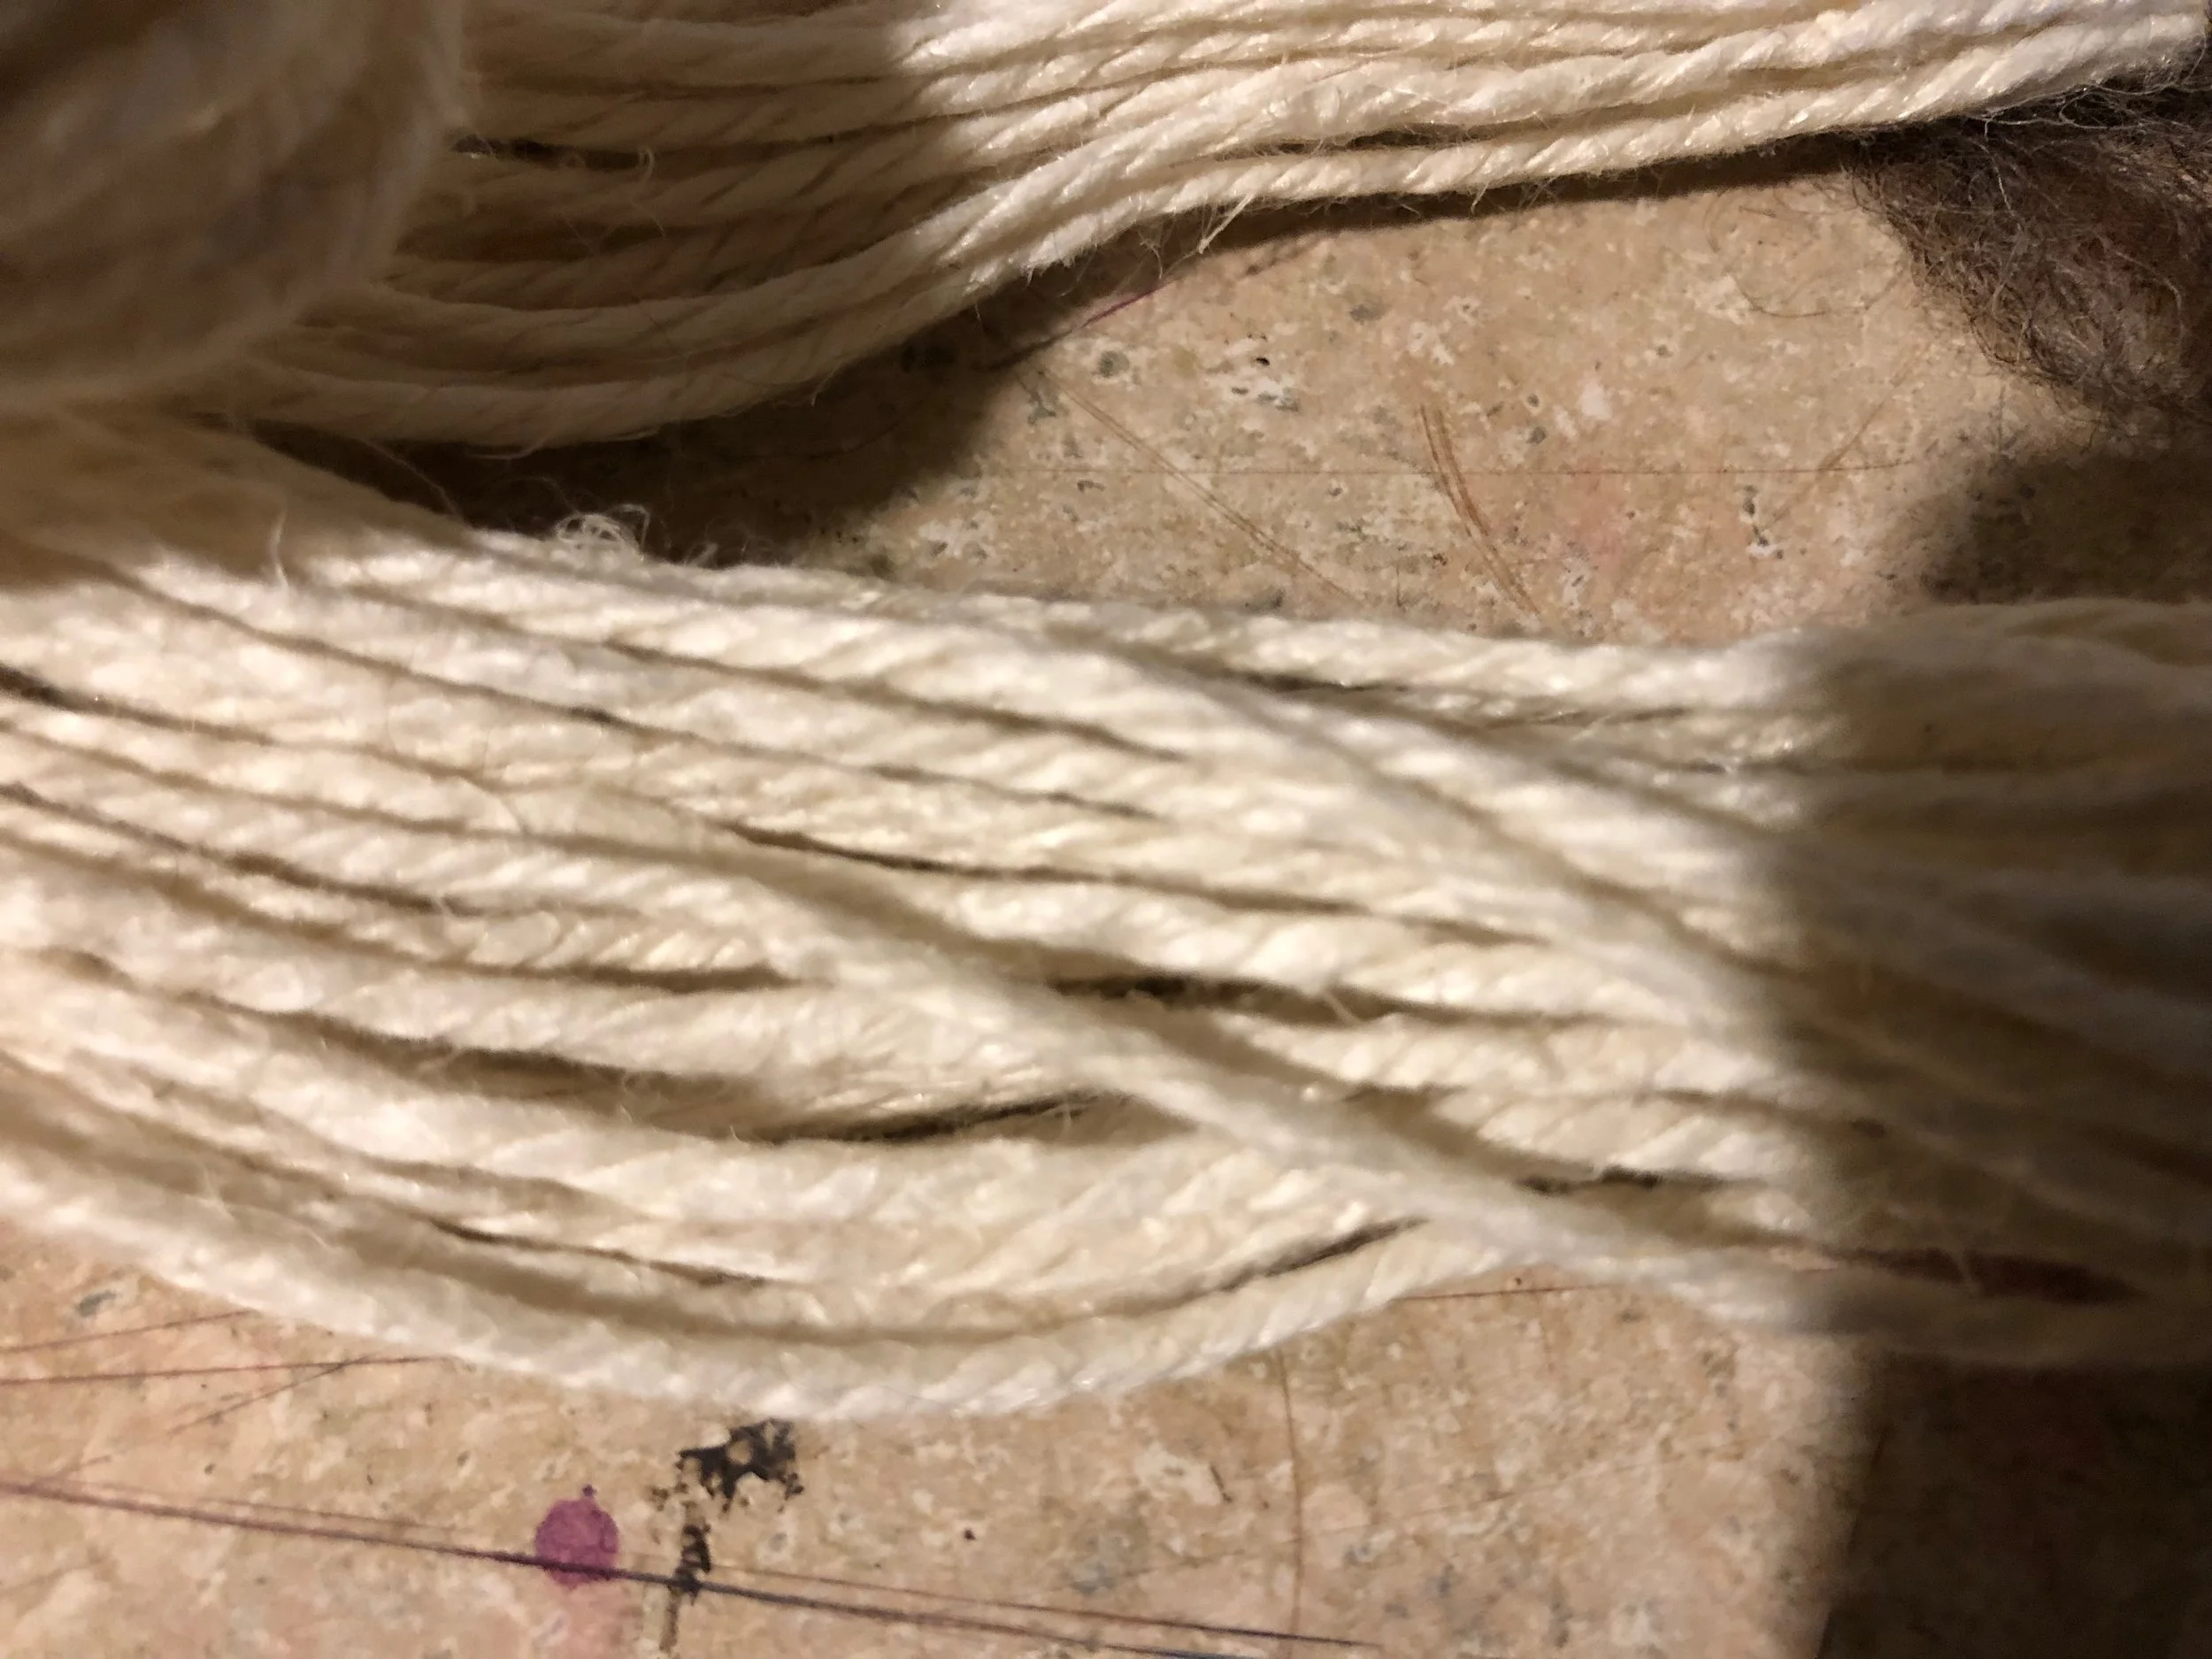
This decision led to a search of the supply cabinet for twine that I could use for the knot. It was after about 10 minutes of searching, that I came to the realization that I could just make the cordage. Even better of a thought was that I Already had. Digging through the skeins that I just had out to photograph, I fount the 3 ply flax that I had made a few years earlier. This seemed good and strong, but not quite thick enough.
The next step was to braid The cord to make it thicker. This was done in a simple brain and produced a cord approximately 50 inches long.
This was then woven and tightened onto the support bar and covered with spar varnish. I am hoping that the spar varnish will help to both glue the knot on place as well as strengthen it.
This will be checked tomorrow to see how strong it became
More Forging 12/10/18
Forged the other 3 hooks for the table. I also forged a spare in case of accidents. This has me now caught up on the work that has been done so far.
The next steps will be:
1. Drill the hooks to match the holes in the angle iron.
2. rivet the hooks to the sides of the table.
3. Rivet the edged onto the table.
Forging the Hooks 12/4/18
Today started the forging of the various components of the fire table. I was able to get through 3 of the hooks for the fire table. These will be riveted to the fire-table and will allow the table to be hung from the round supports on the wooden frame. the holes will be drilled into the hooks at a later date and they will be riveted to the angle iron frame of the table.
The hooks were forged from 3/8 in square stock. The square shape was left on the hooks to provide more resting surface and therefore more stability. Hopefully they were forged close enough in shape to keep the table stable.
Building the base 11/30/18
Today (11/30/18) was the start of the actual work on the table. Today was spent with the 4 inch angle grinder cutting the angle Iron to the size of the 2 ft by 4 ft base. This was then drilled for the rivets and held in place by bolts till all work is done. The sides were also drilled for the hooks that will hold the table to the frame. With the poor job I did on cutting the edges, i might need to plan on forging corners. I still want to have gaps to allow water to drain, but i also want it to be aesthetically pleasing.
Planning 8/31/18 to 10/31/18
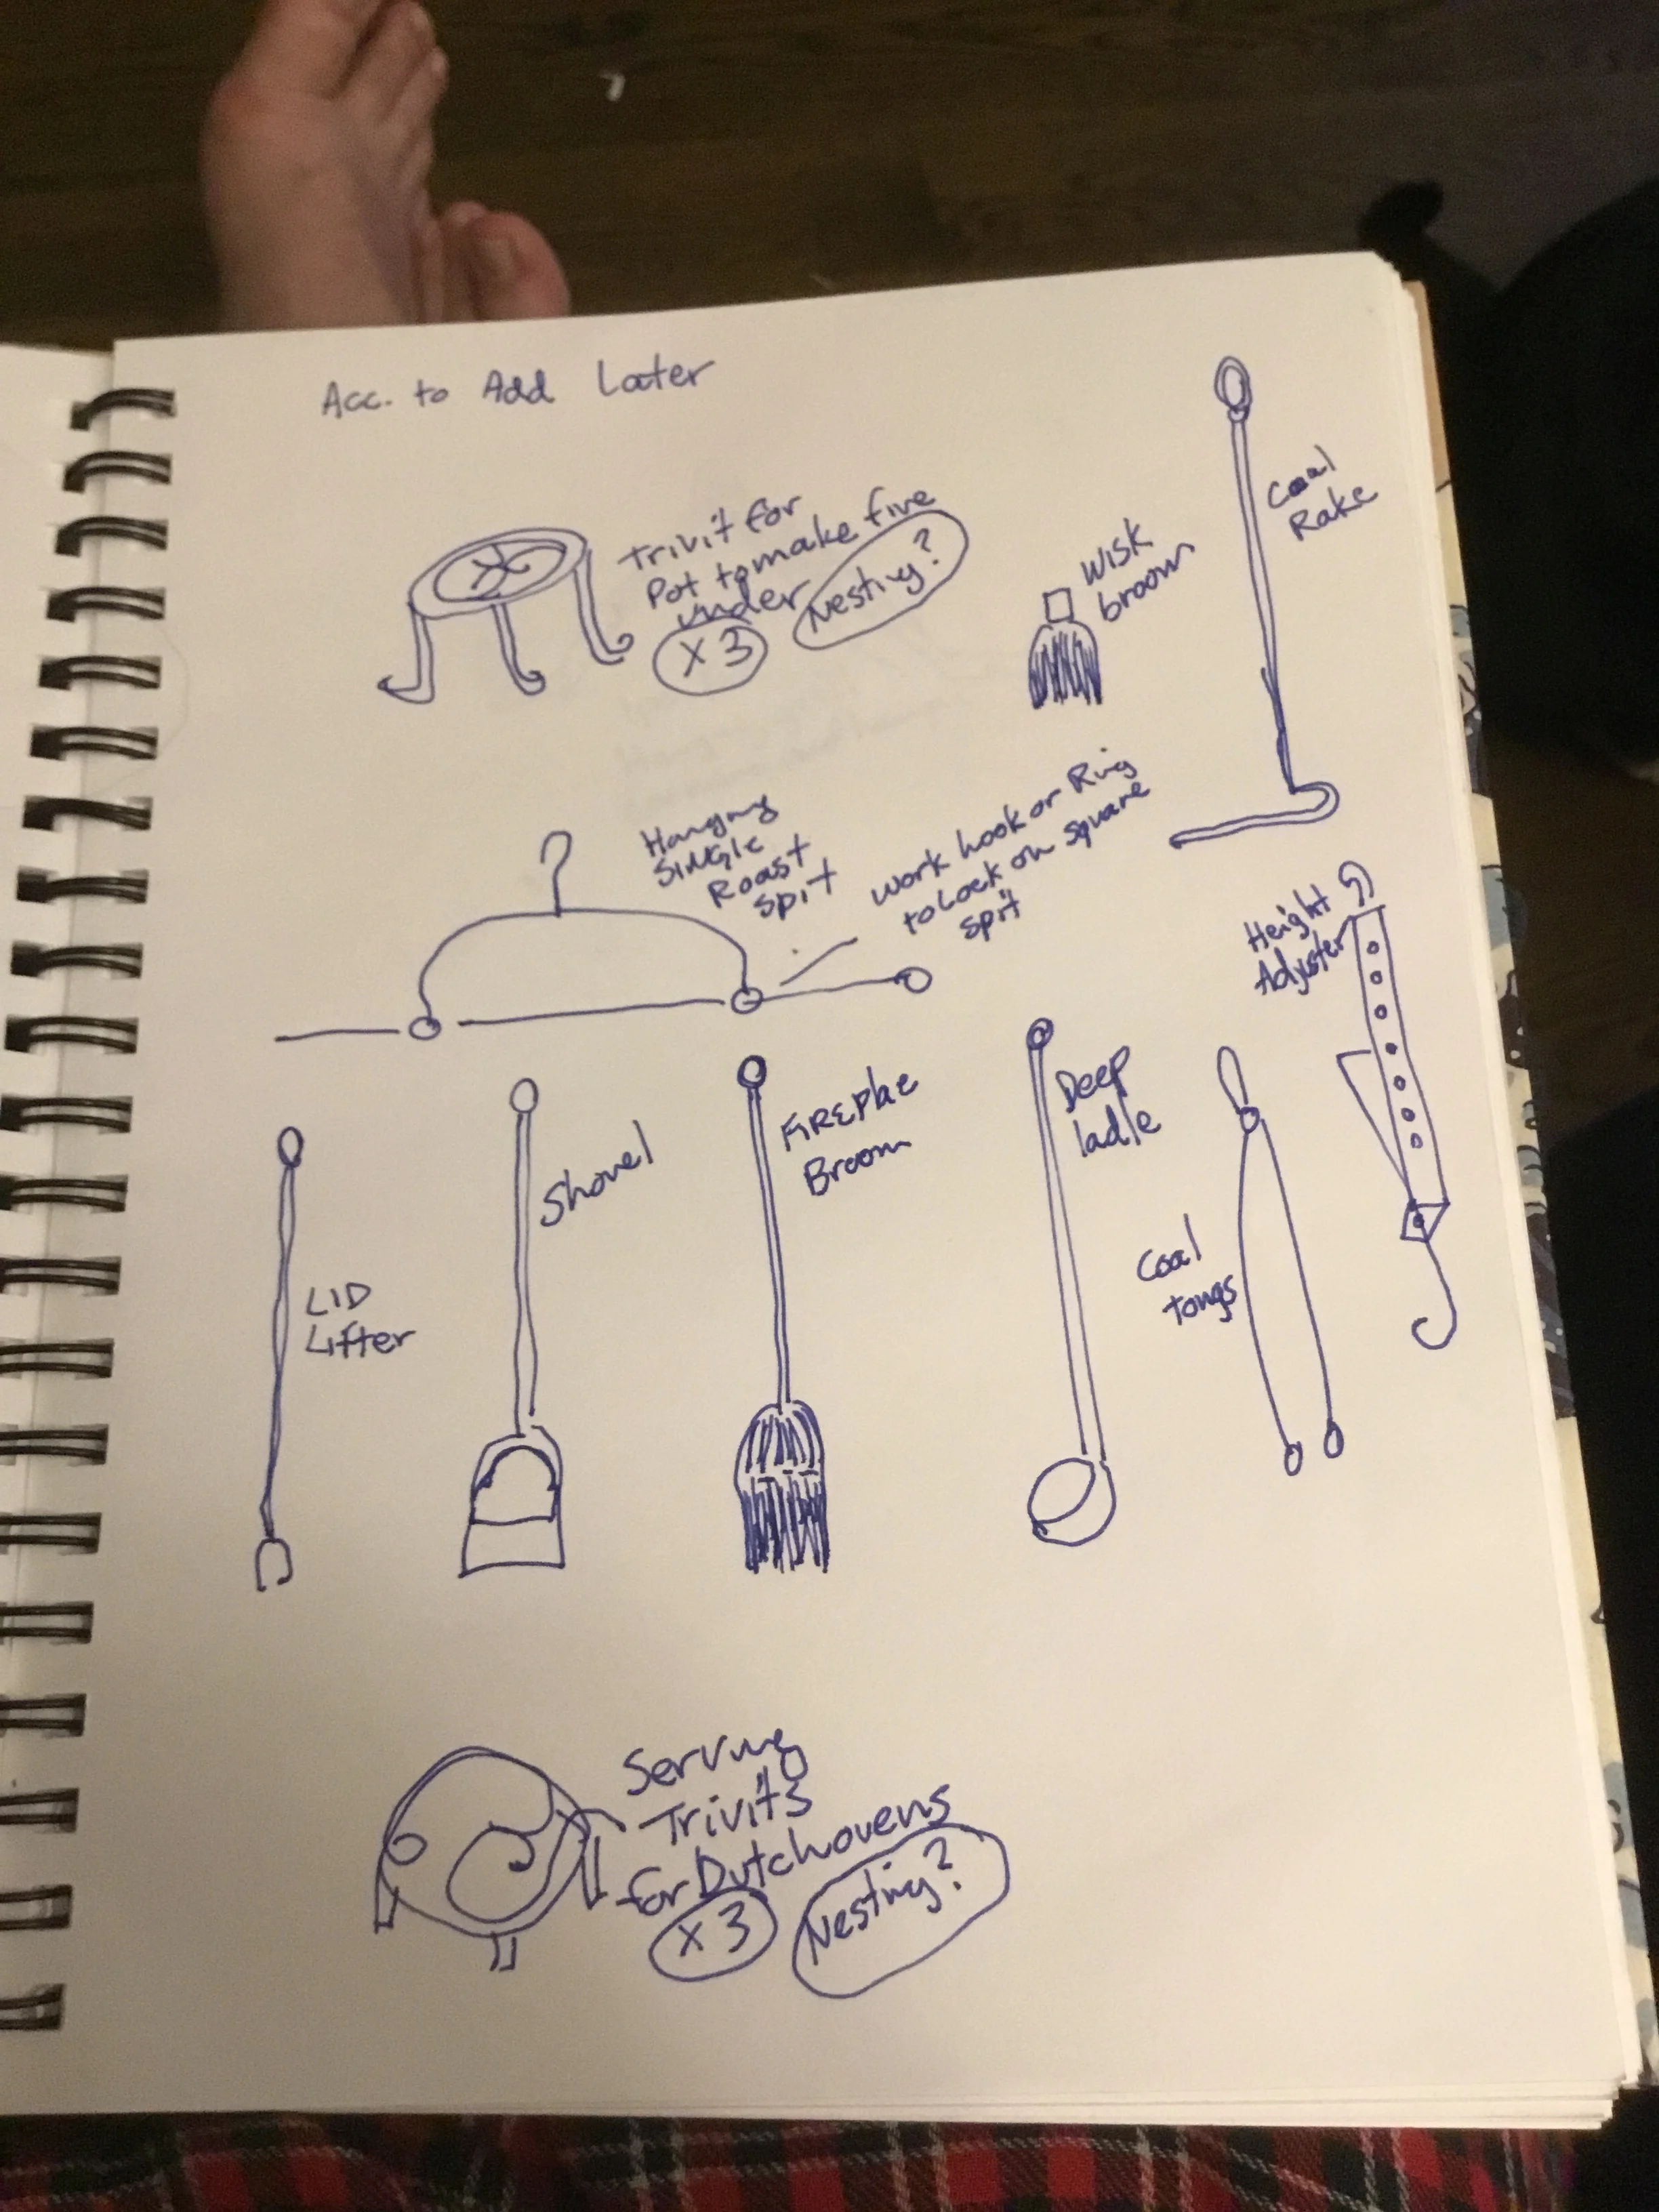
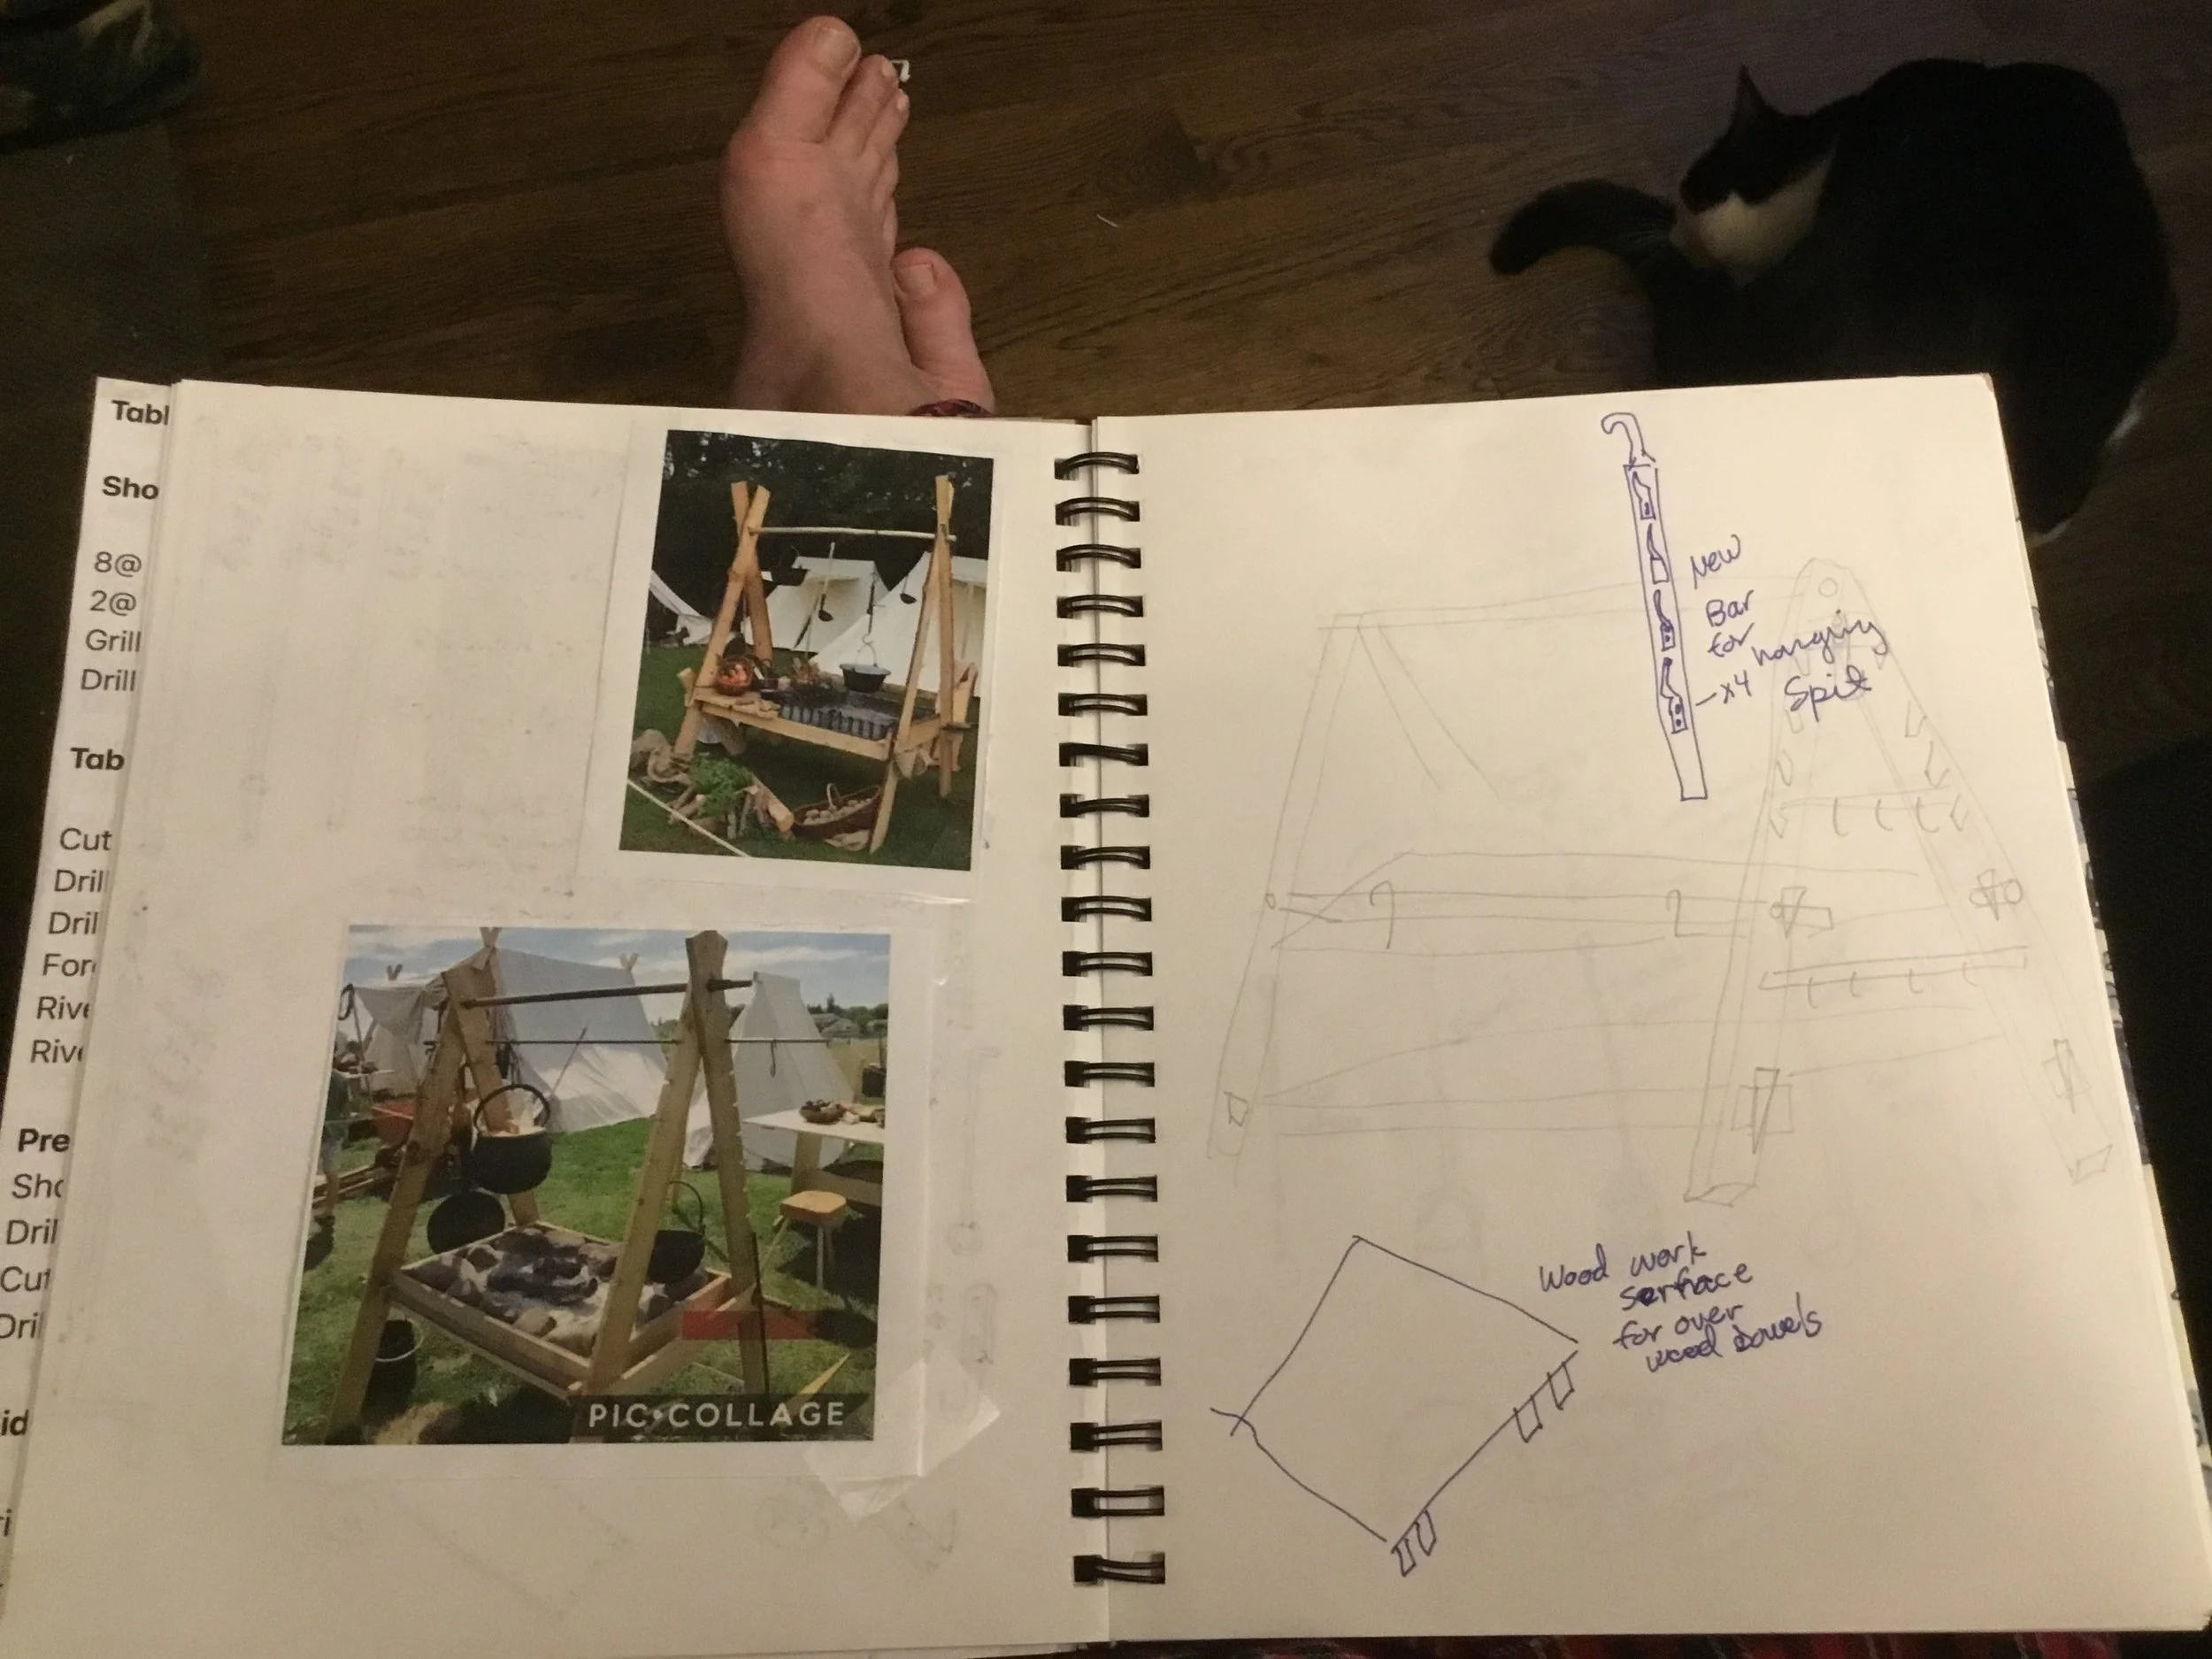
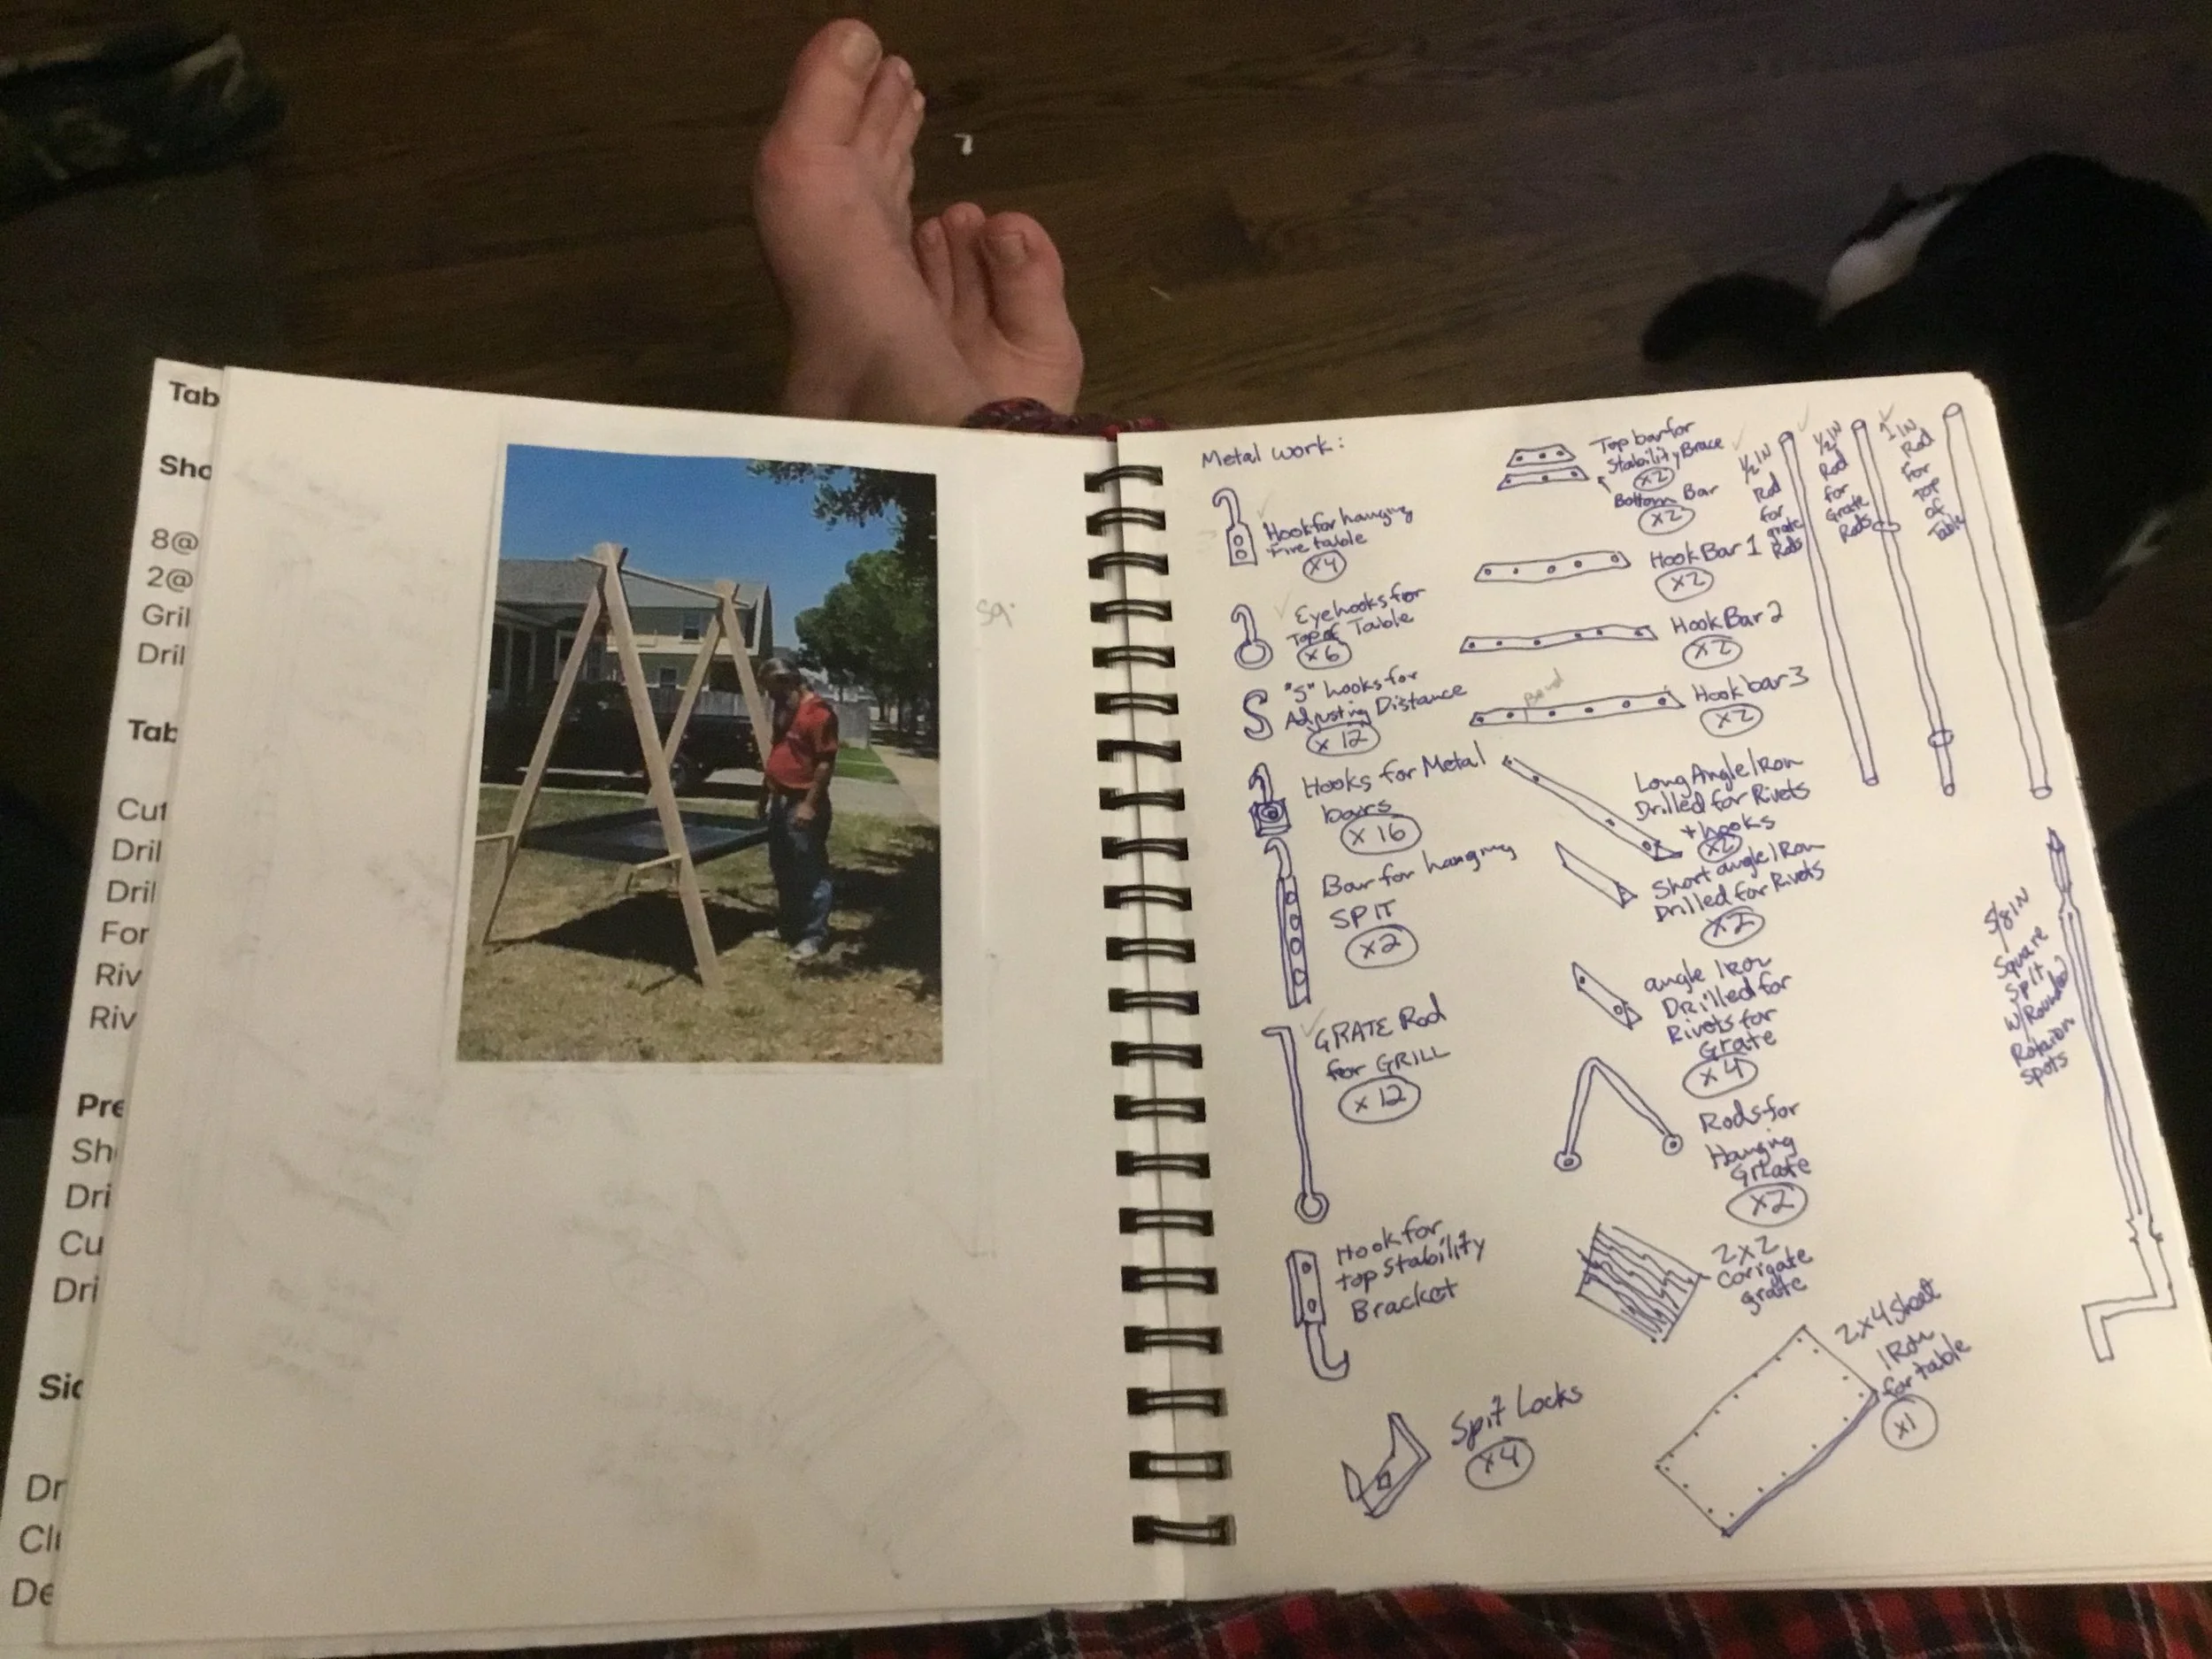
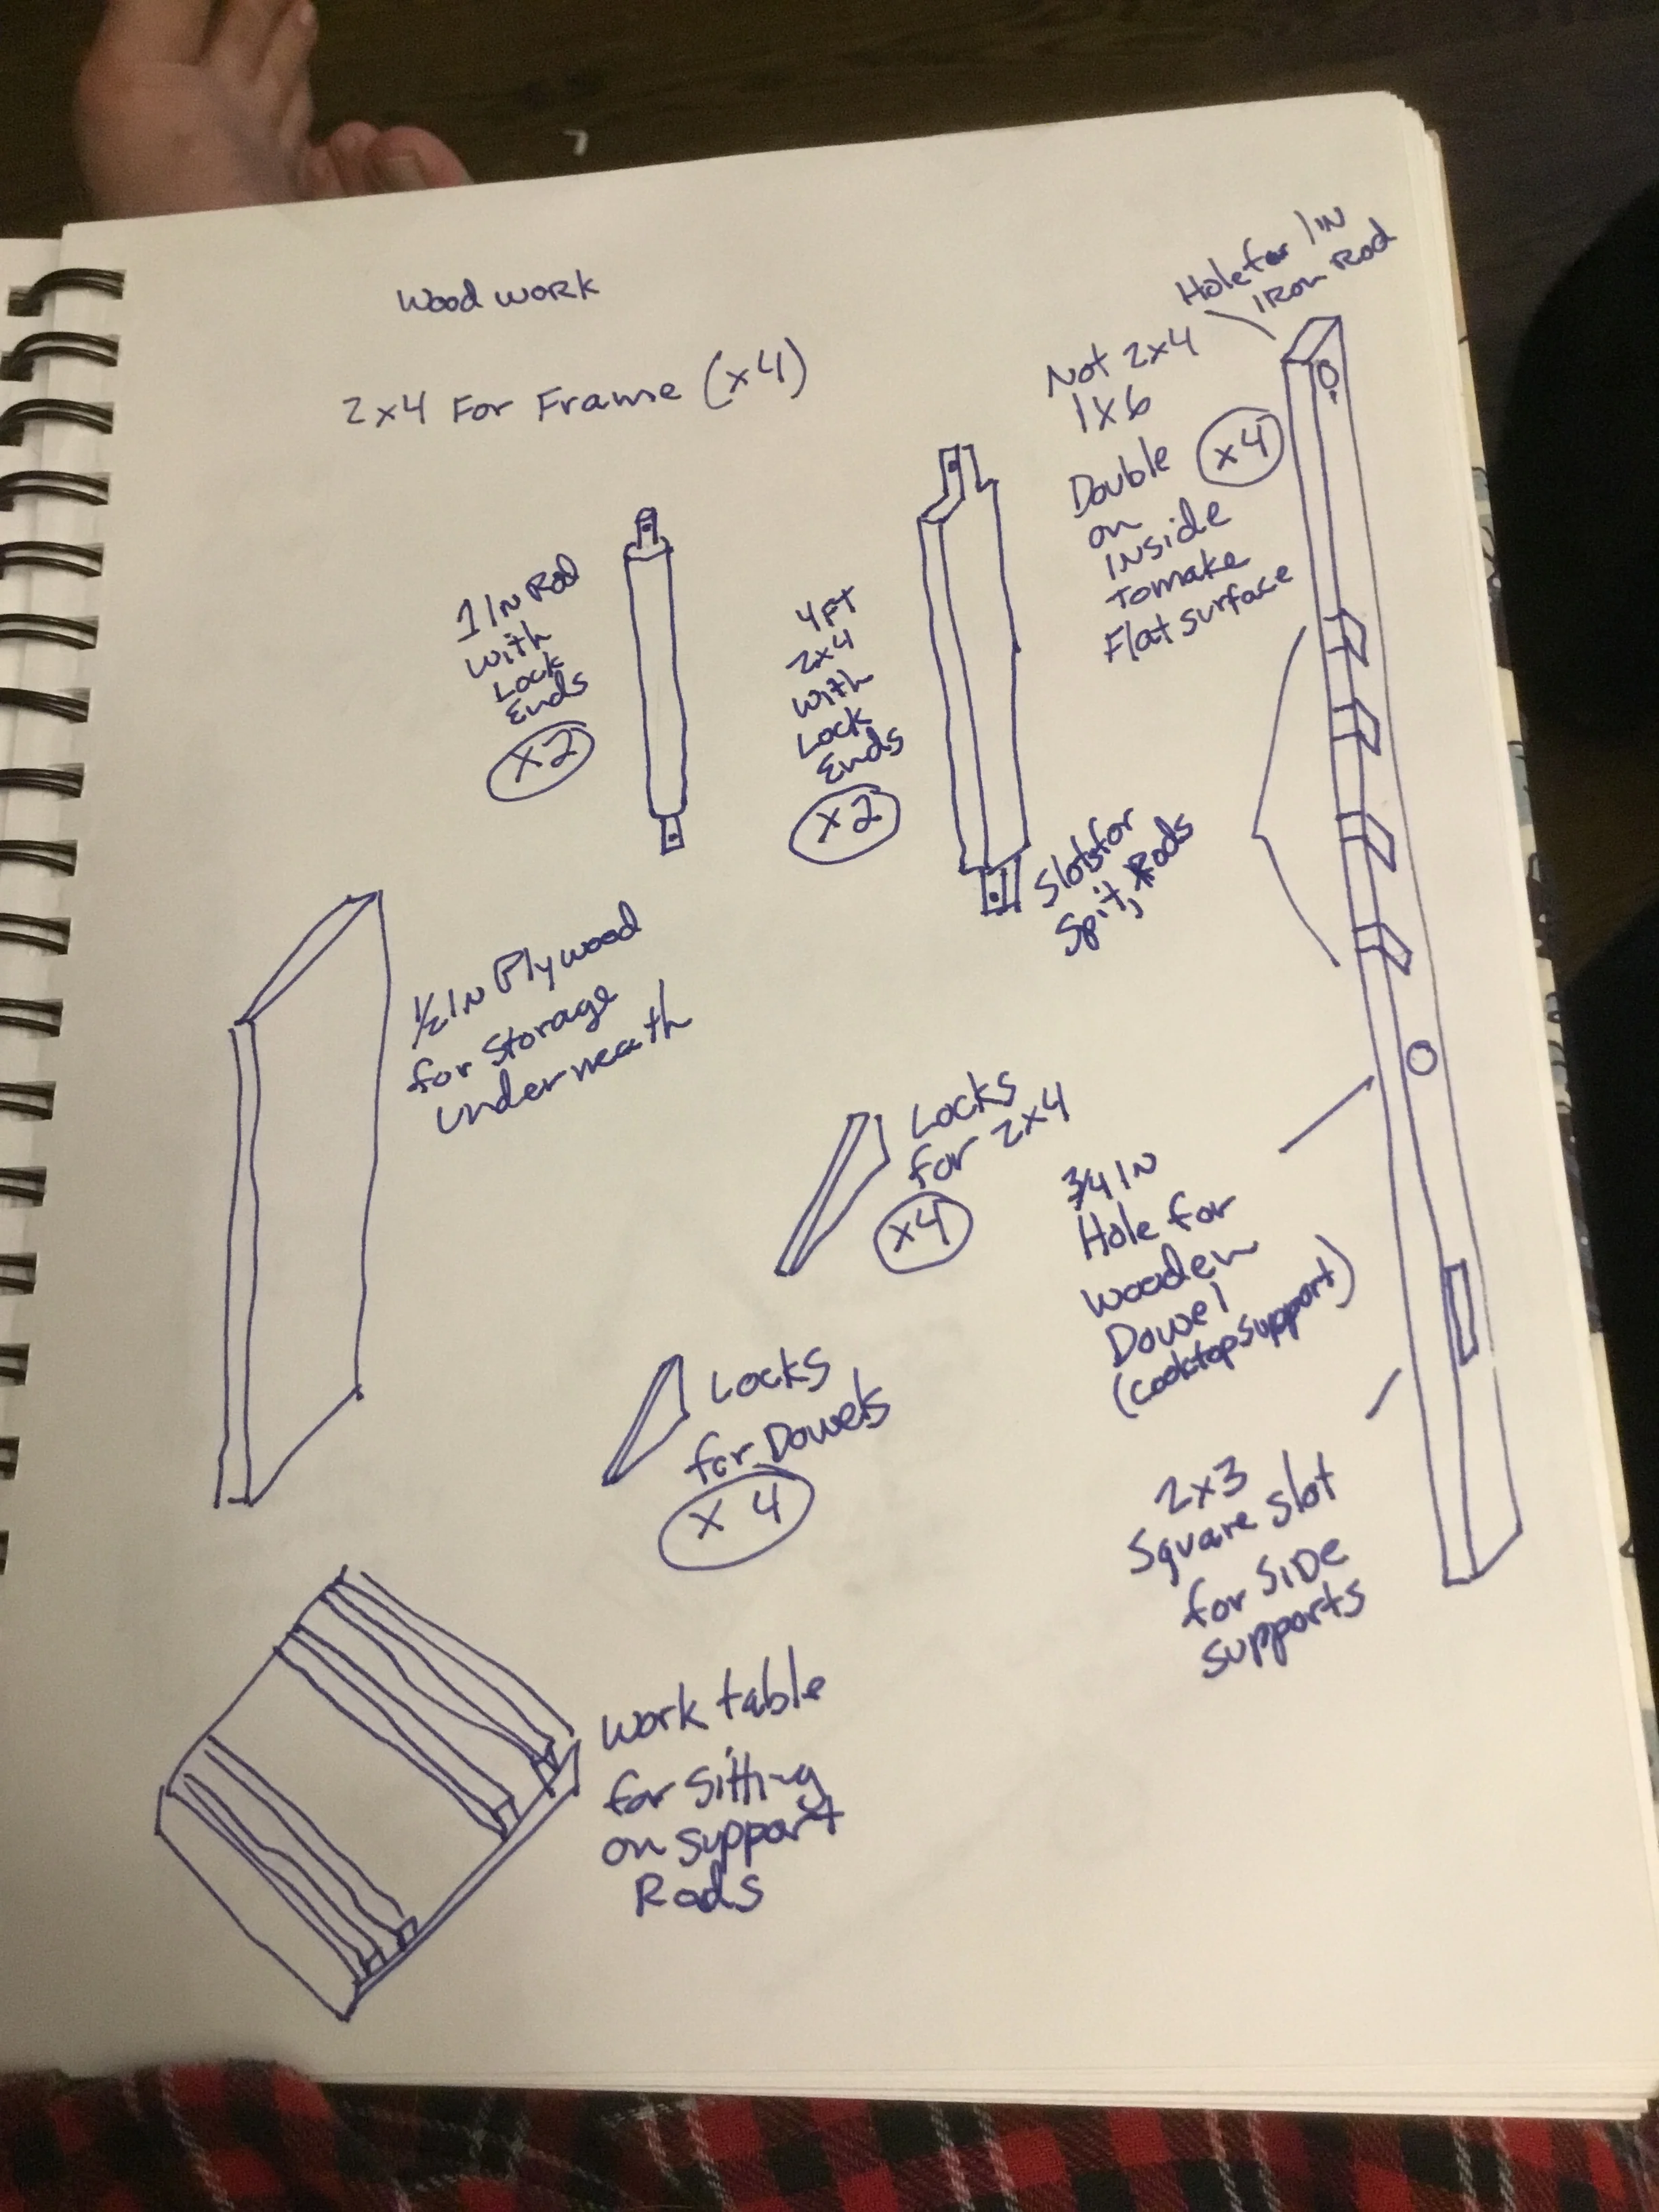
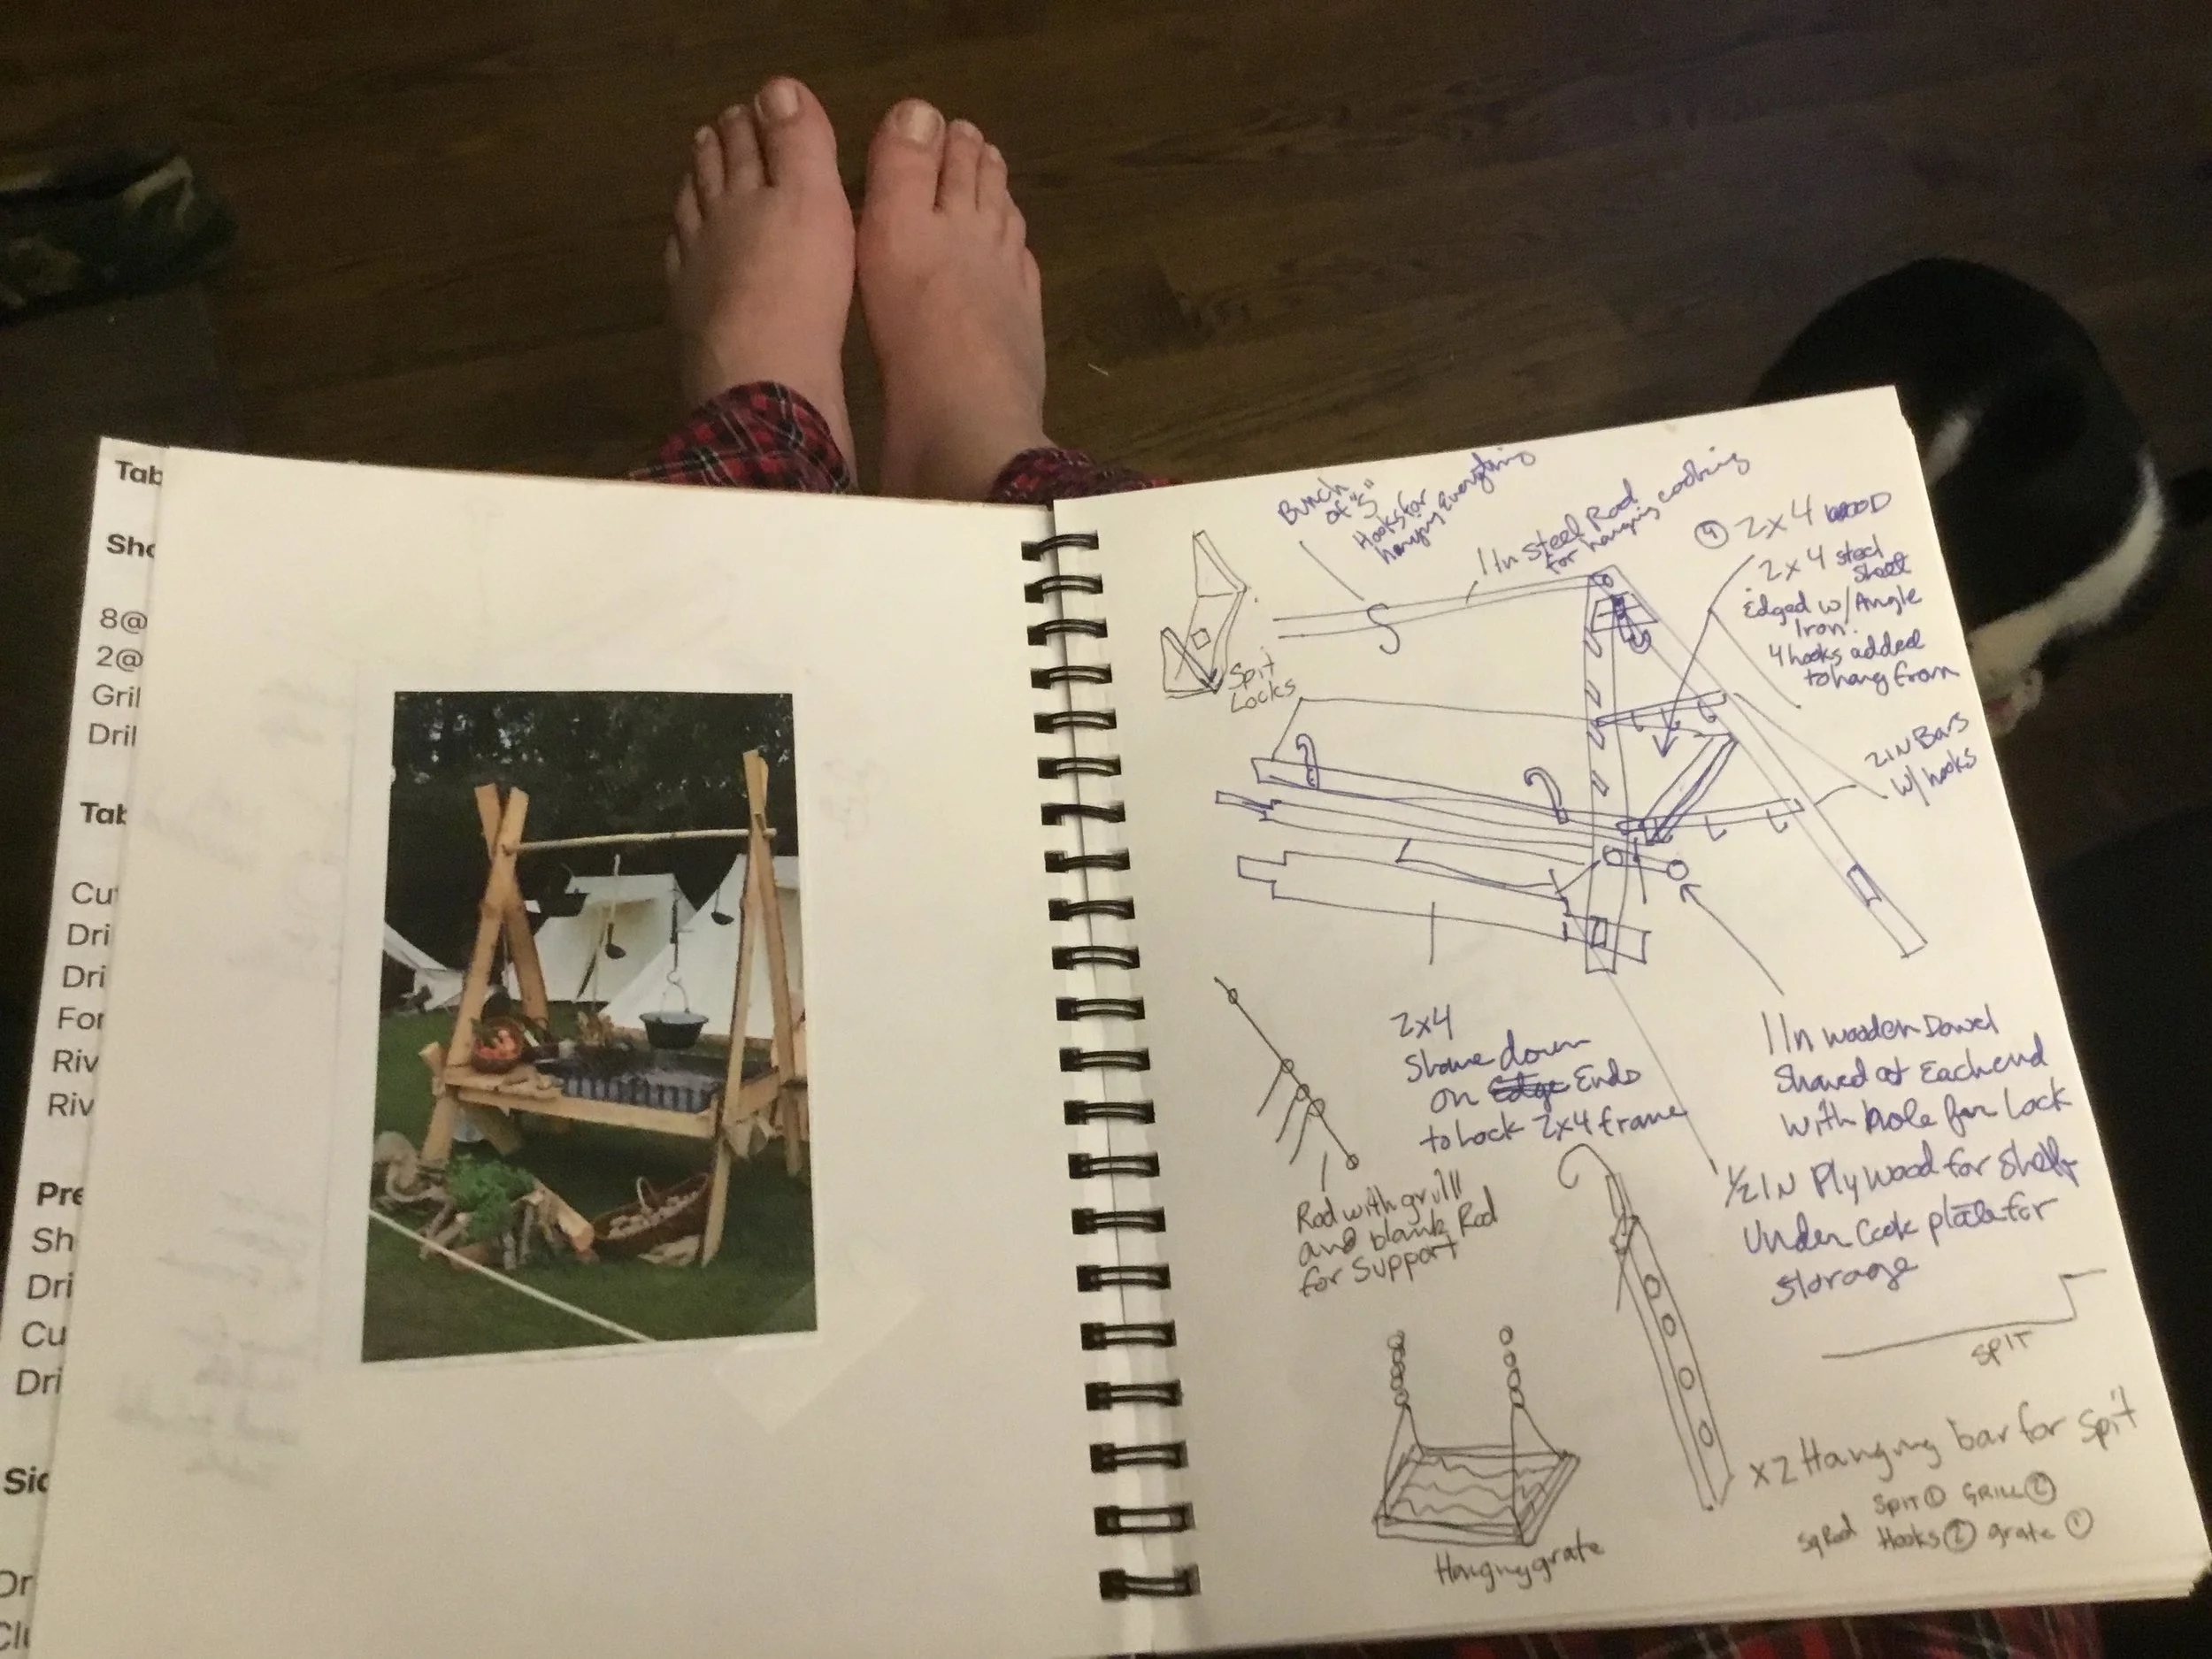
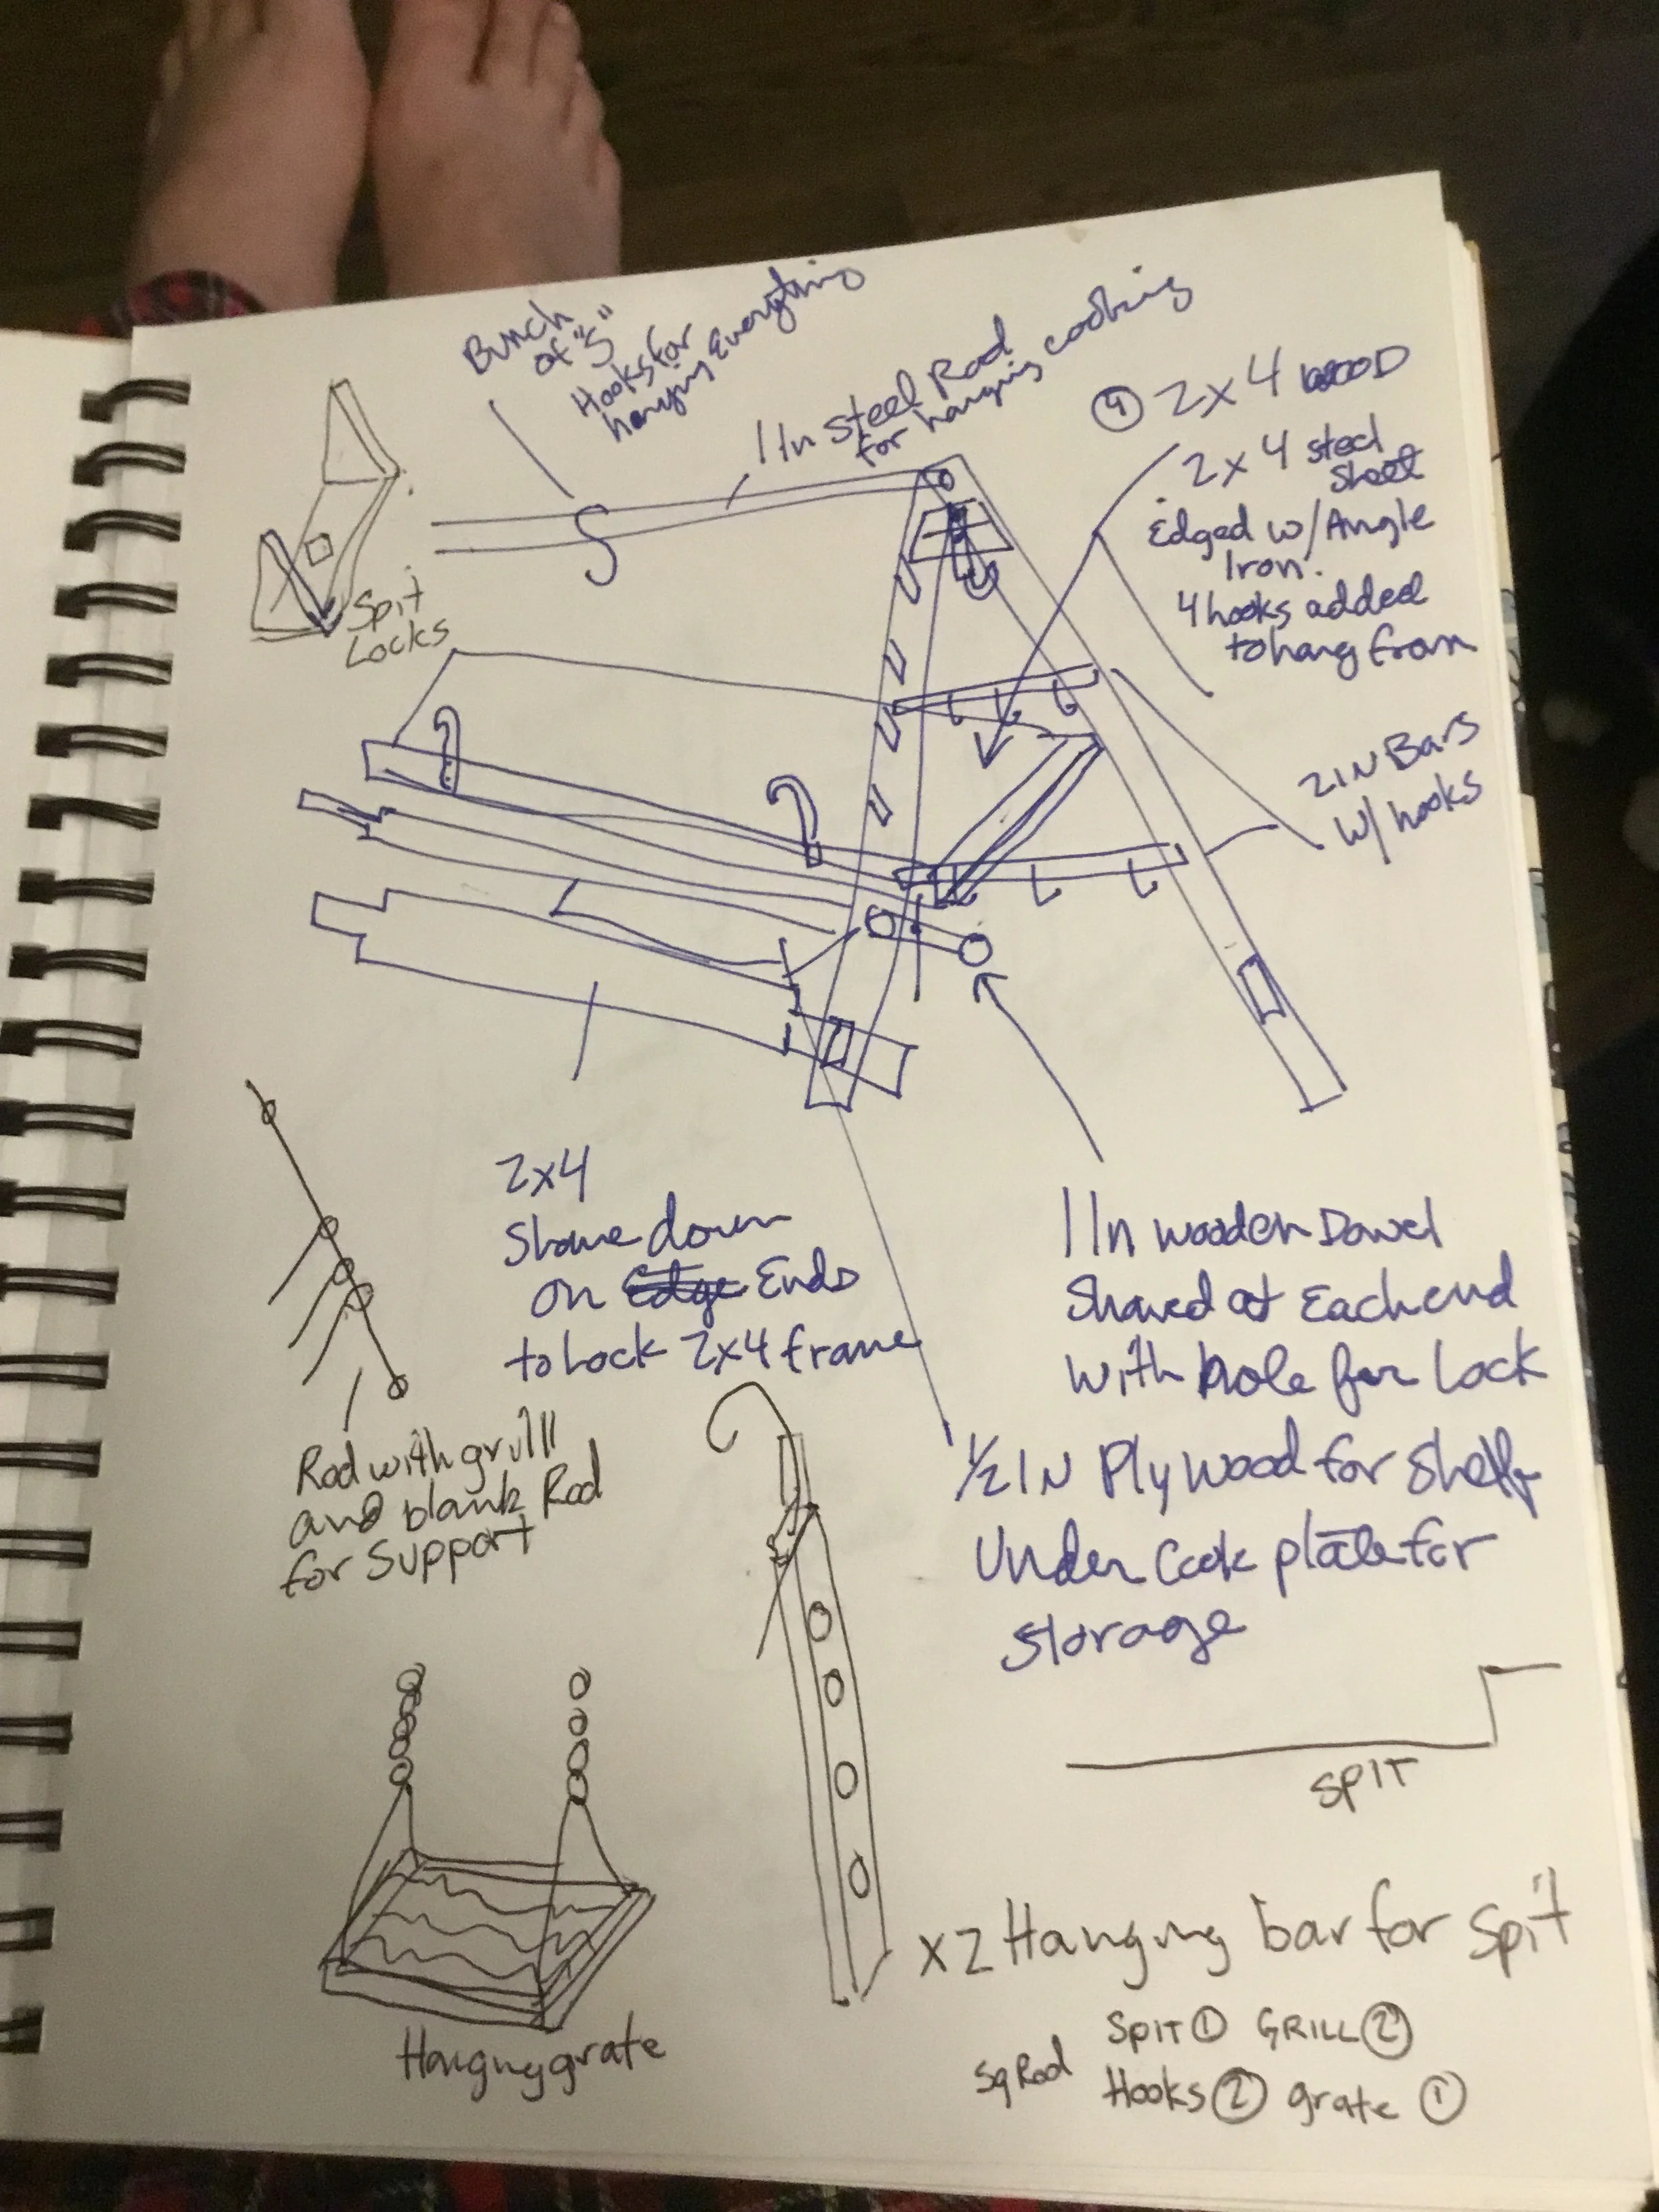
Once the final design was settled on, the shopping lists, and order of operations were planned out. Here are some of the sketches and the plans:
The order of operations as first planned are:
Shopping at BMG metals:
1 of Mild Steel A36 Hot Rolled Round 1"
4 of Mild Steel A36 Hot Rolled Round 0.5"
4 of Mild Steel A36 Hot Rolled Round 0.375"
4 of Mild Steel A36 Hot Rolled Square 0.375"
4 of Mild Steel A36 Hot Rolled Square 0.5"
6 of Hot Rolled Rectangle 0.125" x 1.5"
1 of Hot Rolled Sheet 0.135" (10 ga.) Cut to: 24" x 48"
4 of Mild Steel A36 Hot Rolled Angle 1.5" x 1.5" x 0.125"
Shopping at Home Depot:
8@ 1x6 8ft
2@ 1 in dowel/closet rod x8ft
Grill grate
Drill bits
Table setup:
Cut angle iron to size.
Drill angle iron for steel plate and hooks
Drill sheet
Forge hooks for plate/drill
Rivet hooks to angle iron
Rivet angle iron to sheet
Prep for side supports:
Shave support poles
Drill support poles for shims
Cut 1x6 with locking ends
Drill locking ends for shims.
Side supports setup:
Drill top hole for iron pole
Clue and nail 2nd layer on inside supports
Determine height of table and drill holes for poles.
Cut holes for bottom supports
Cut slots for side bars
Assemble, mark and cut bottoms
Finishing parts:
Cut 4 cross bars
Drill crossbars for hooks and bolts
Rivet hooks on crossbars
Cut planks for storage table
Glue and nail cross bars/locking bars
Hanging grate:
Cut angle iron to grill size
Forge corners/hanging bar
Accessories:
Lid lifter
Coal Shovel
Broom
Wisk broom
Ladle
Coal Tongs
Coal Rake
Trivits
Hanging Spit
“S” hooks
Fire Table Beginnings
This page/blog is going to be an attempt to keep track of the work done on a fire table for our encampment. I have done some research on historical examples, but this is much more of an attempt to make it easier for others to create period pieces (cooking). The idea is to allow hearth or fire-pit cooking to be done at a convenient height. The table used by the 3 bears campsite is an example of what I hope to create and improve.
