Back to the forge

*** Please note that clicking on any image will give you an expanded view. *****

Another weekend has come and gone and I was able to get out to my forge 2 times this week. The first day (Sunday) i set out with 3 goals:

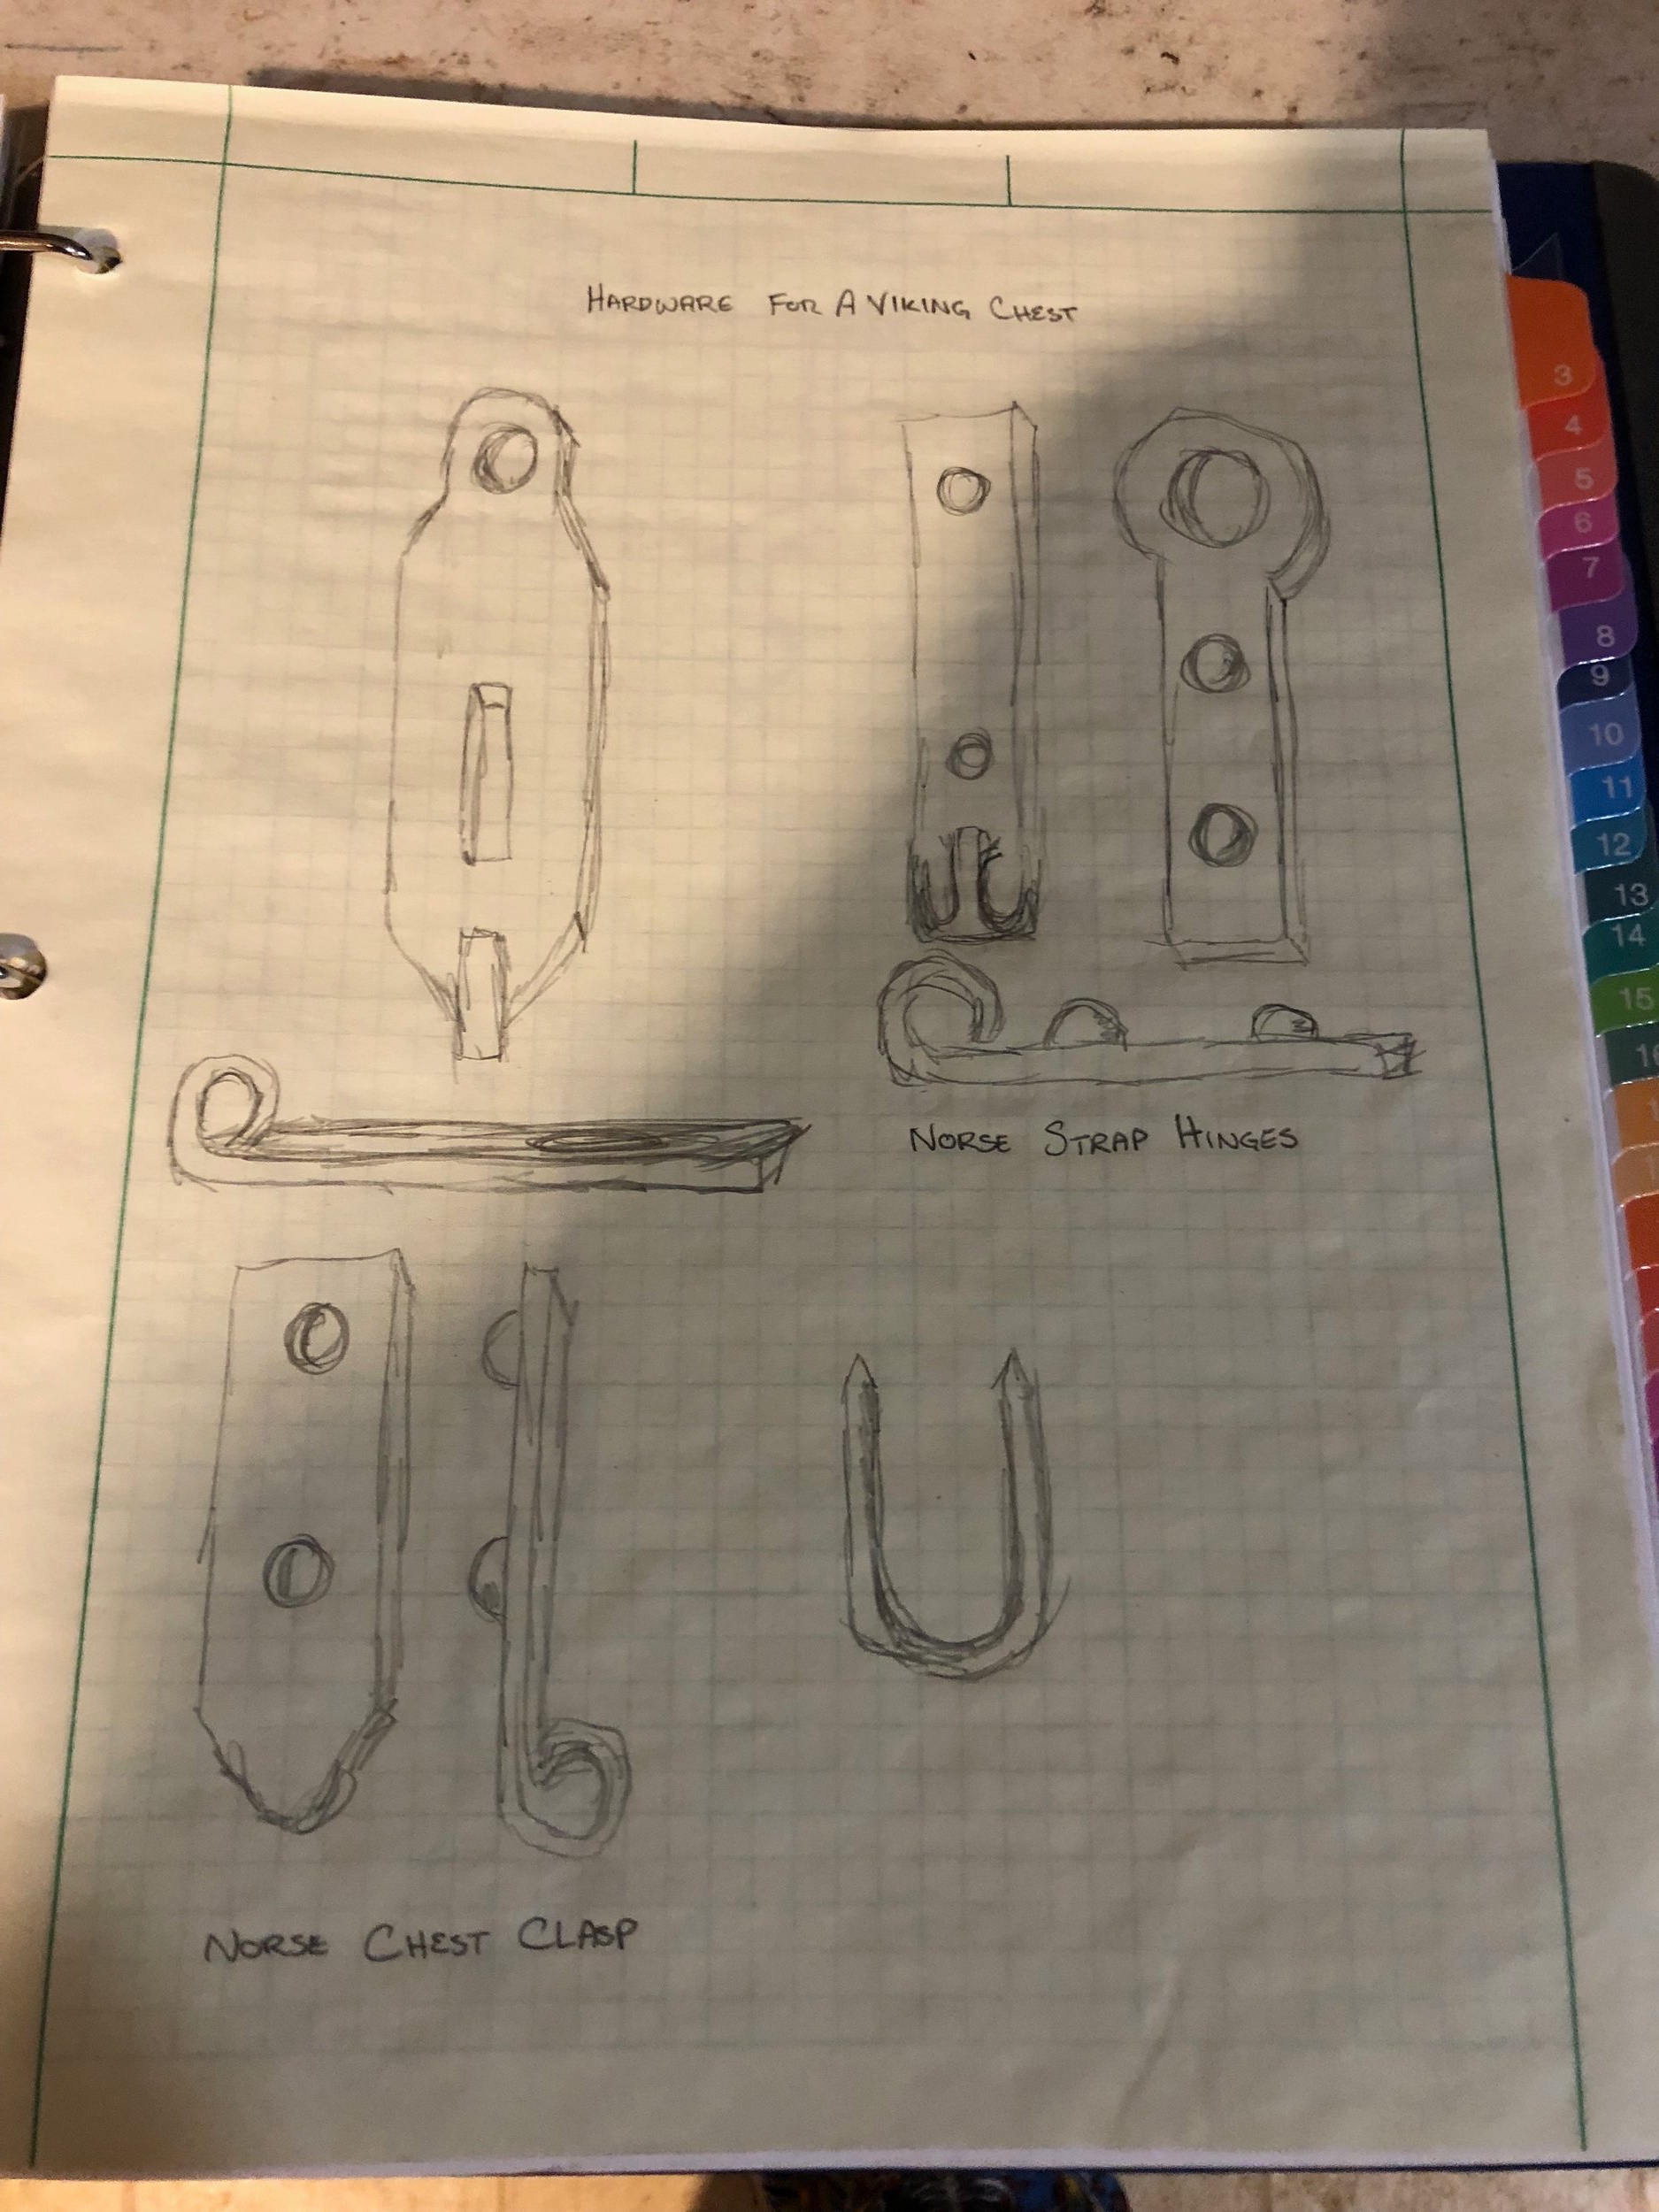
  1. Work on the new anirons for the upstairs fireplace.

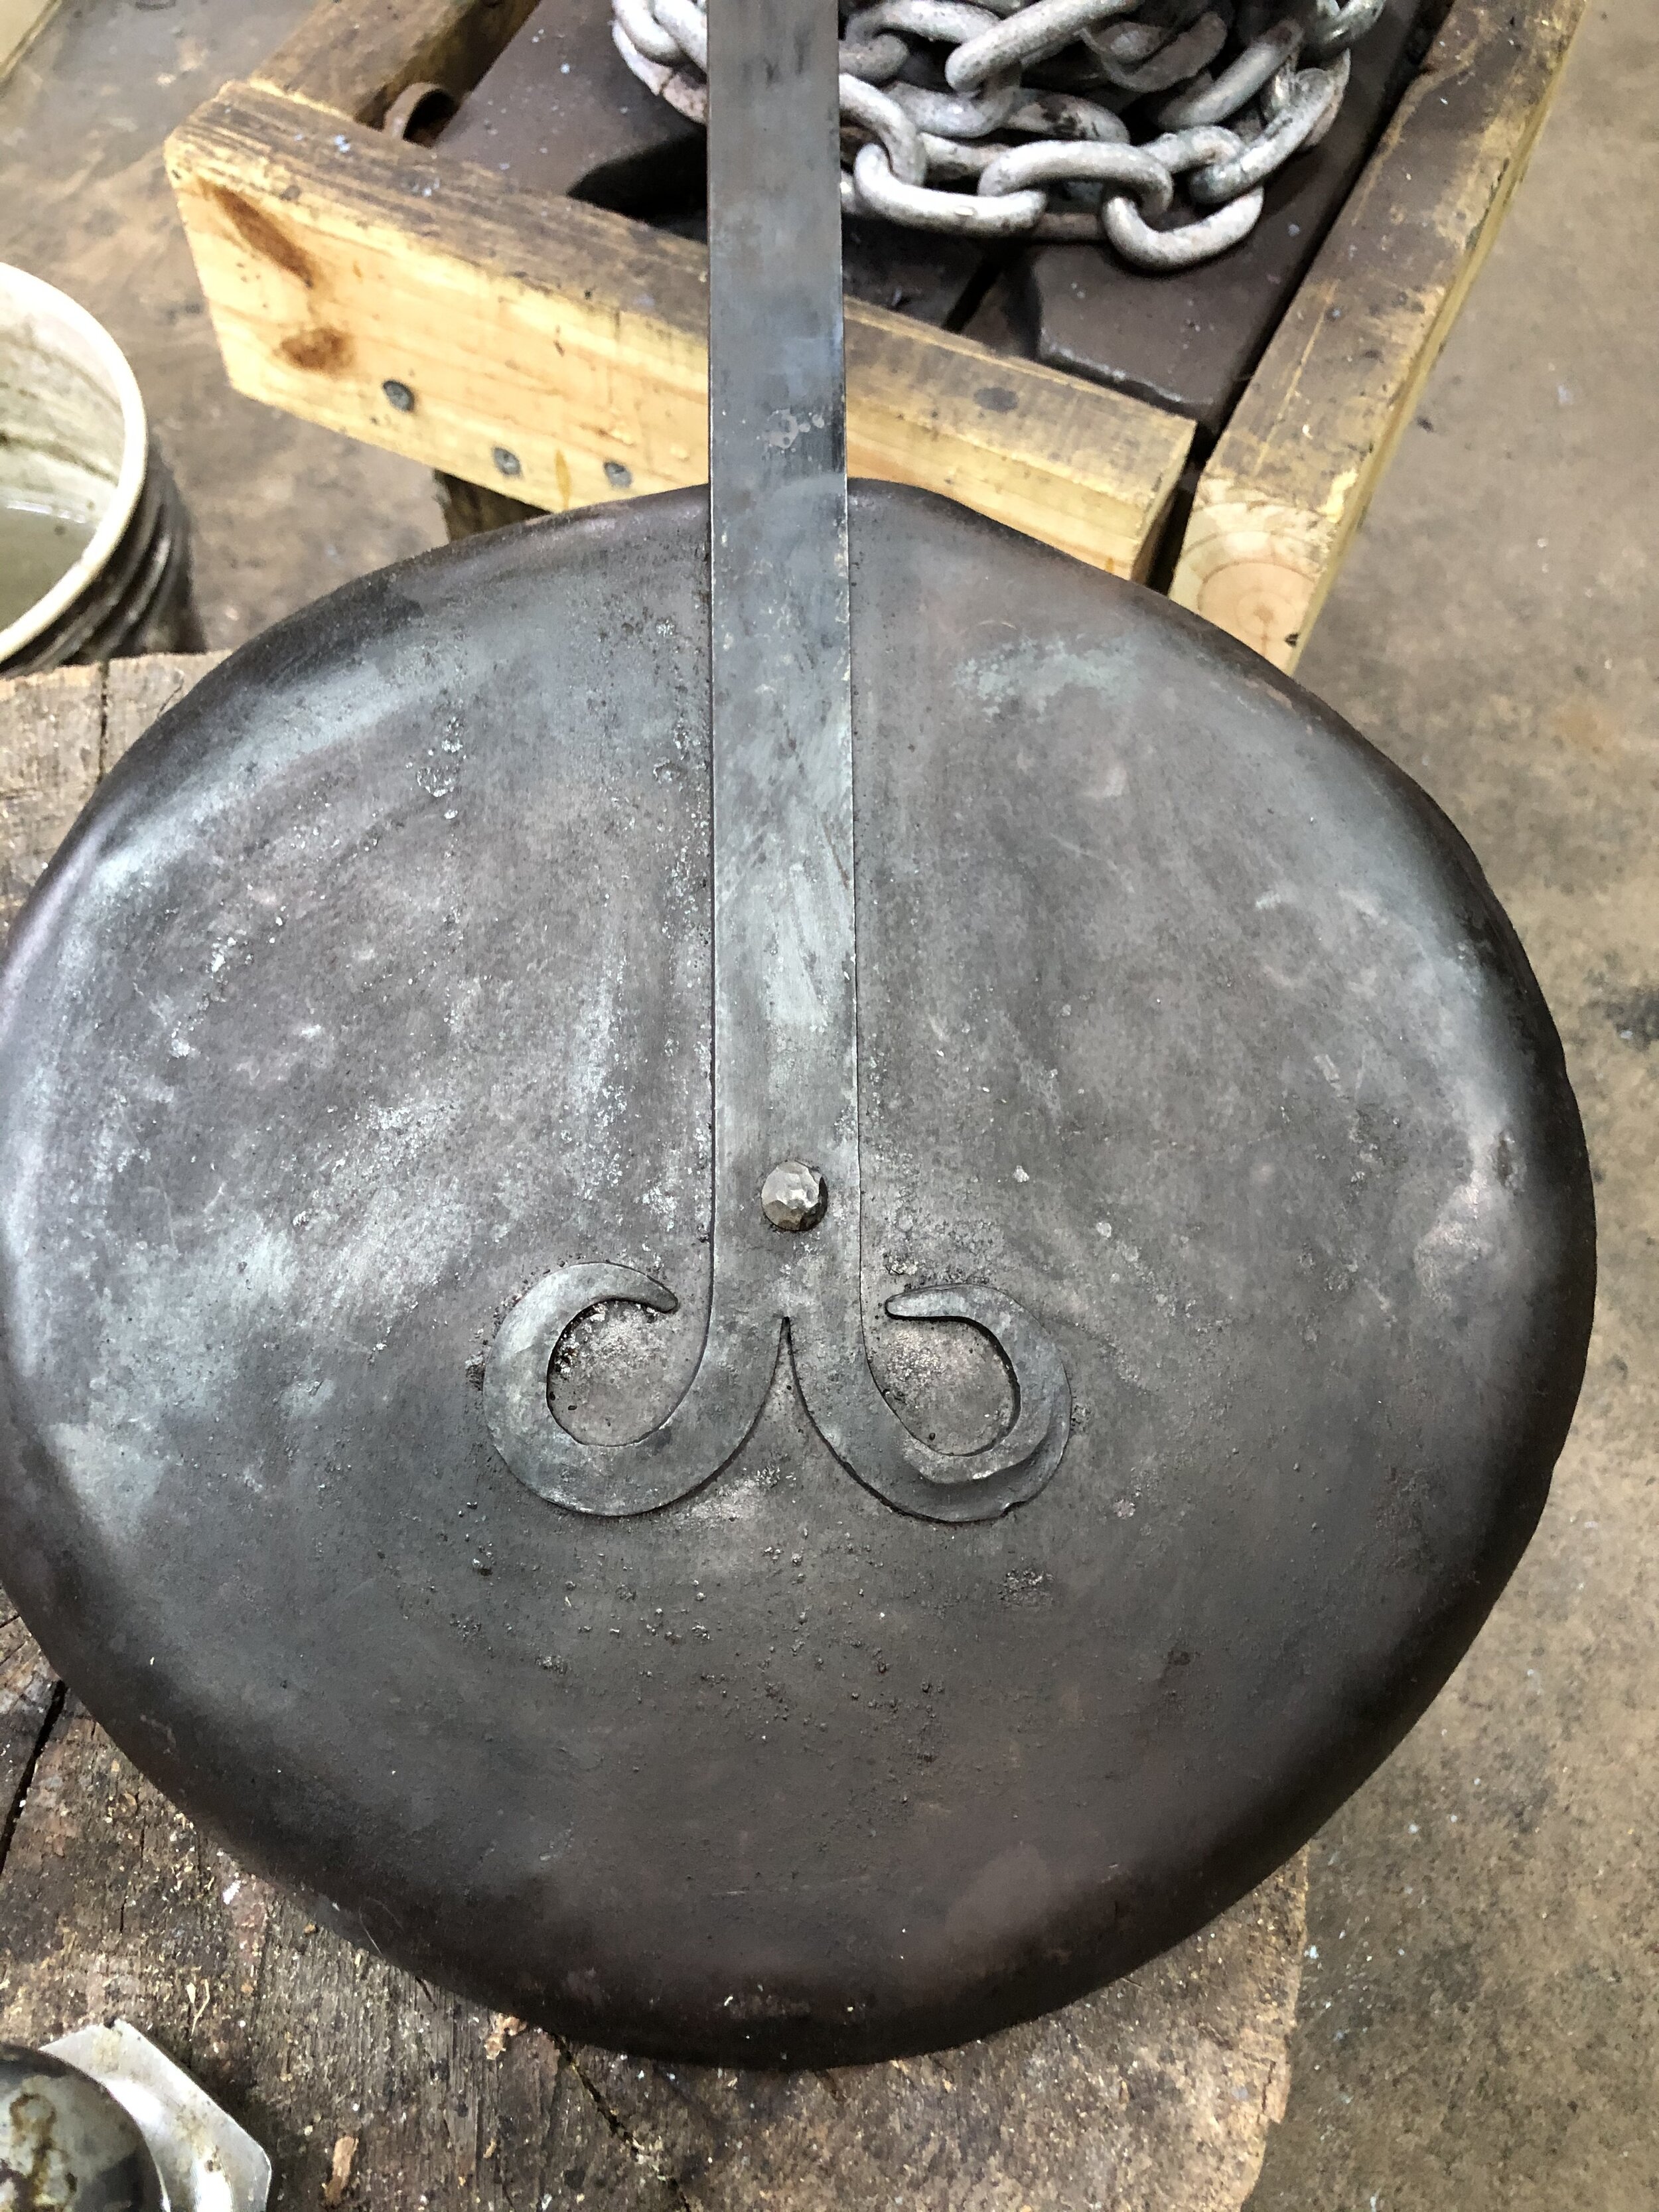
  2. Begin the work on a medieval shovel blade for Mistress Lorelei

  3. Forge weld a piece of round stock back on itself

Started on #2 first. My first thought was to take a piece of thin stock, fold it in half and then bend it to shape. This would make the fold the edge and create the space for the wood to be inserted.

The problem with this plan was the lack of movement allowed in this thin of metal. There was just no room for the expansion and contraction needed for the proper shape.

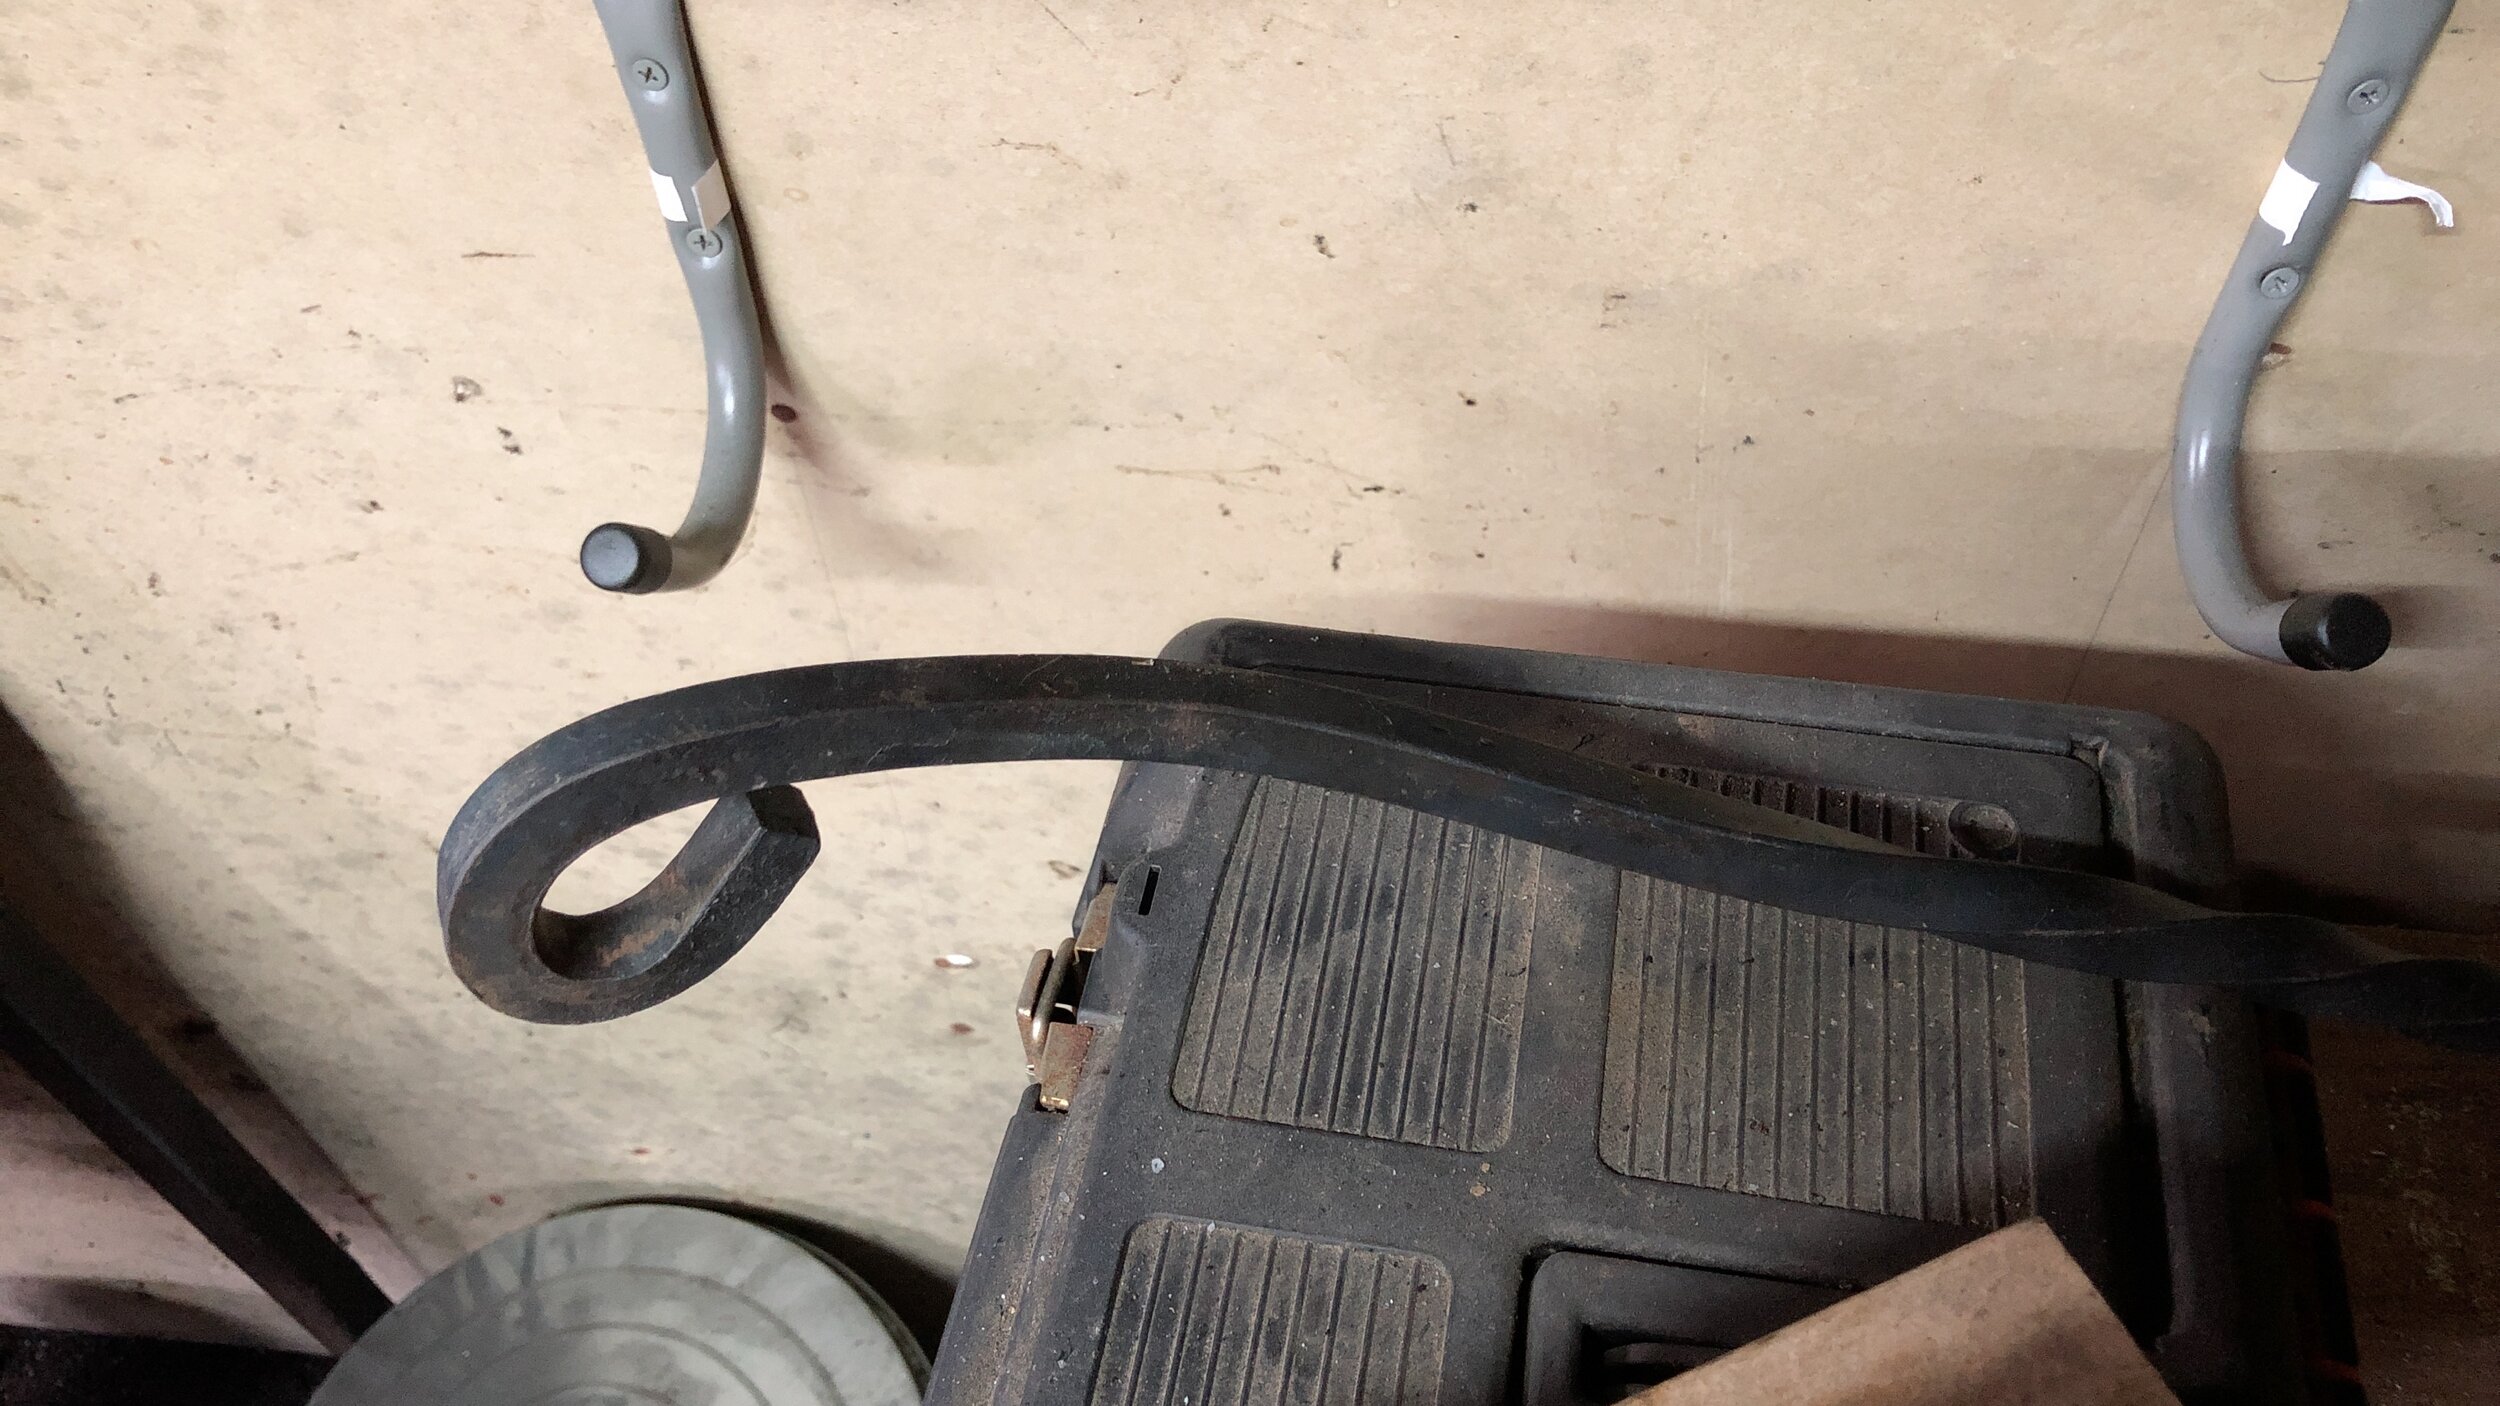
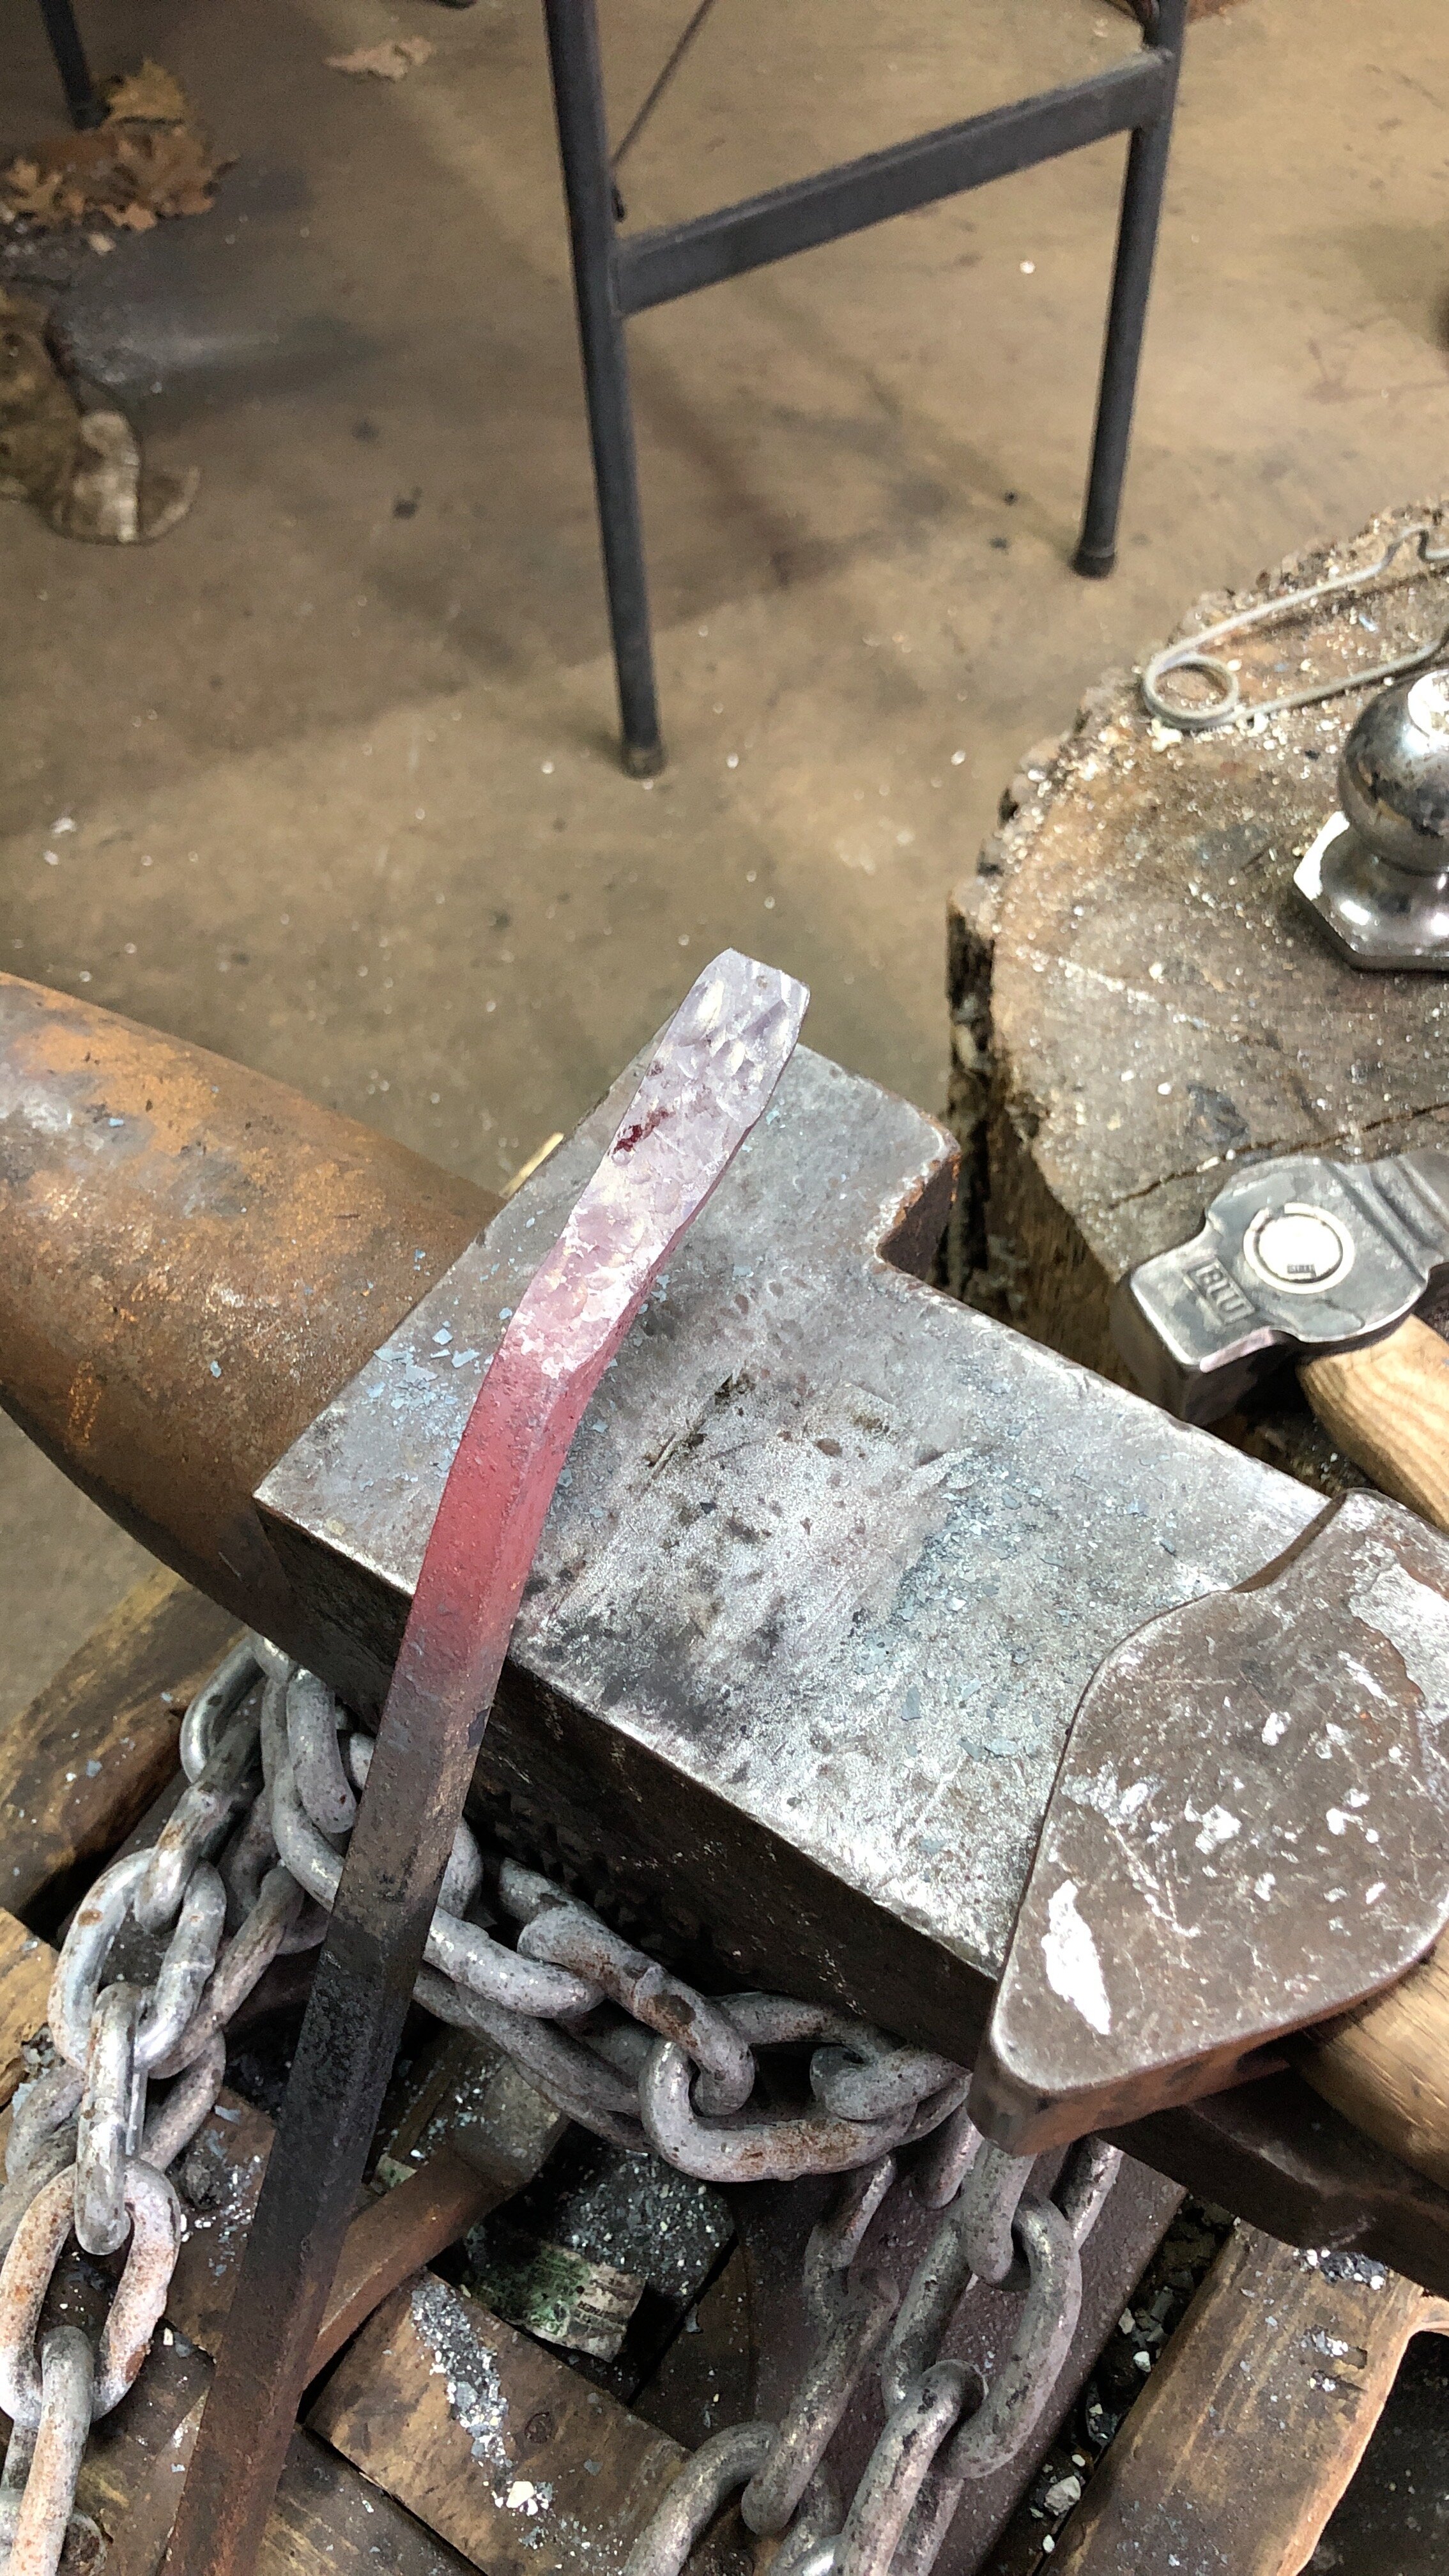
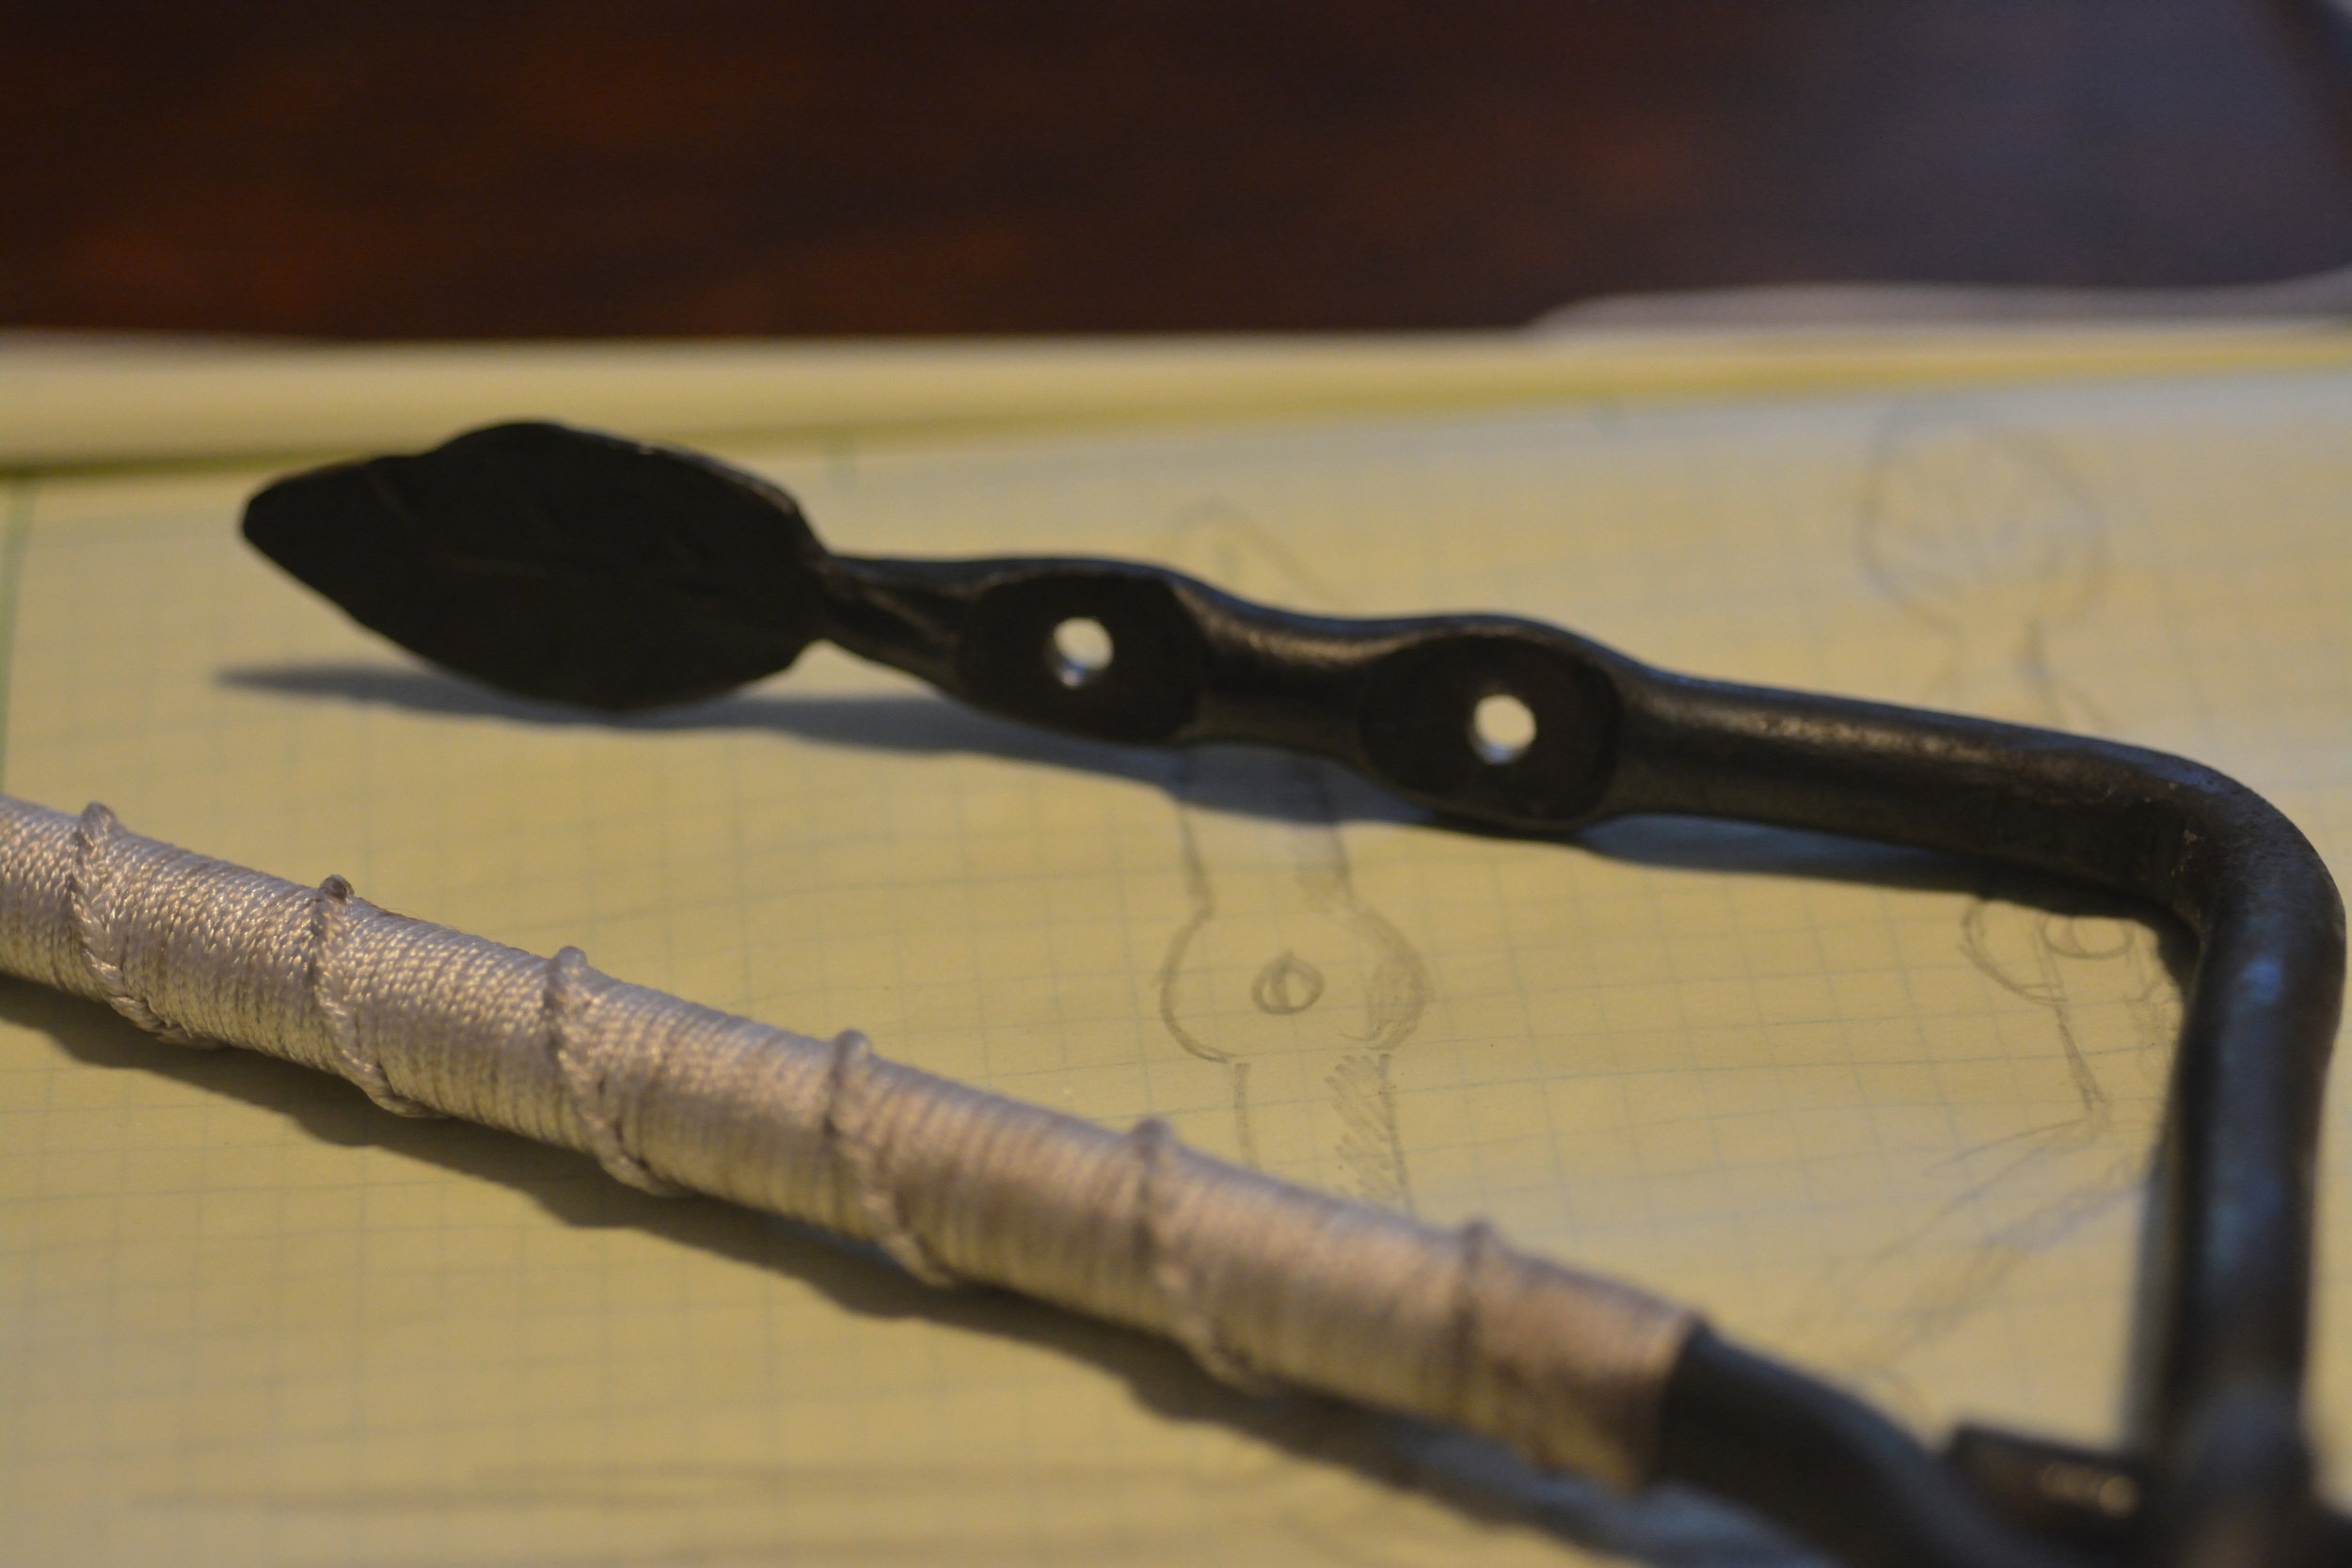
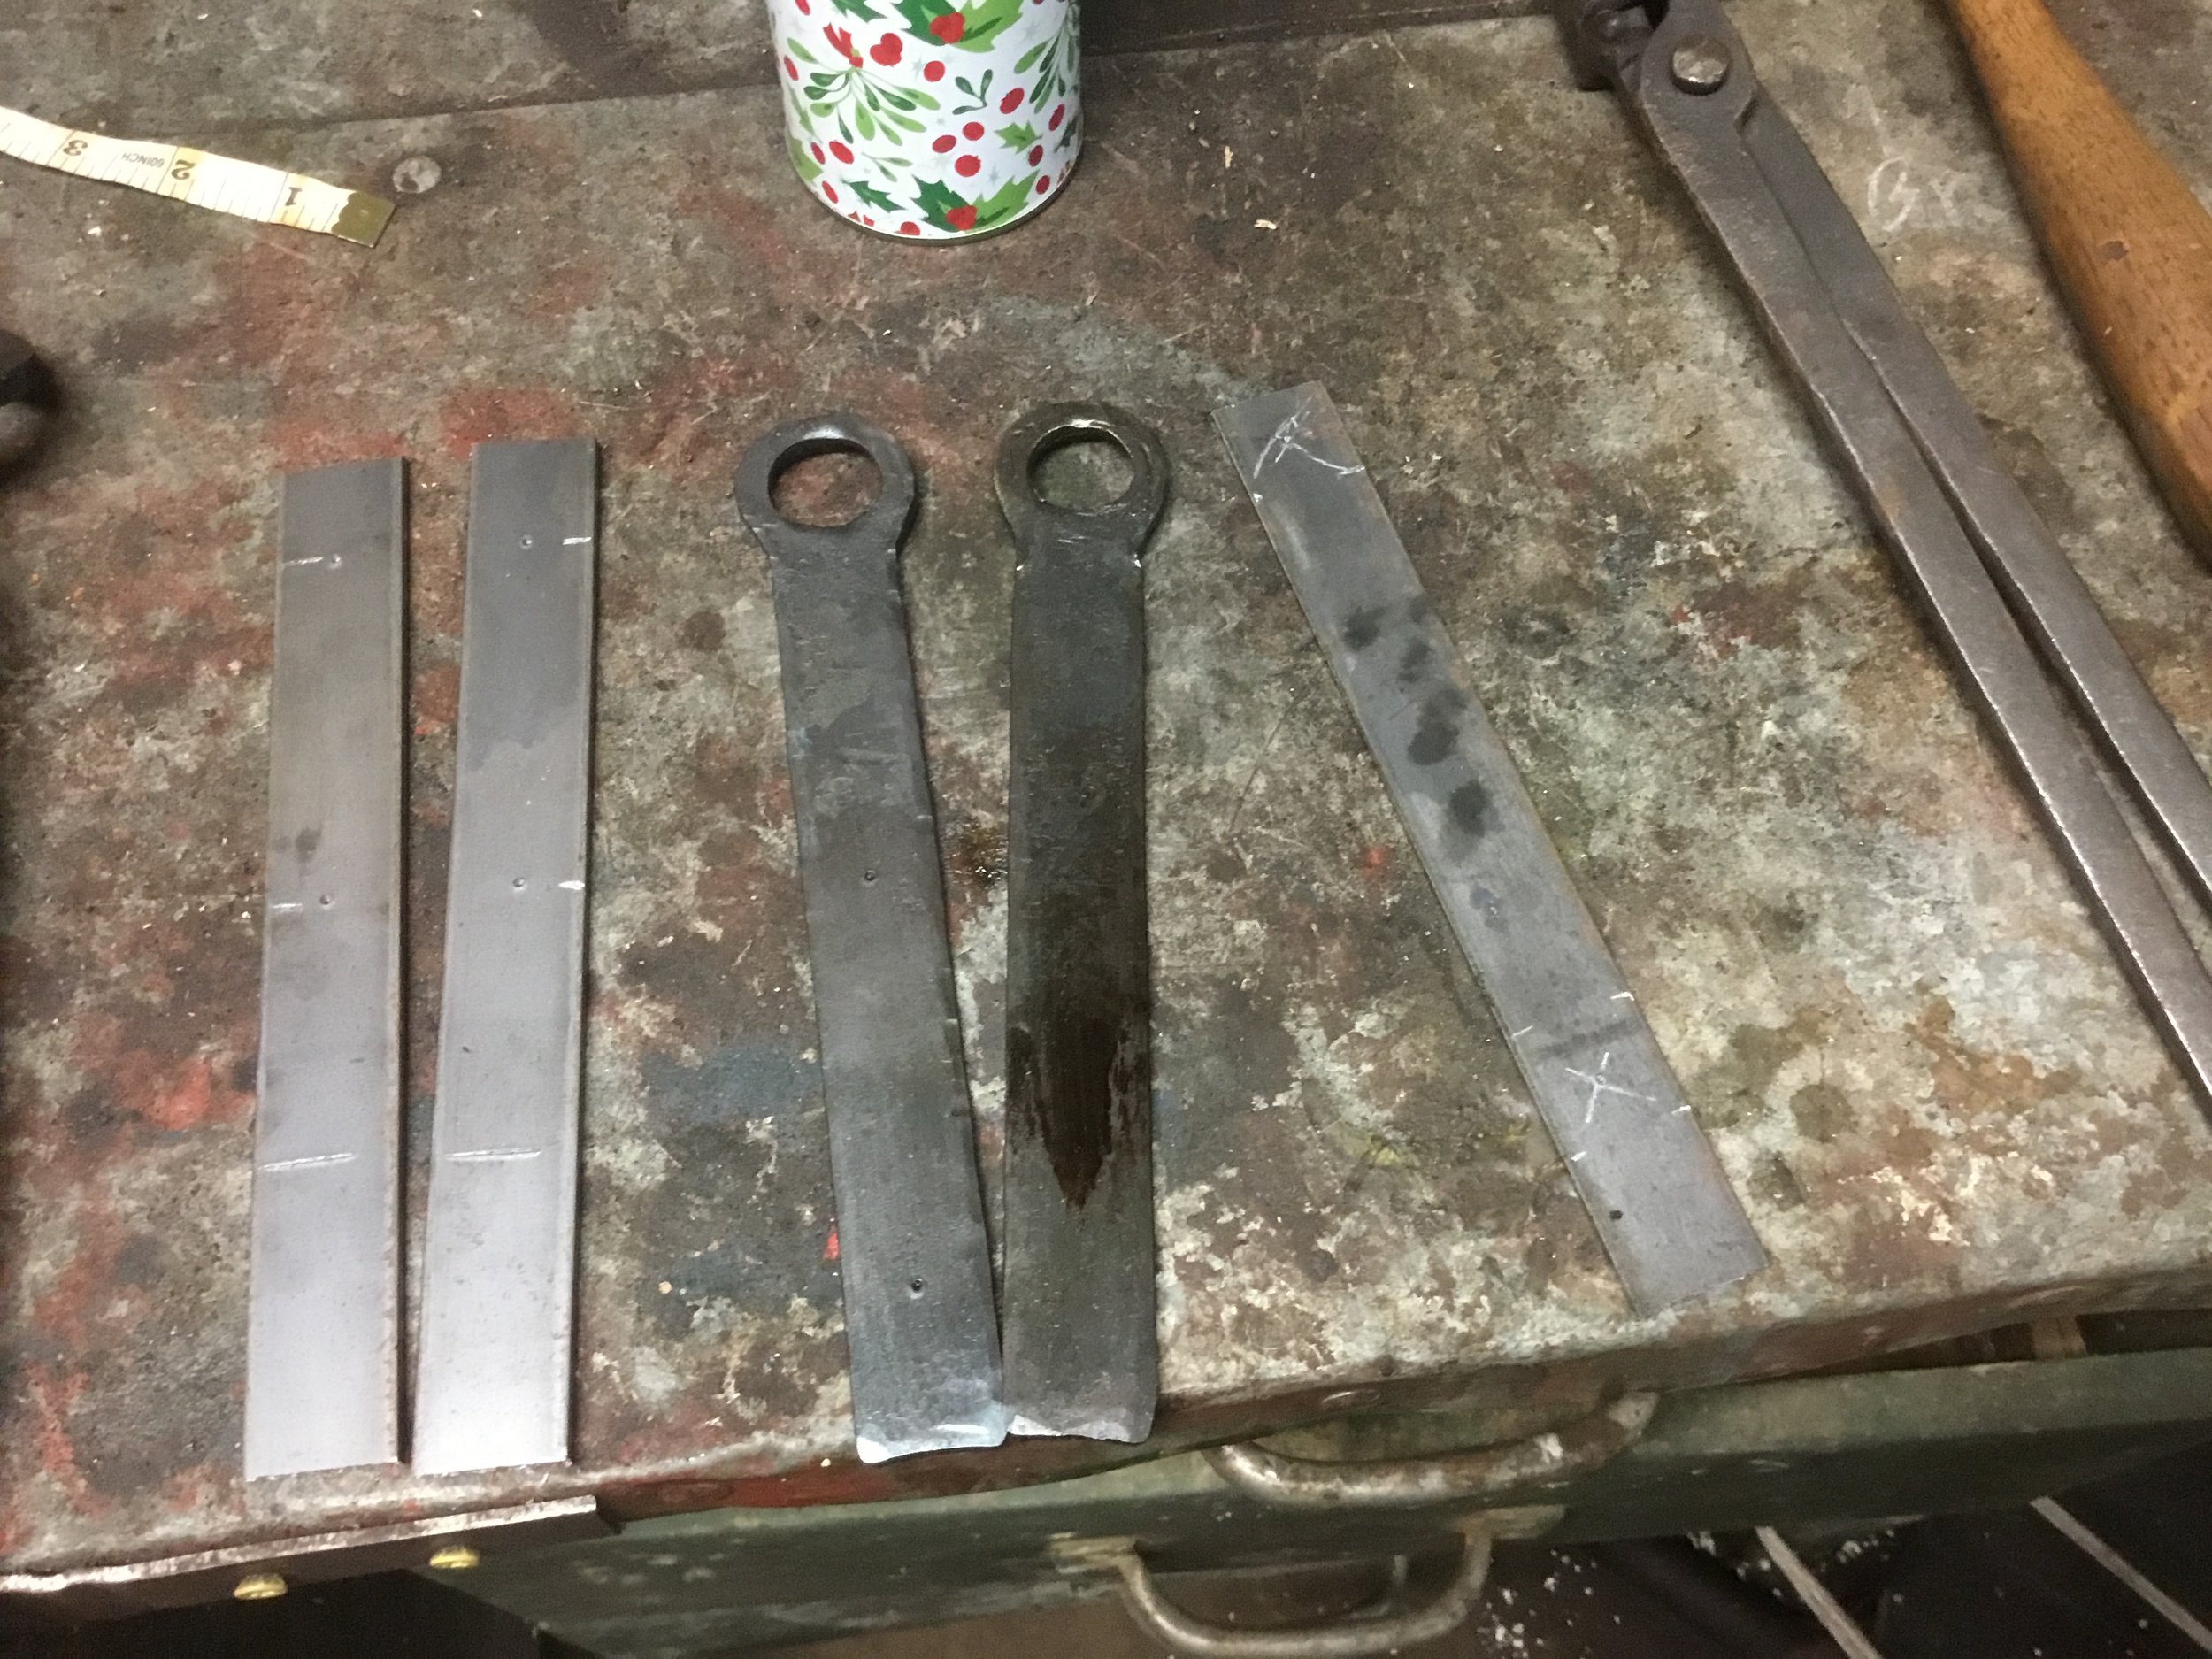
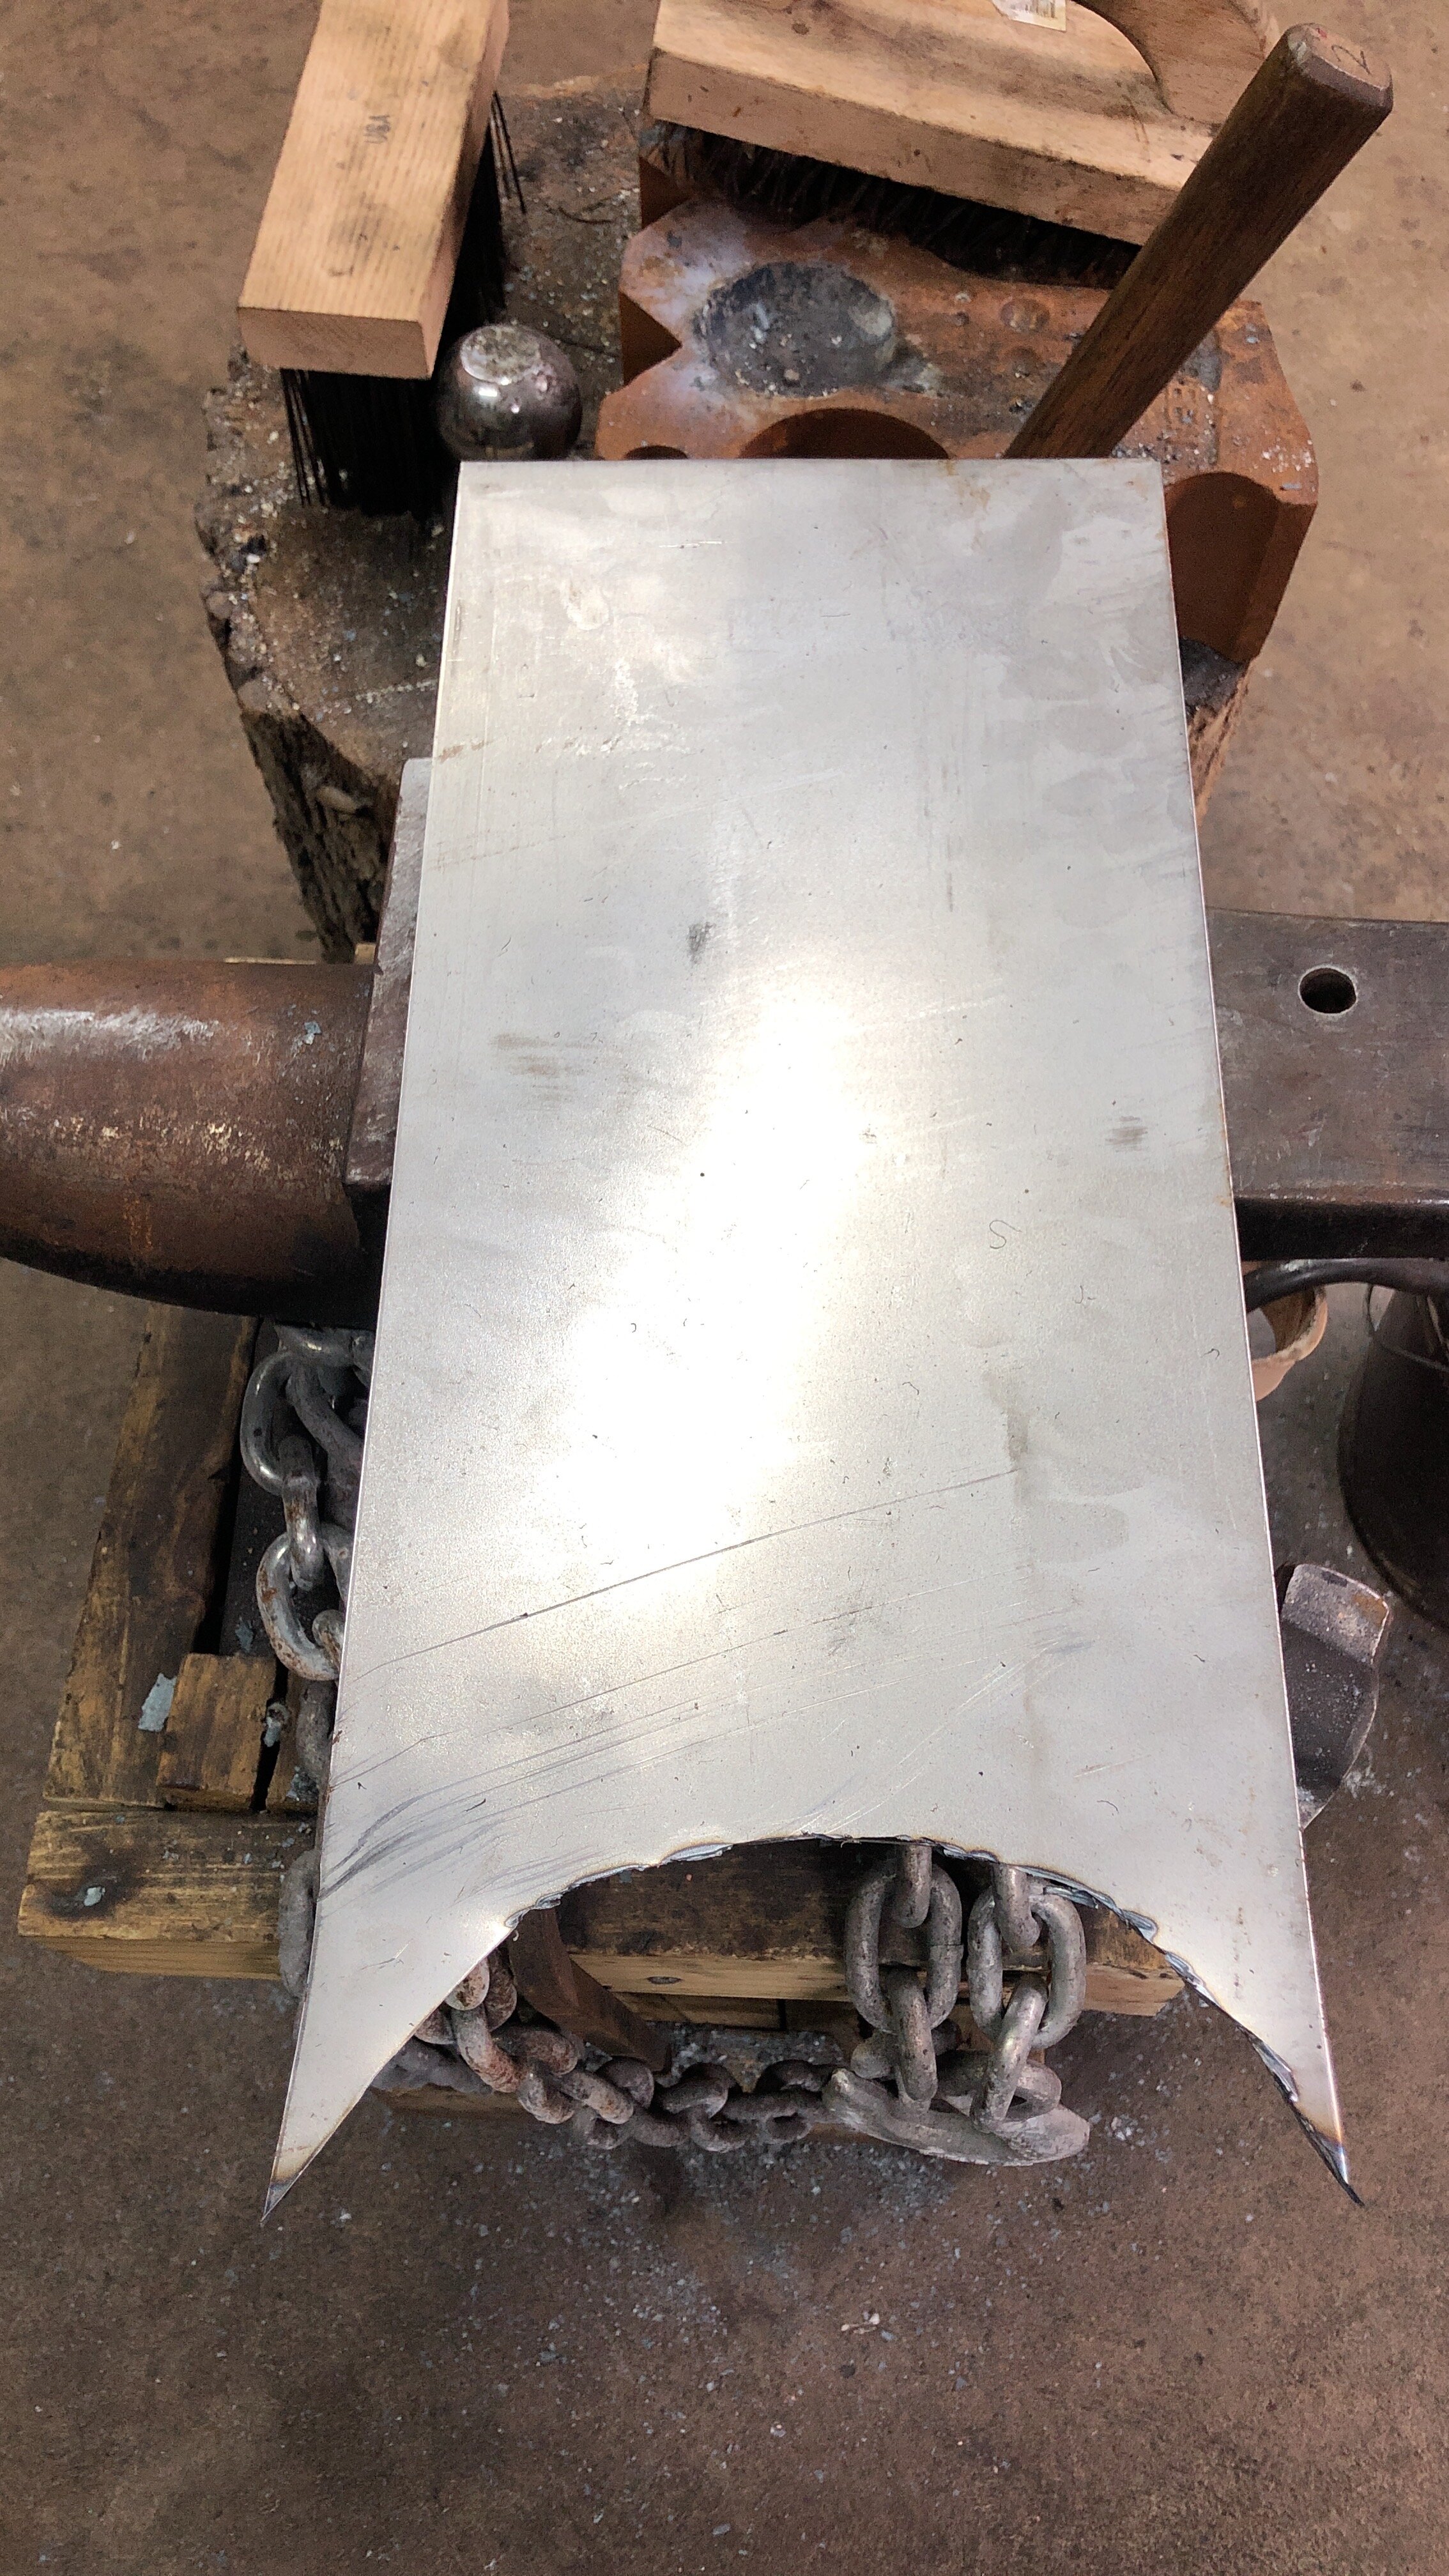
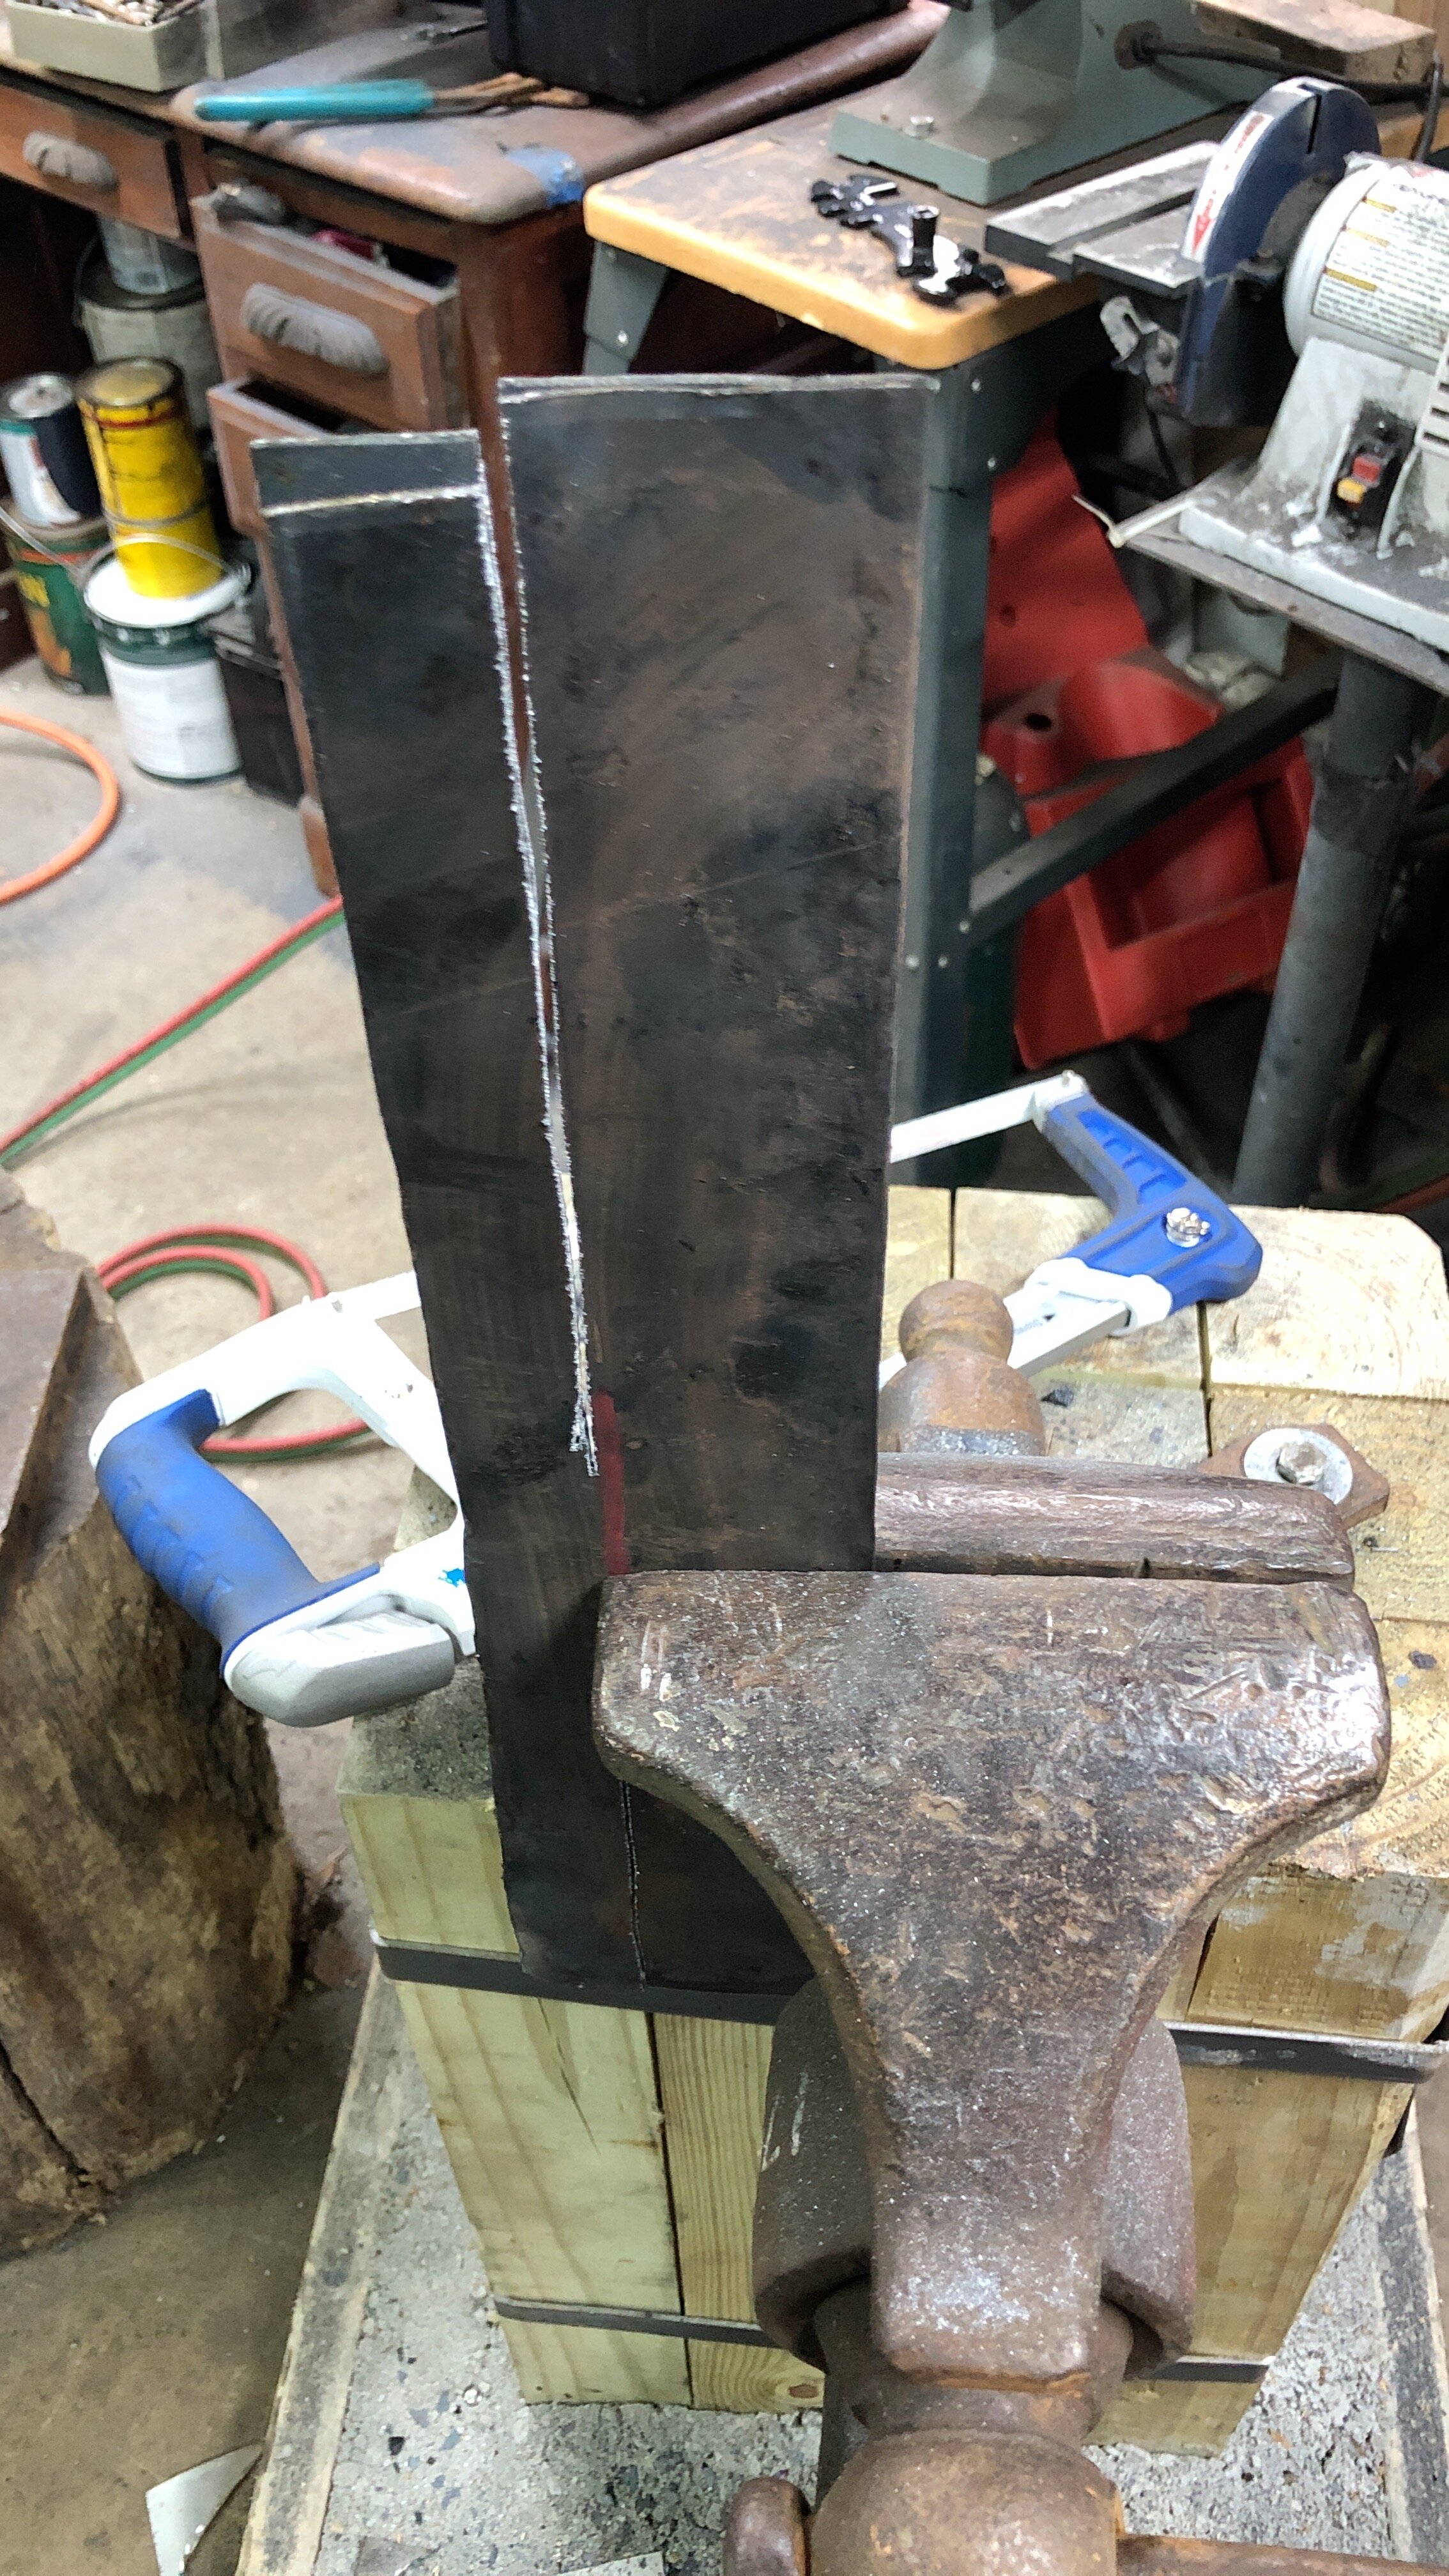
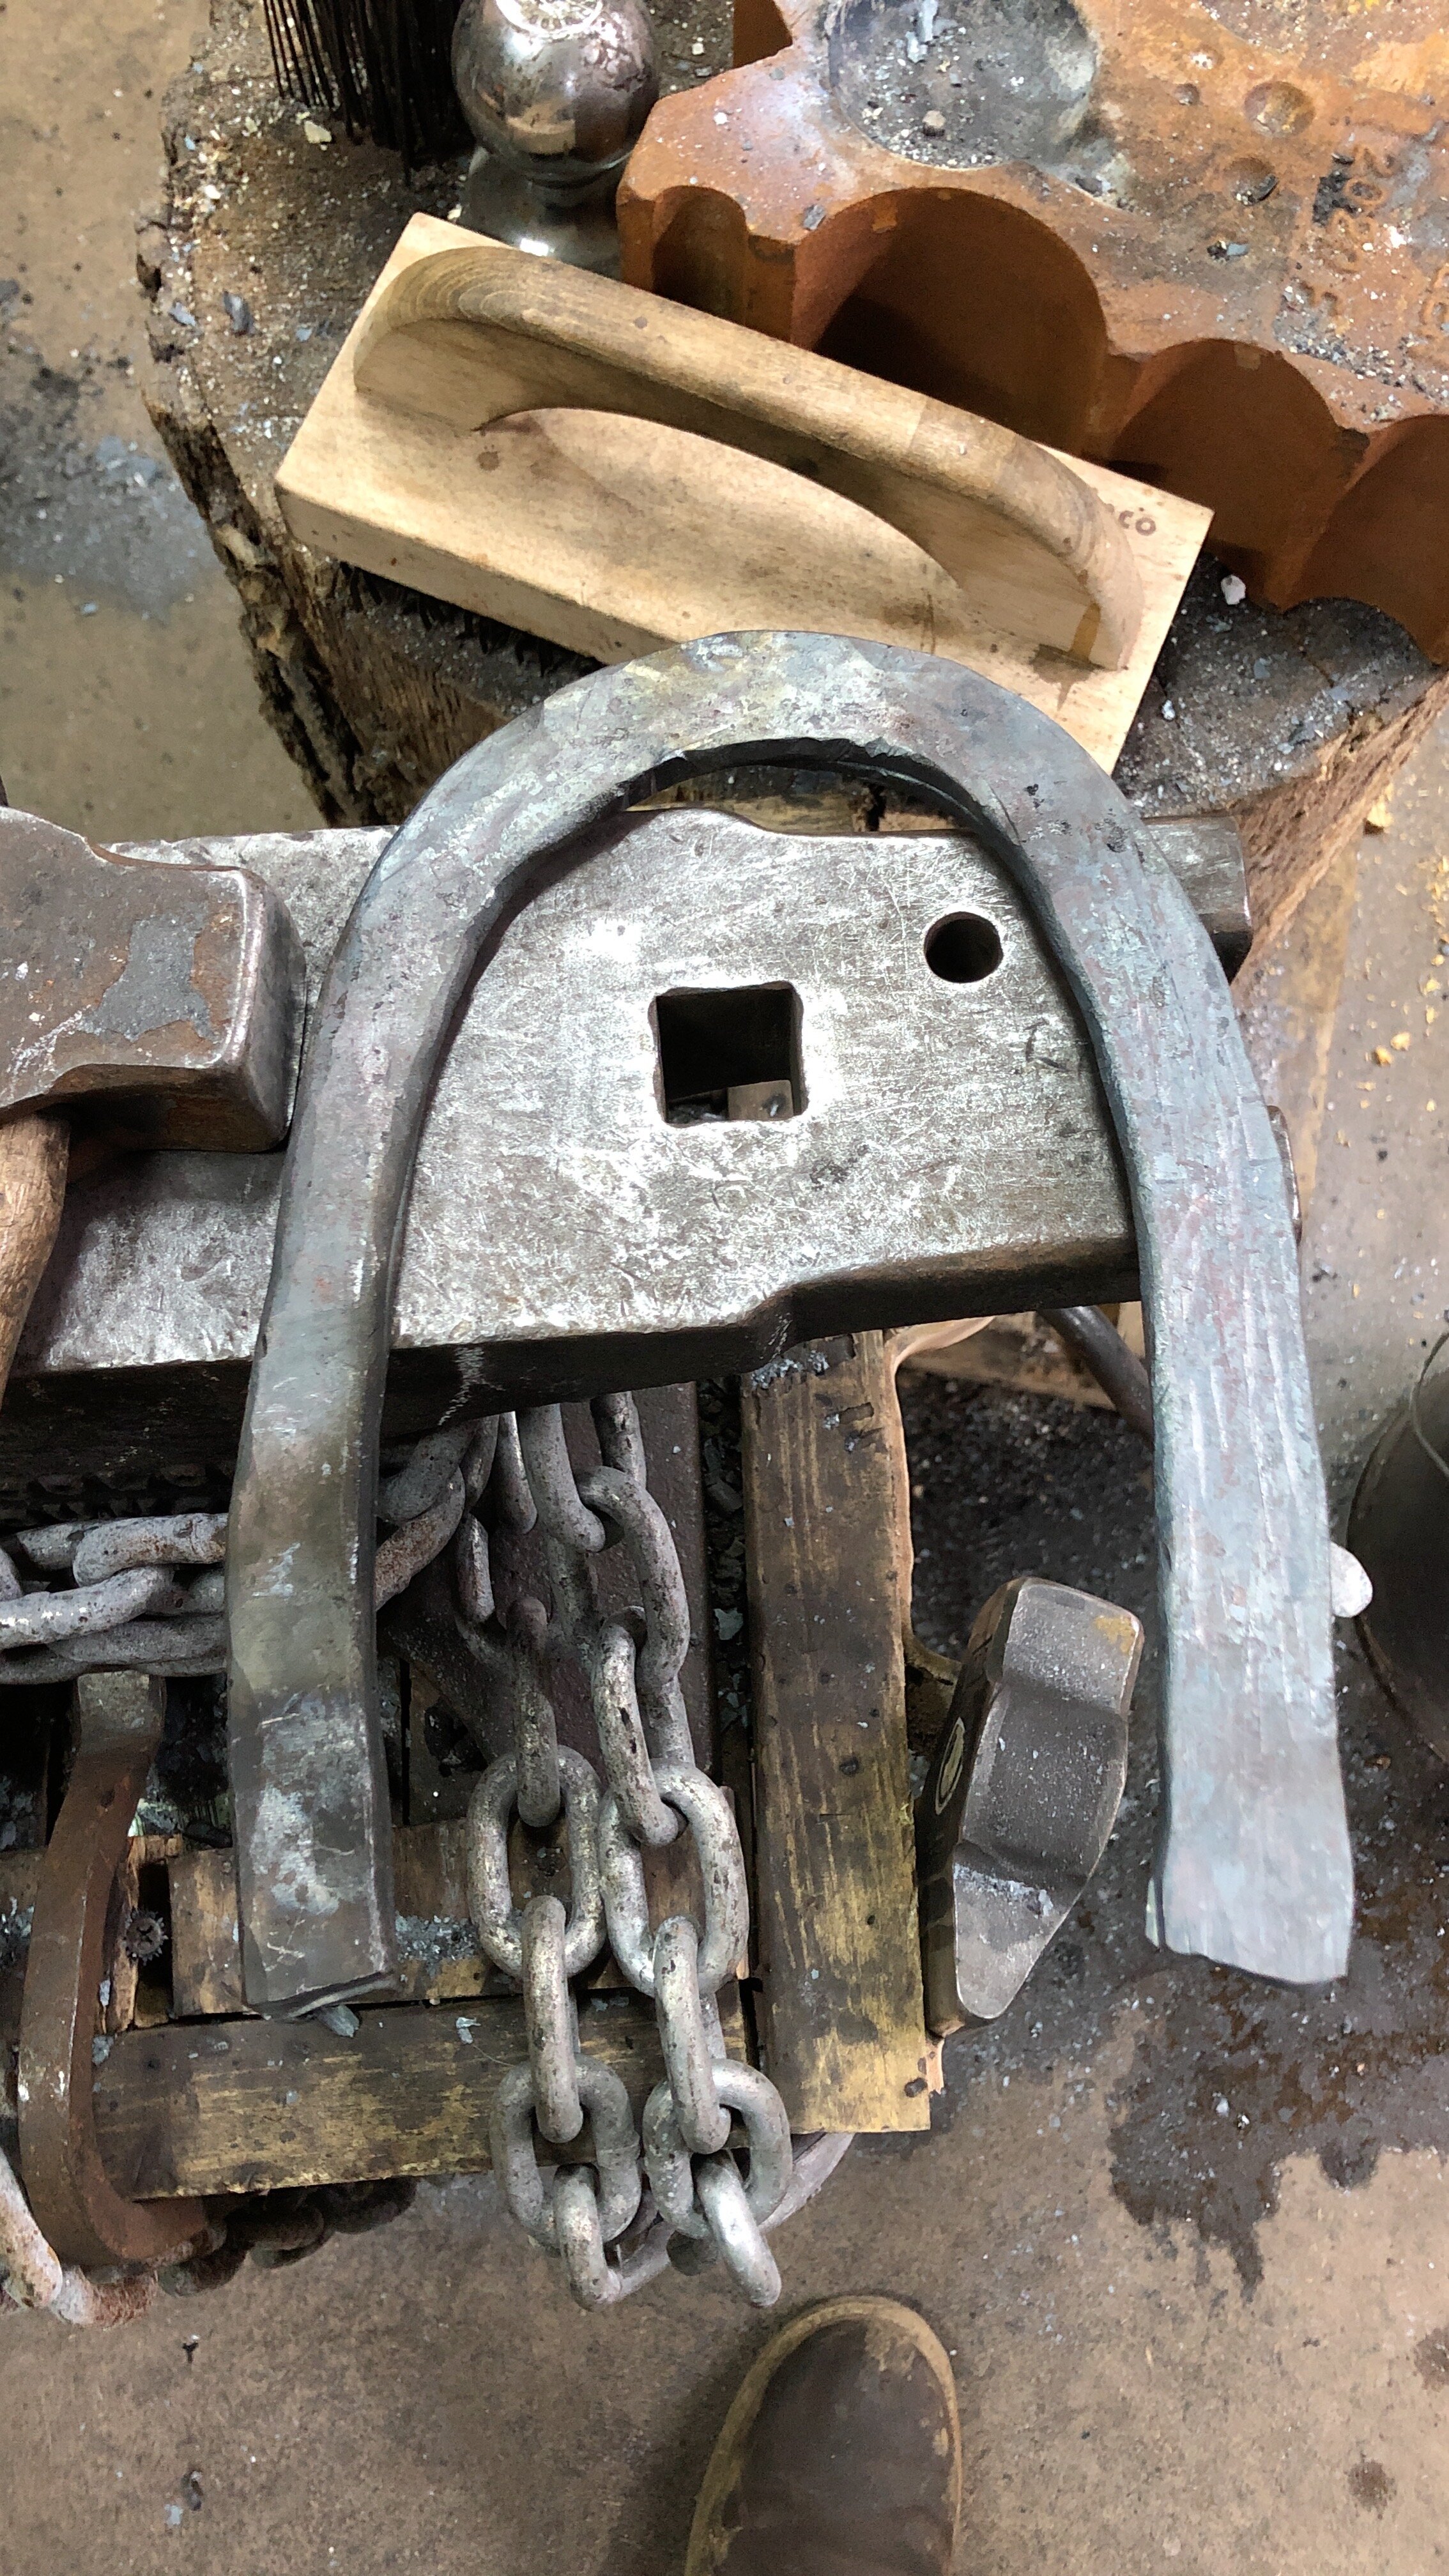
The next plan of attack was to use steel with enough thickness to make the bend and then draw it out to the proper thickness. For this, i started with 18 inches of 1 1/2 by 1/4 inch bar stock. This was then folded over on itself to create a 3/4 by 1/2 piece of stock with a cut down the center.

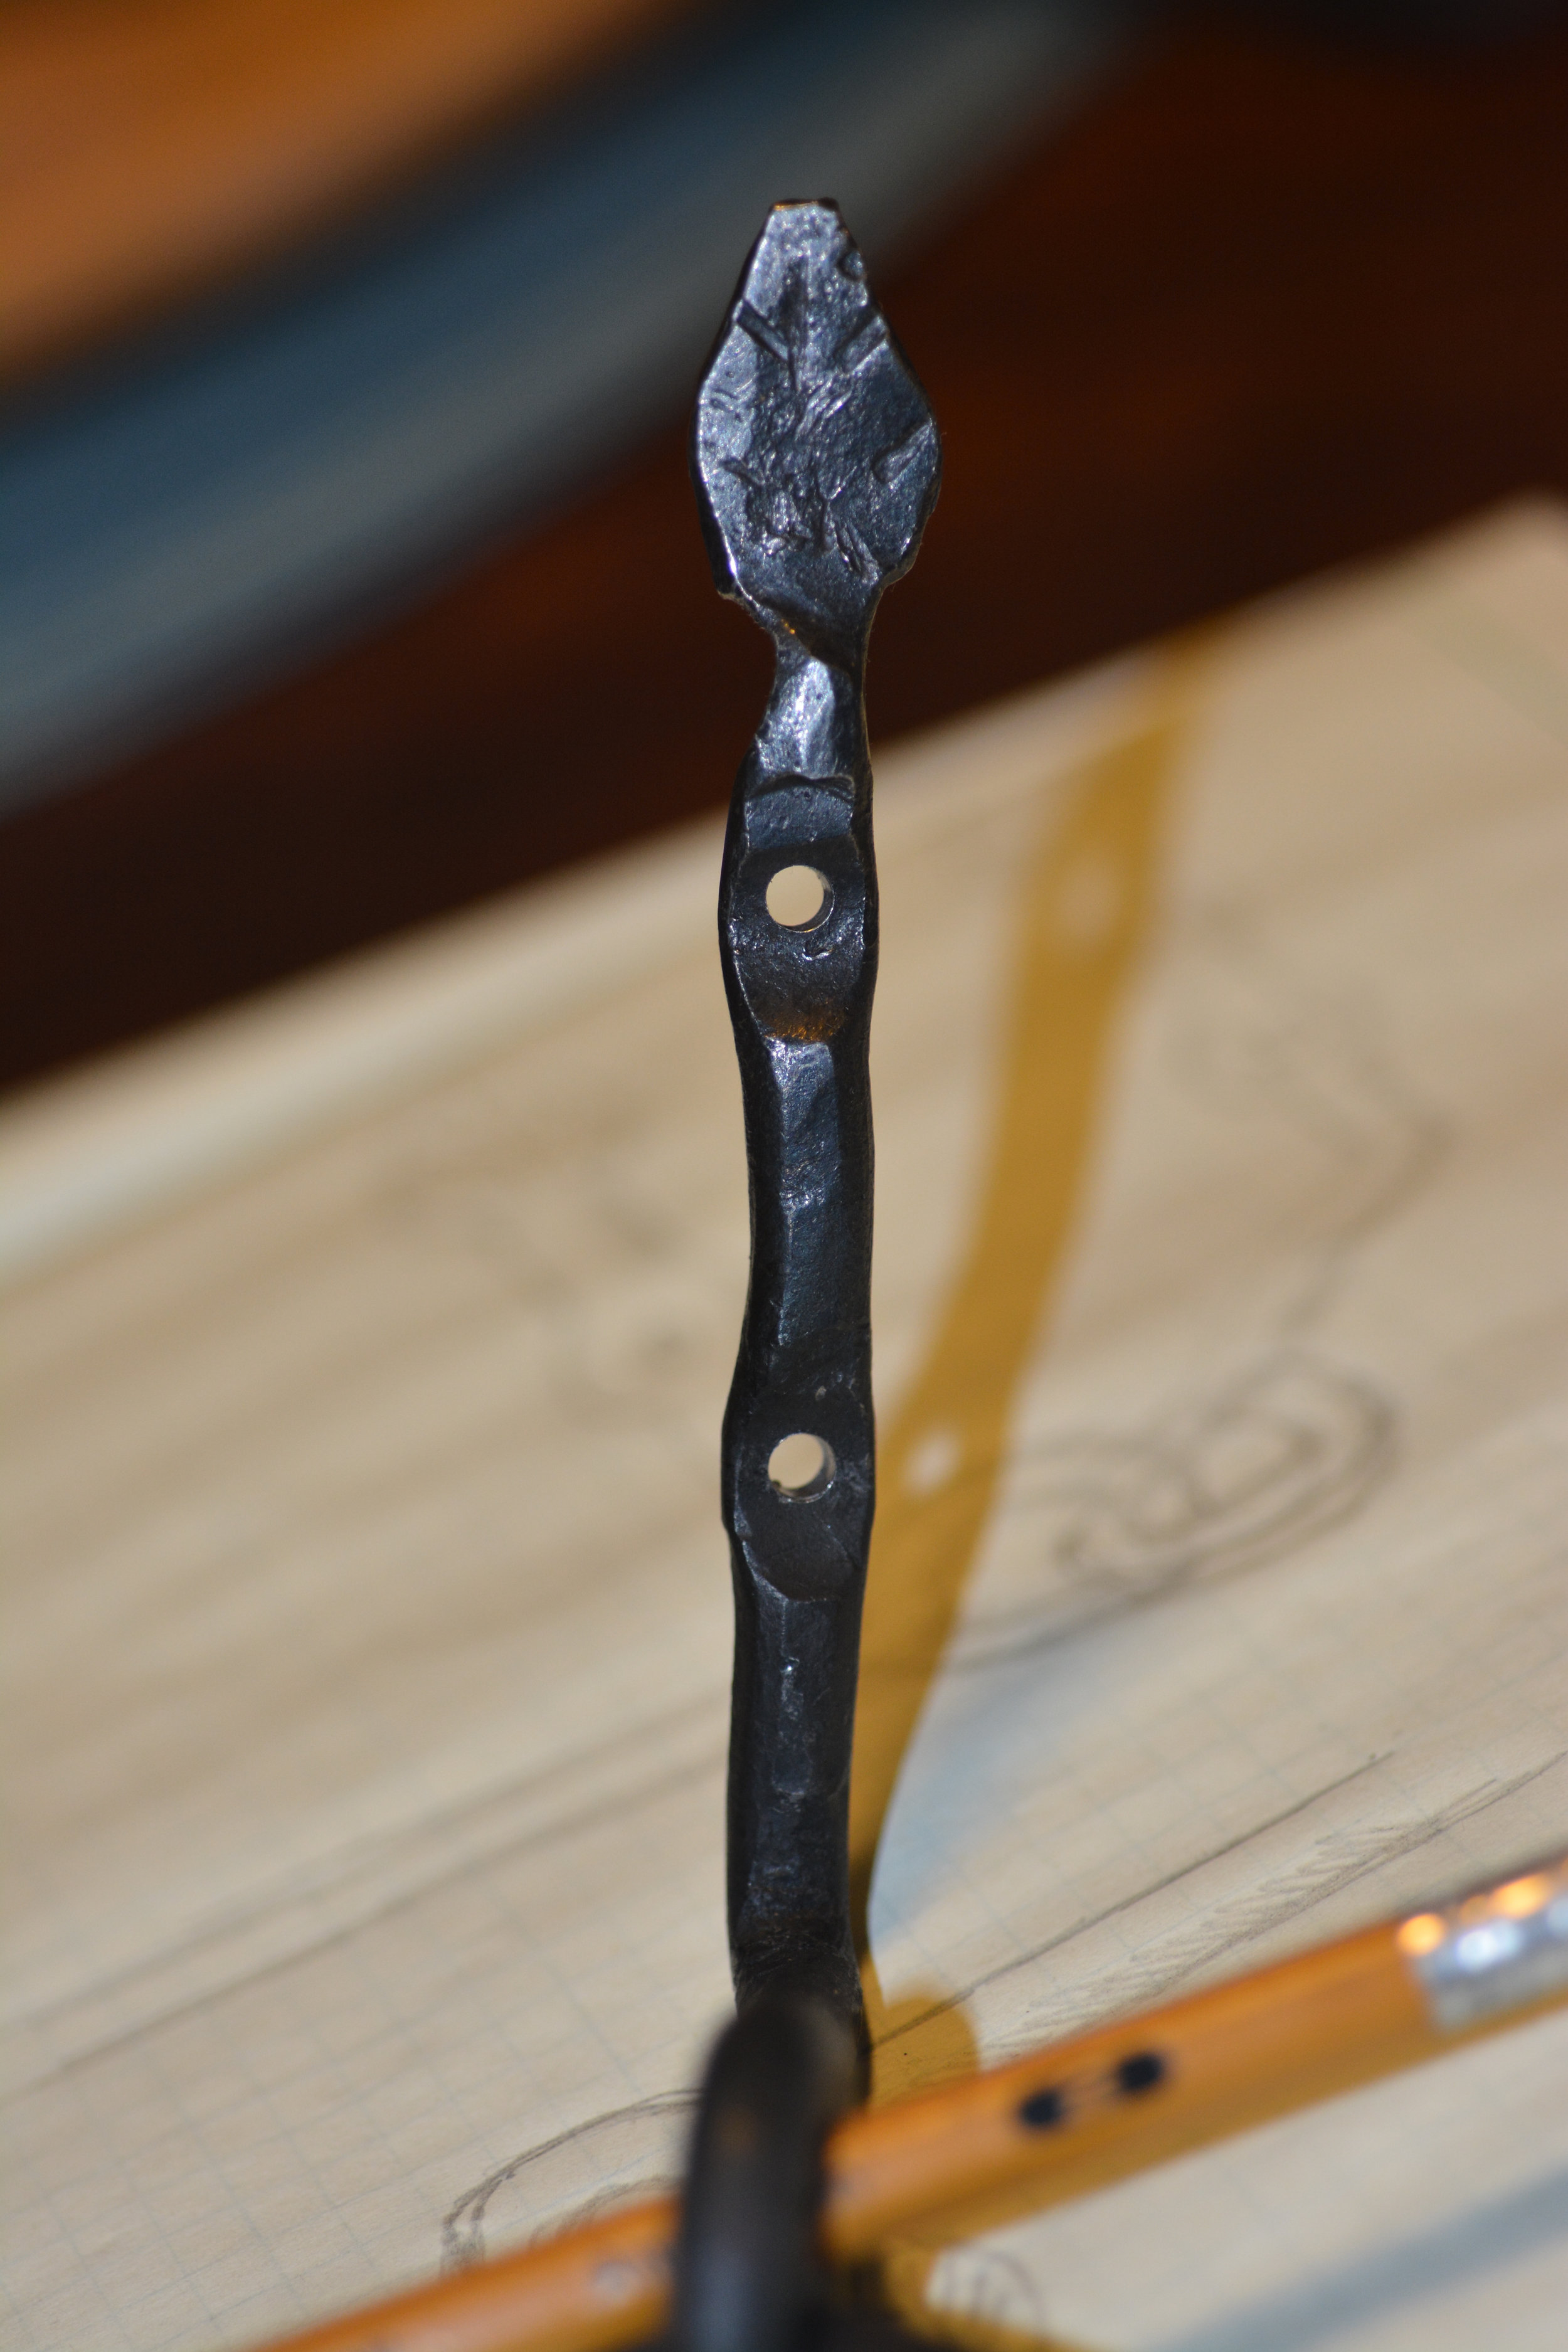
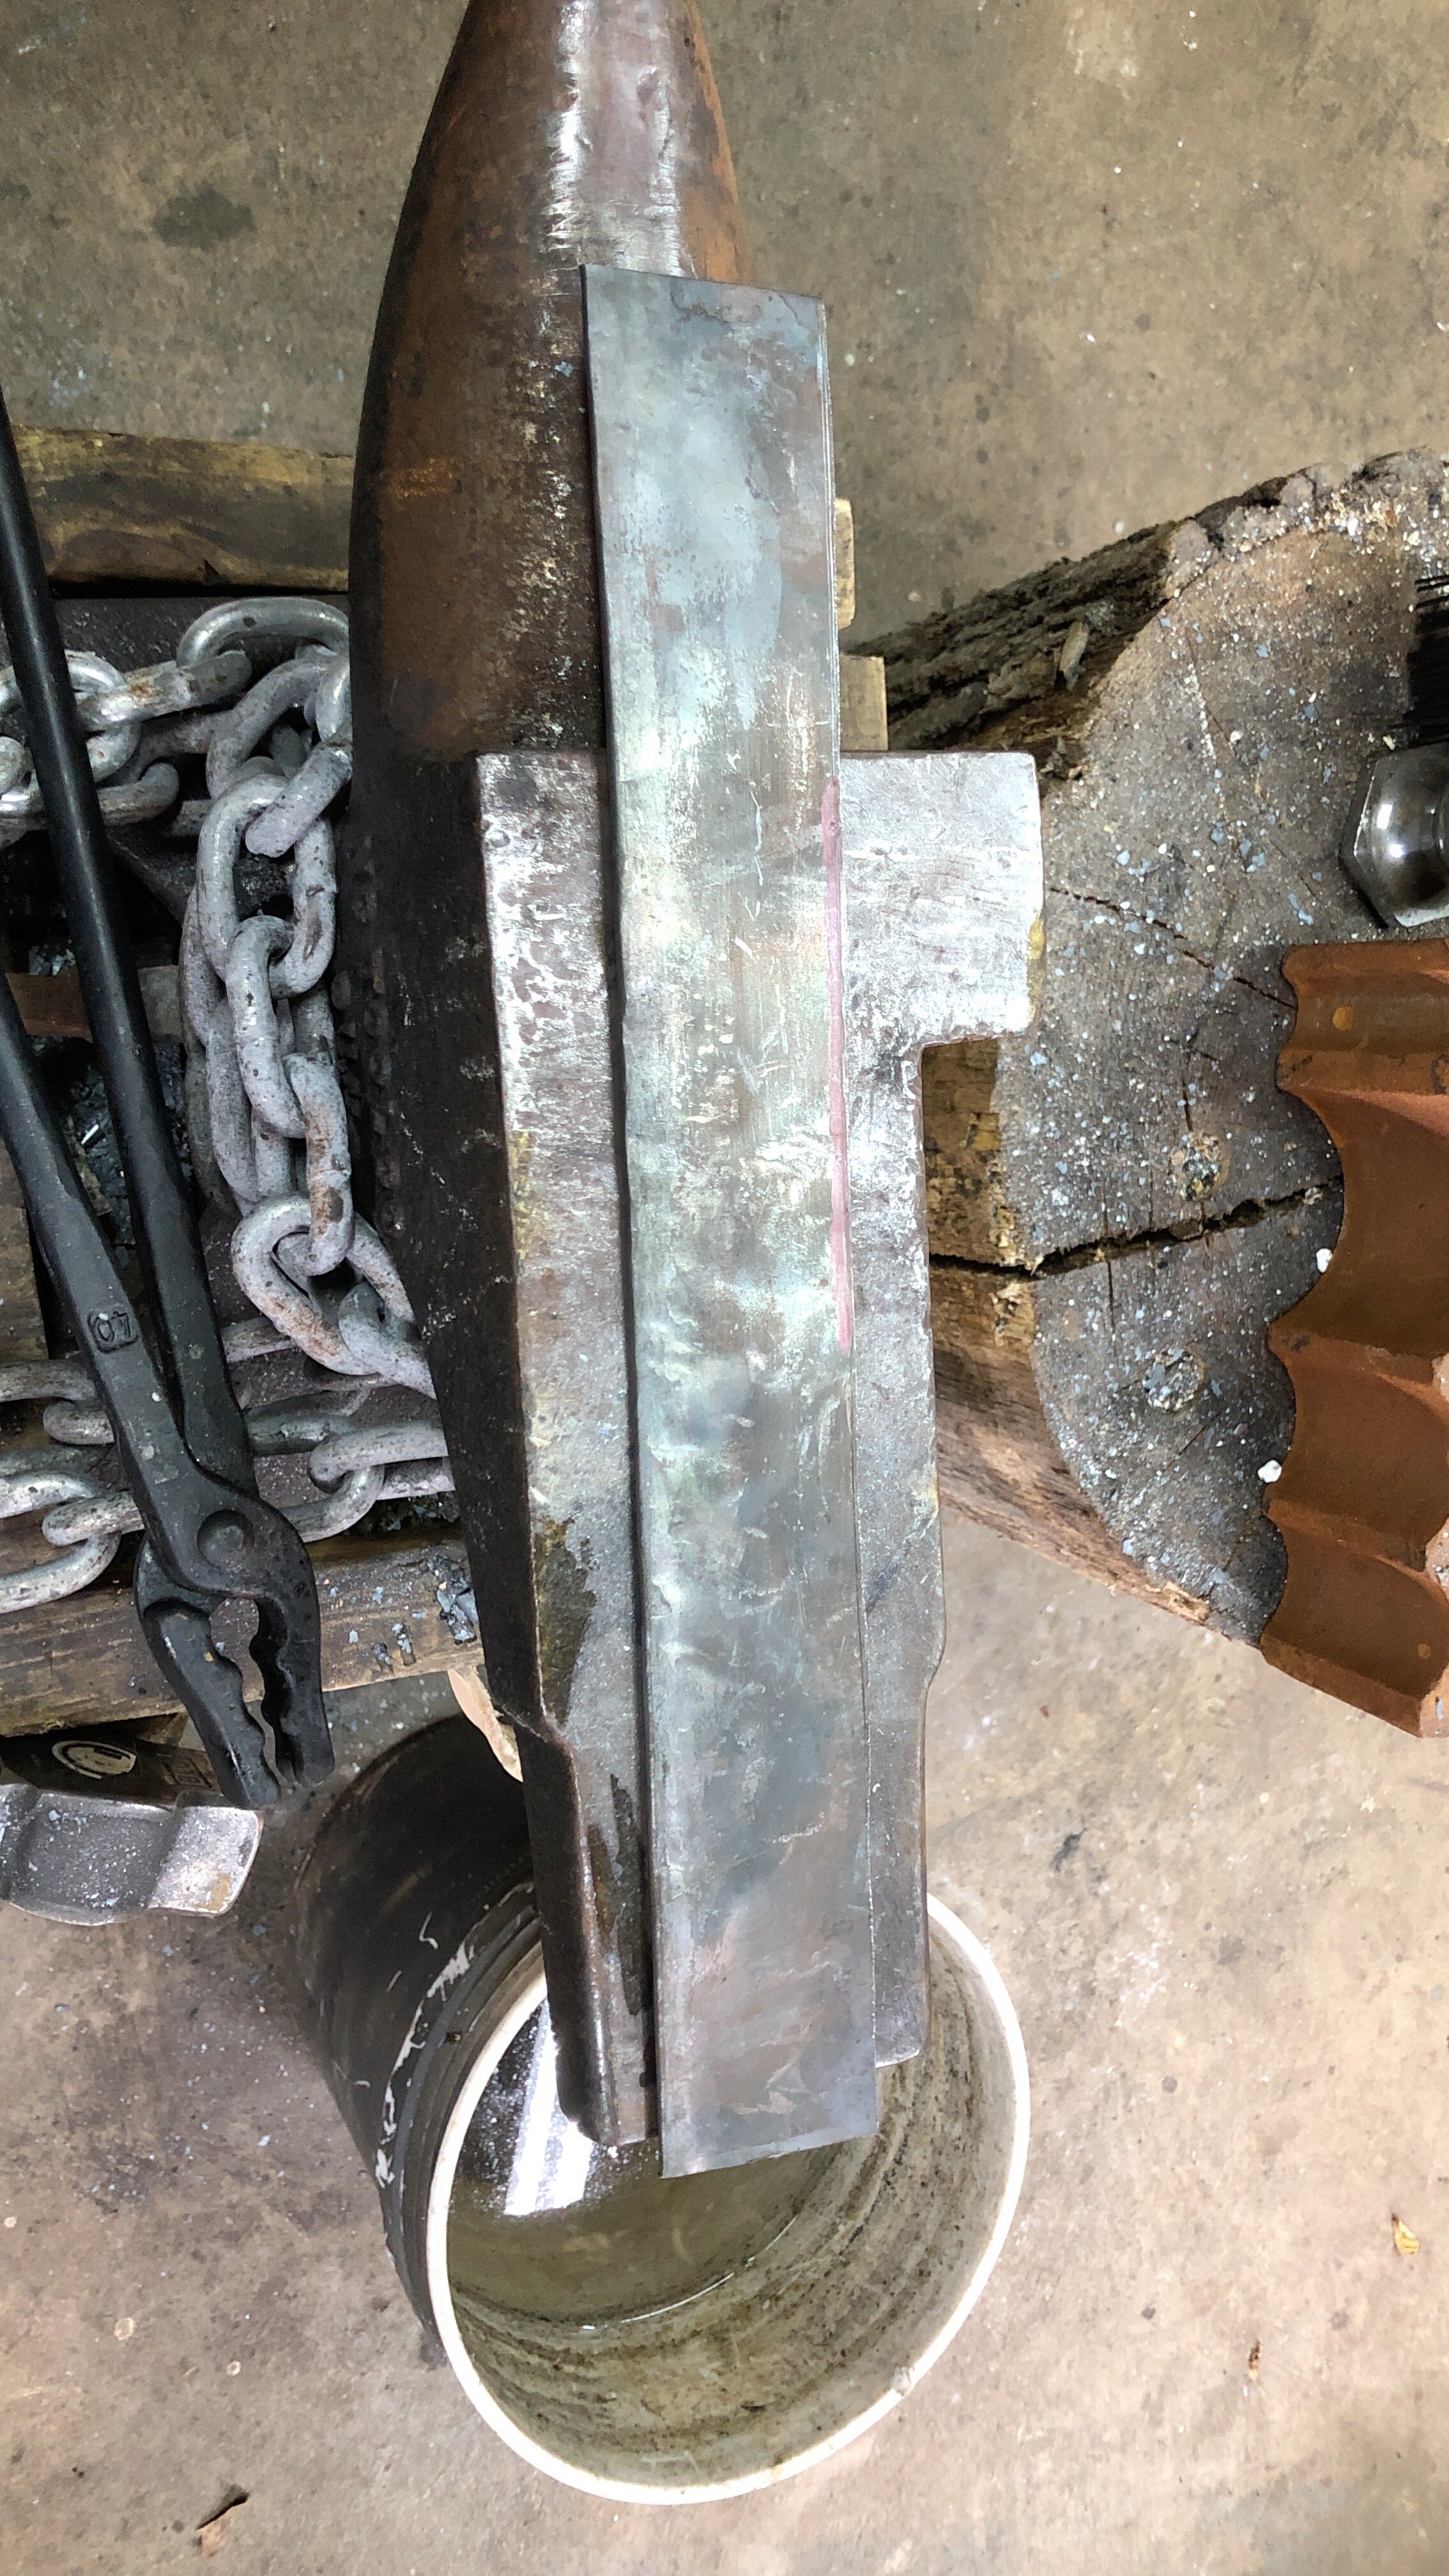
Once the “taco” was created, the bend was then forged into the bar in the shape of a spade head. This was then hammered flat and spread to create 2 thin sheets joined by the fold. As long as I did not heat the metal to forge welding temps, the 2 sheets would remain separate. .

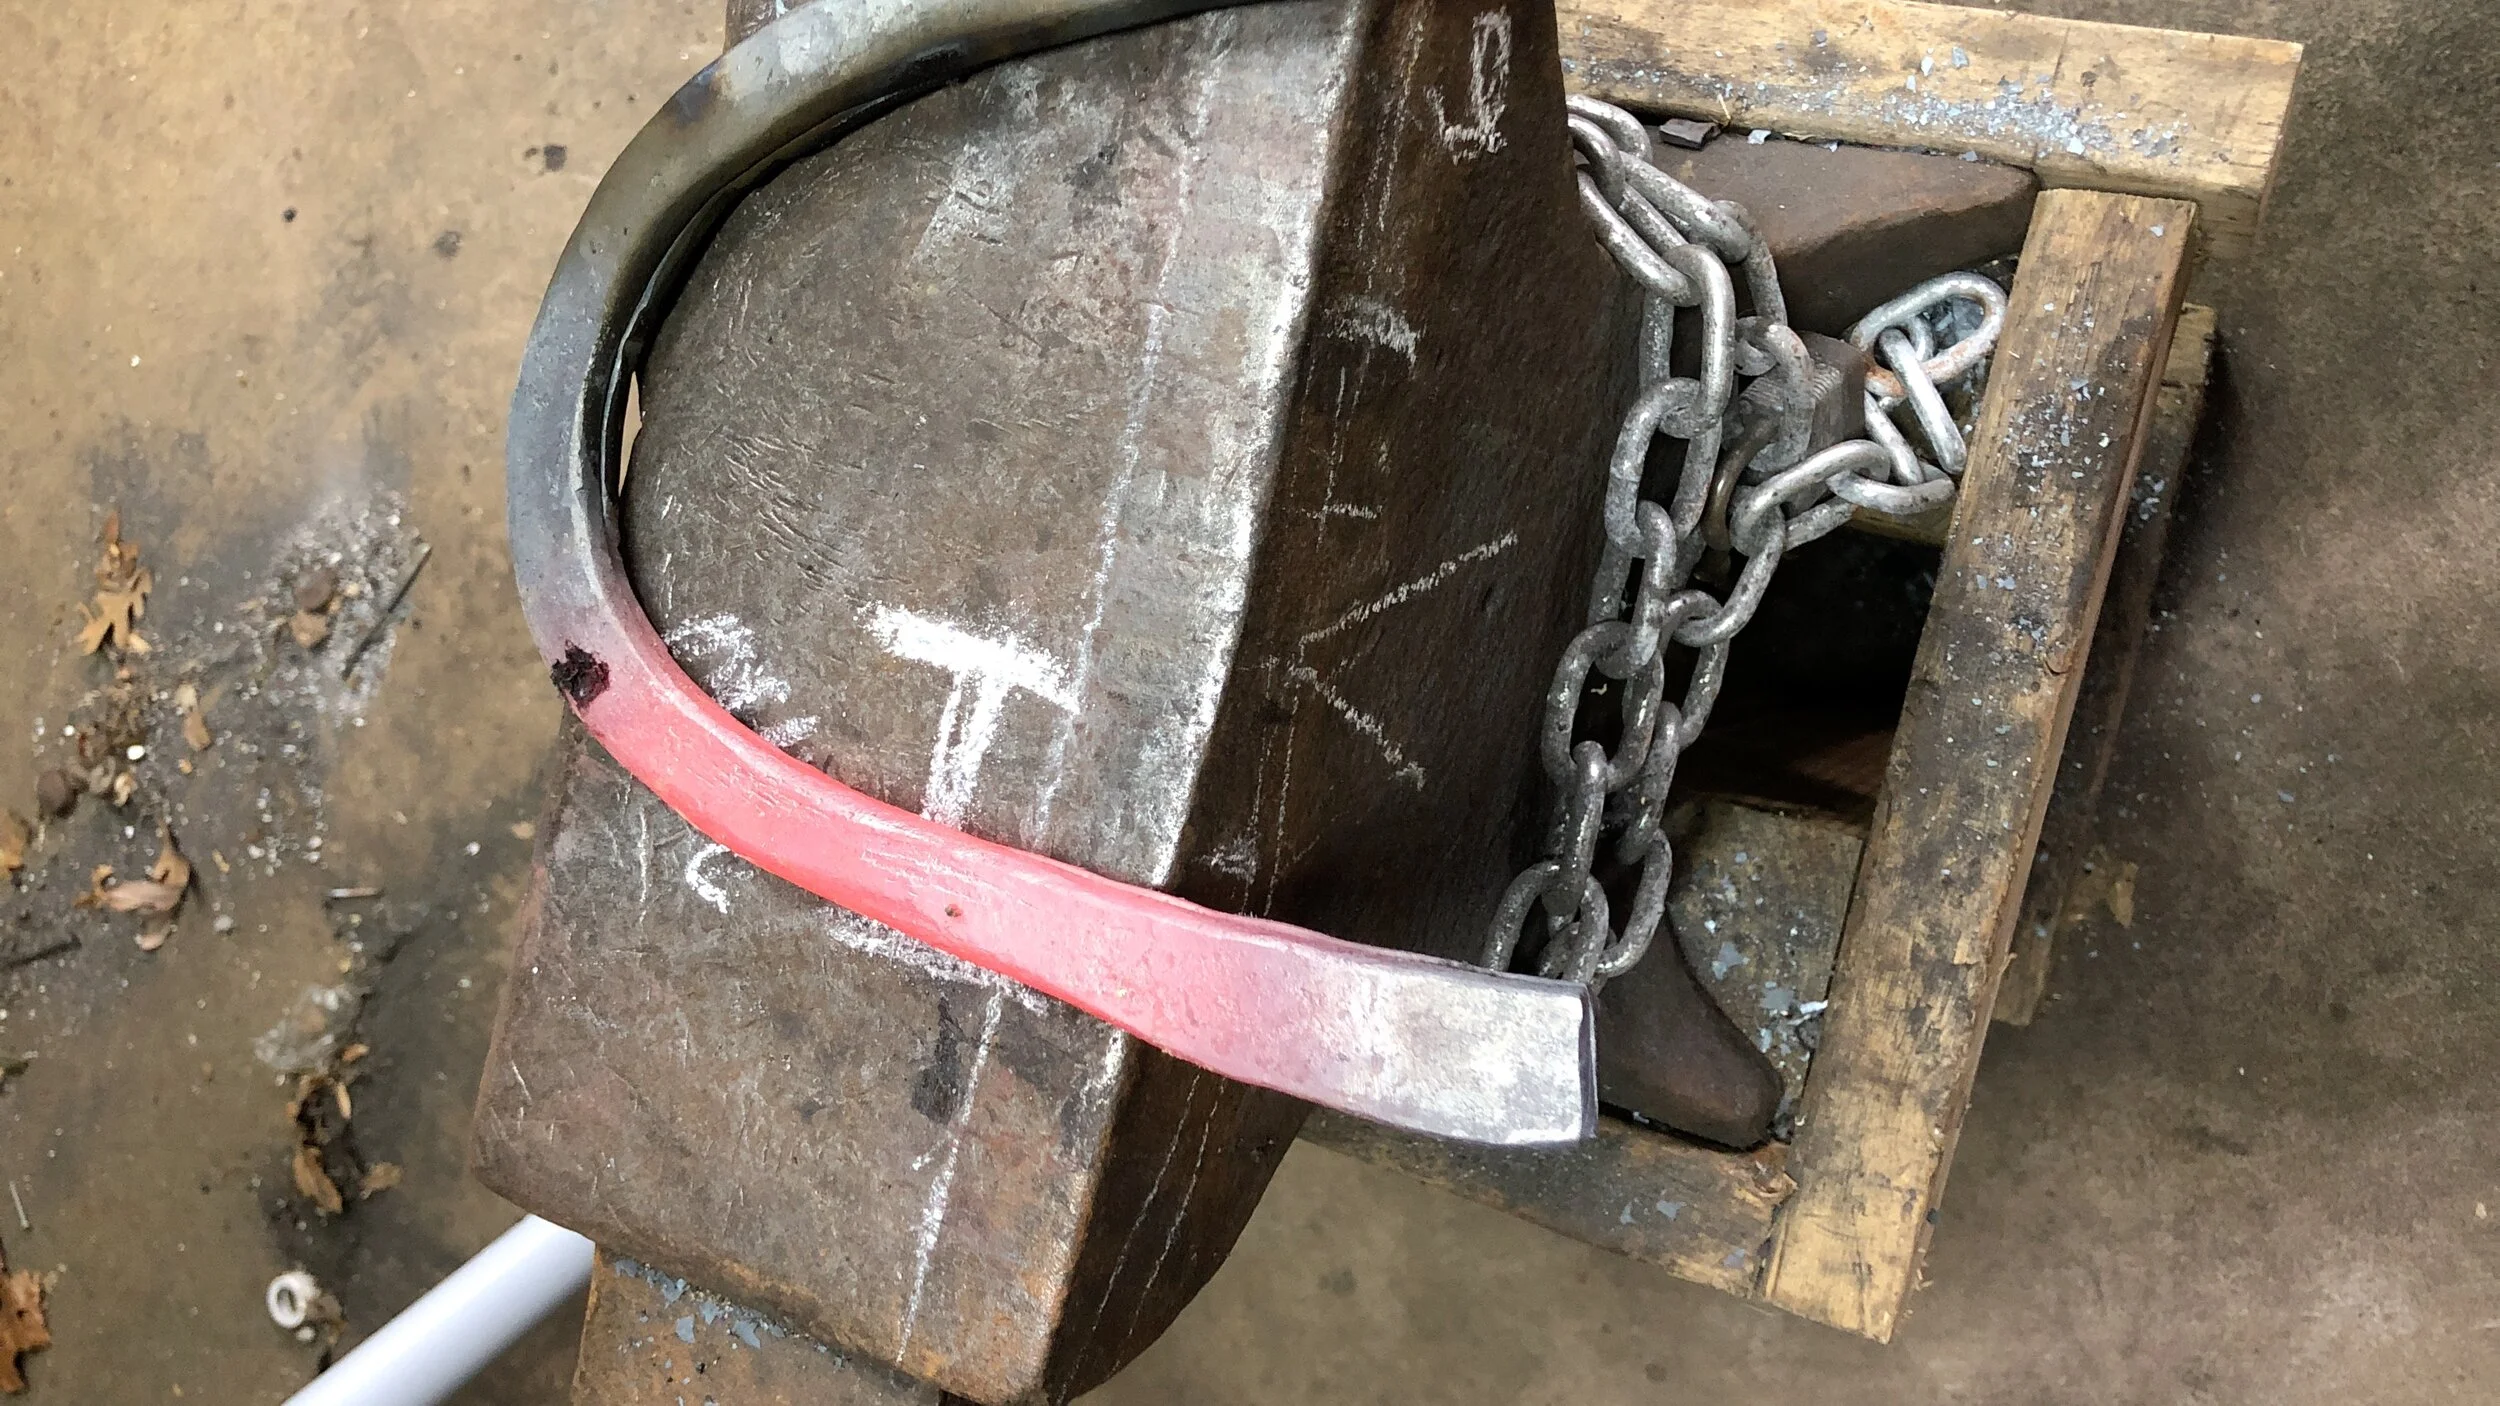
Because of the shear mass of metal that needed to be moved, i was working with my 3 lb hammer instead of my normal 2. The peen end on this moved metal quite well and I was able to make some good progress on it. The trouble is, I am not in shape to swing a 3 pounder for very long, As my hammering time became less and less, i decided to stop on this for the day and switch to my other projects.

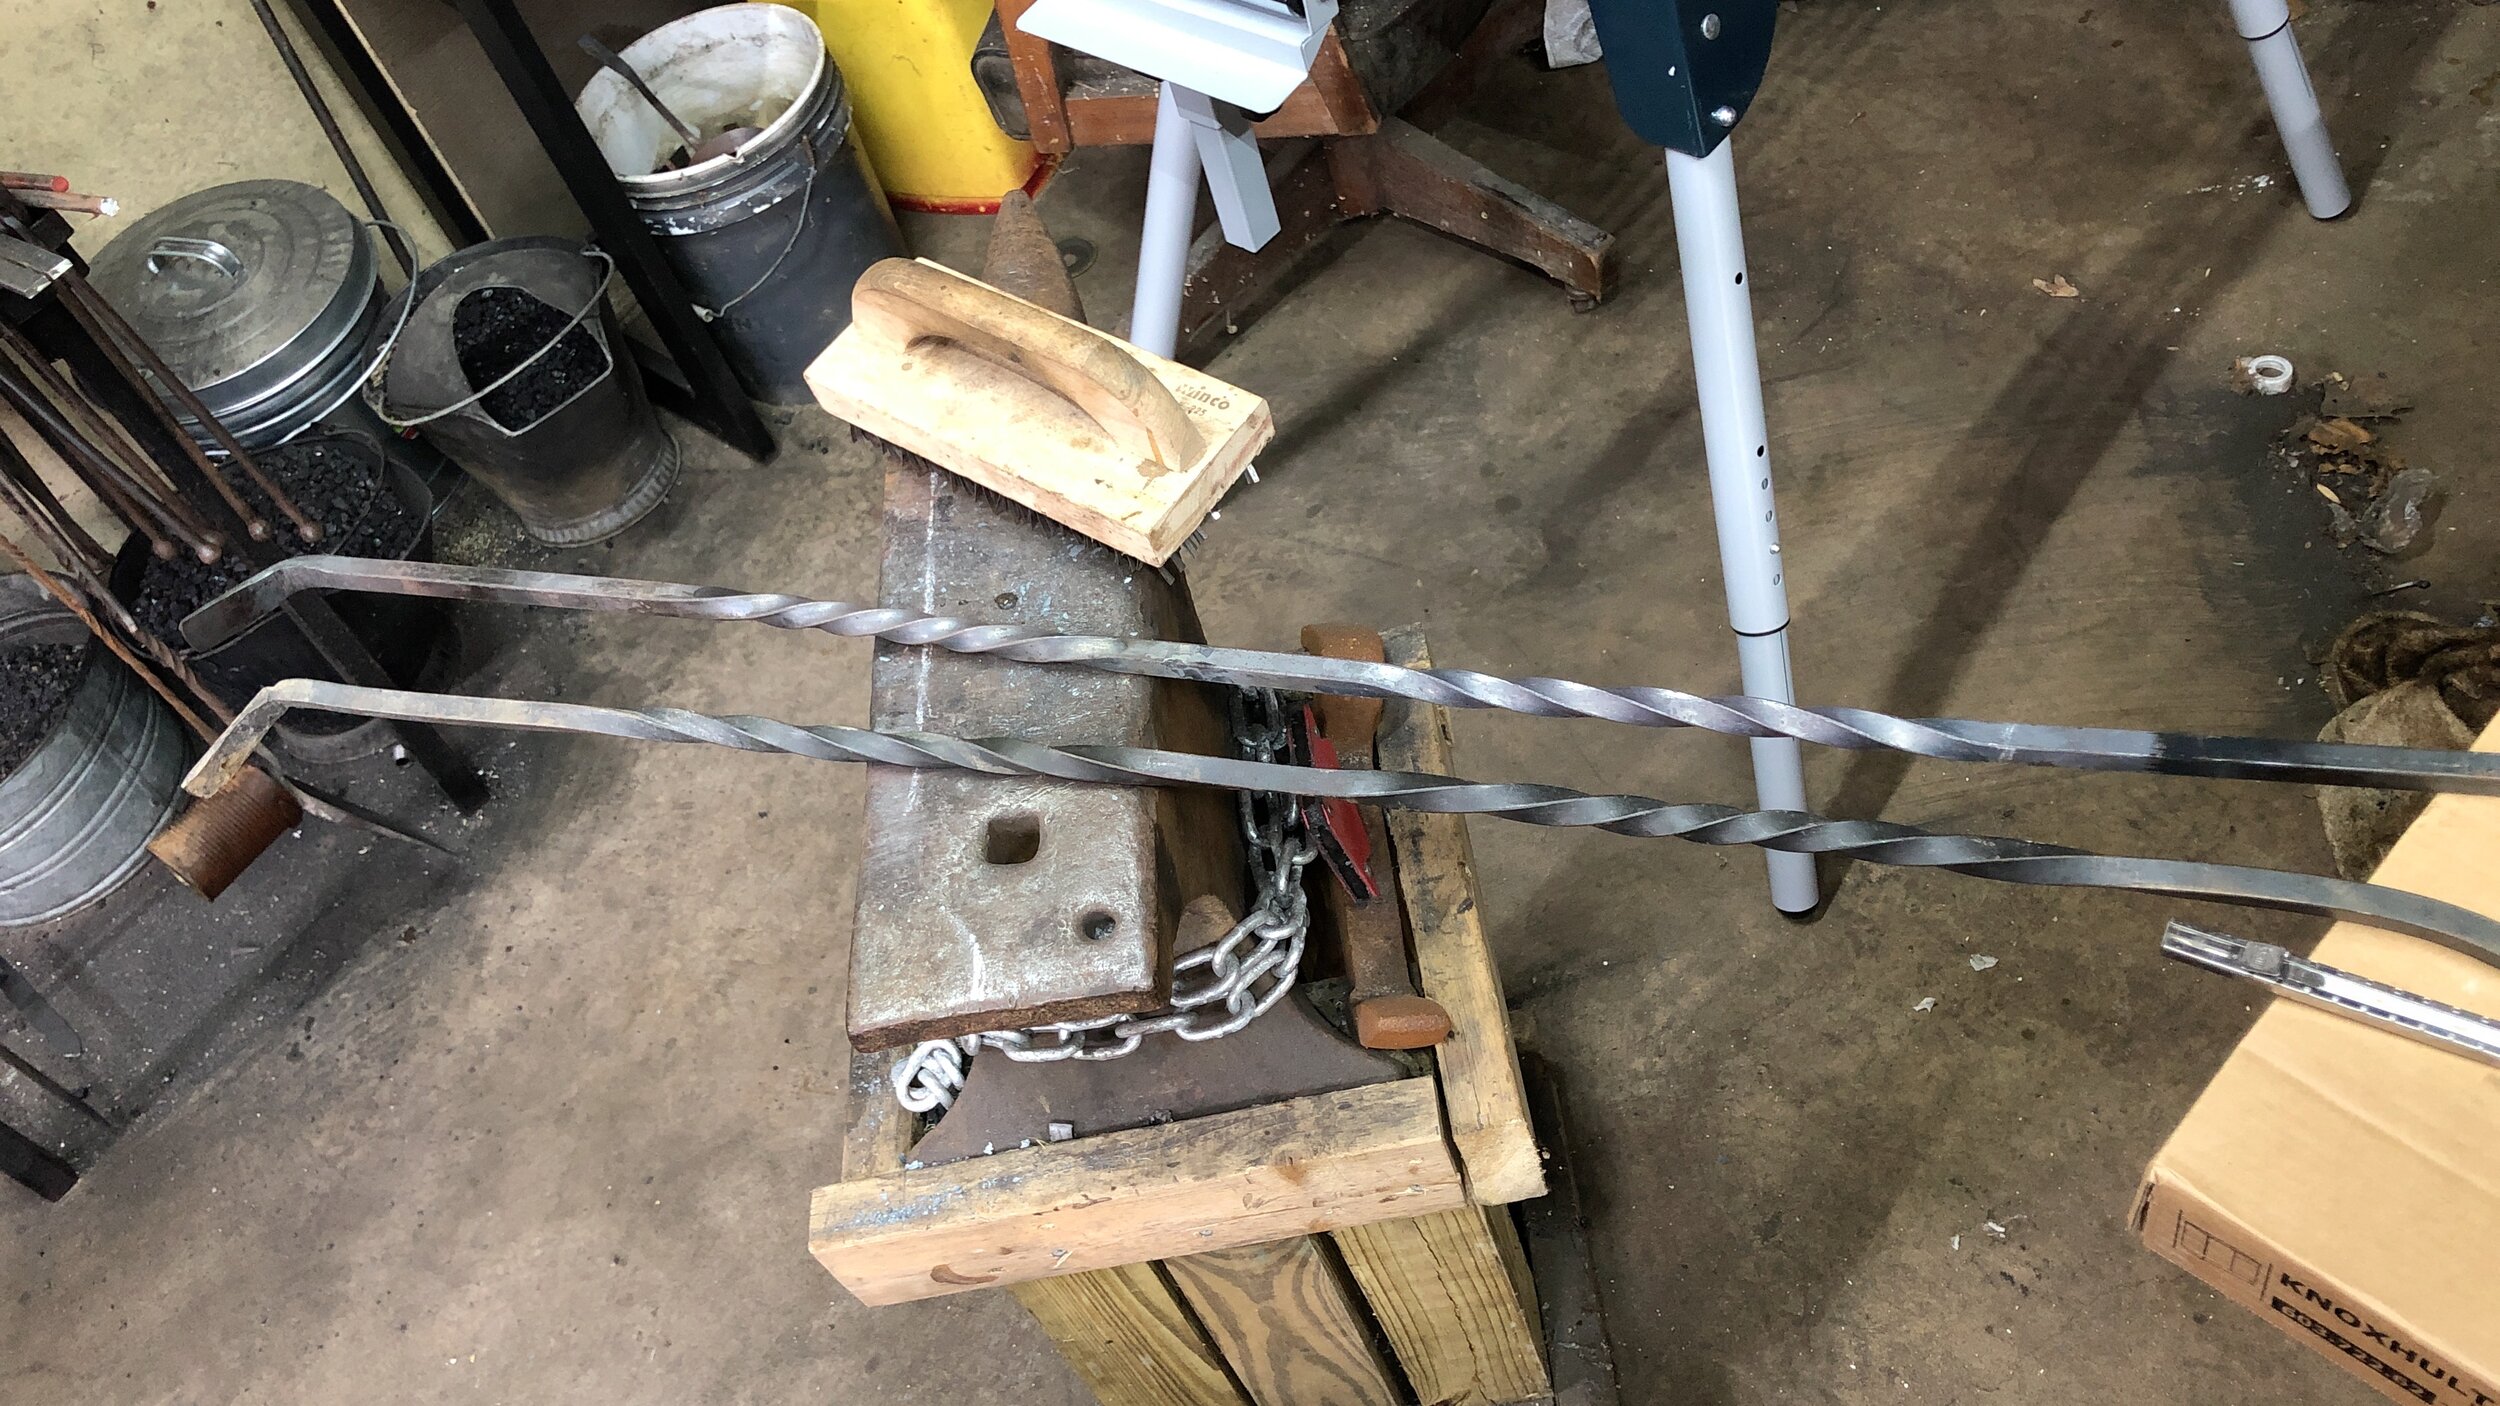
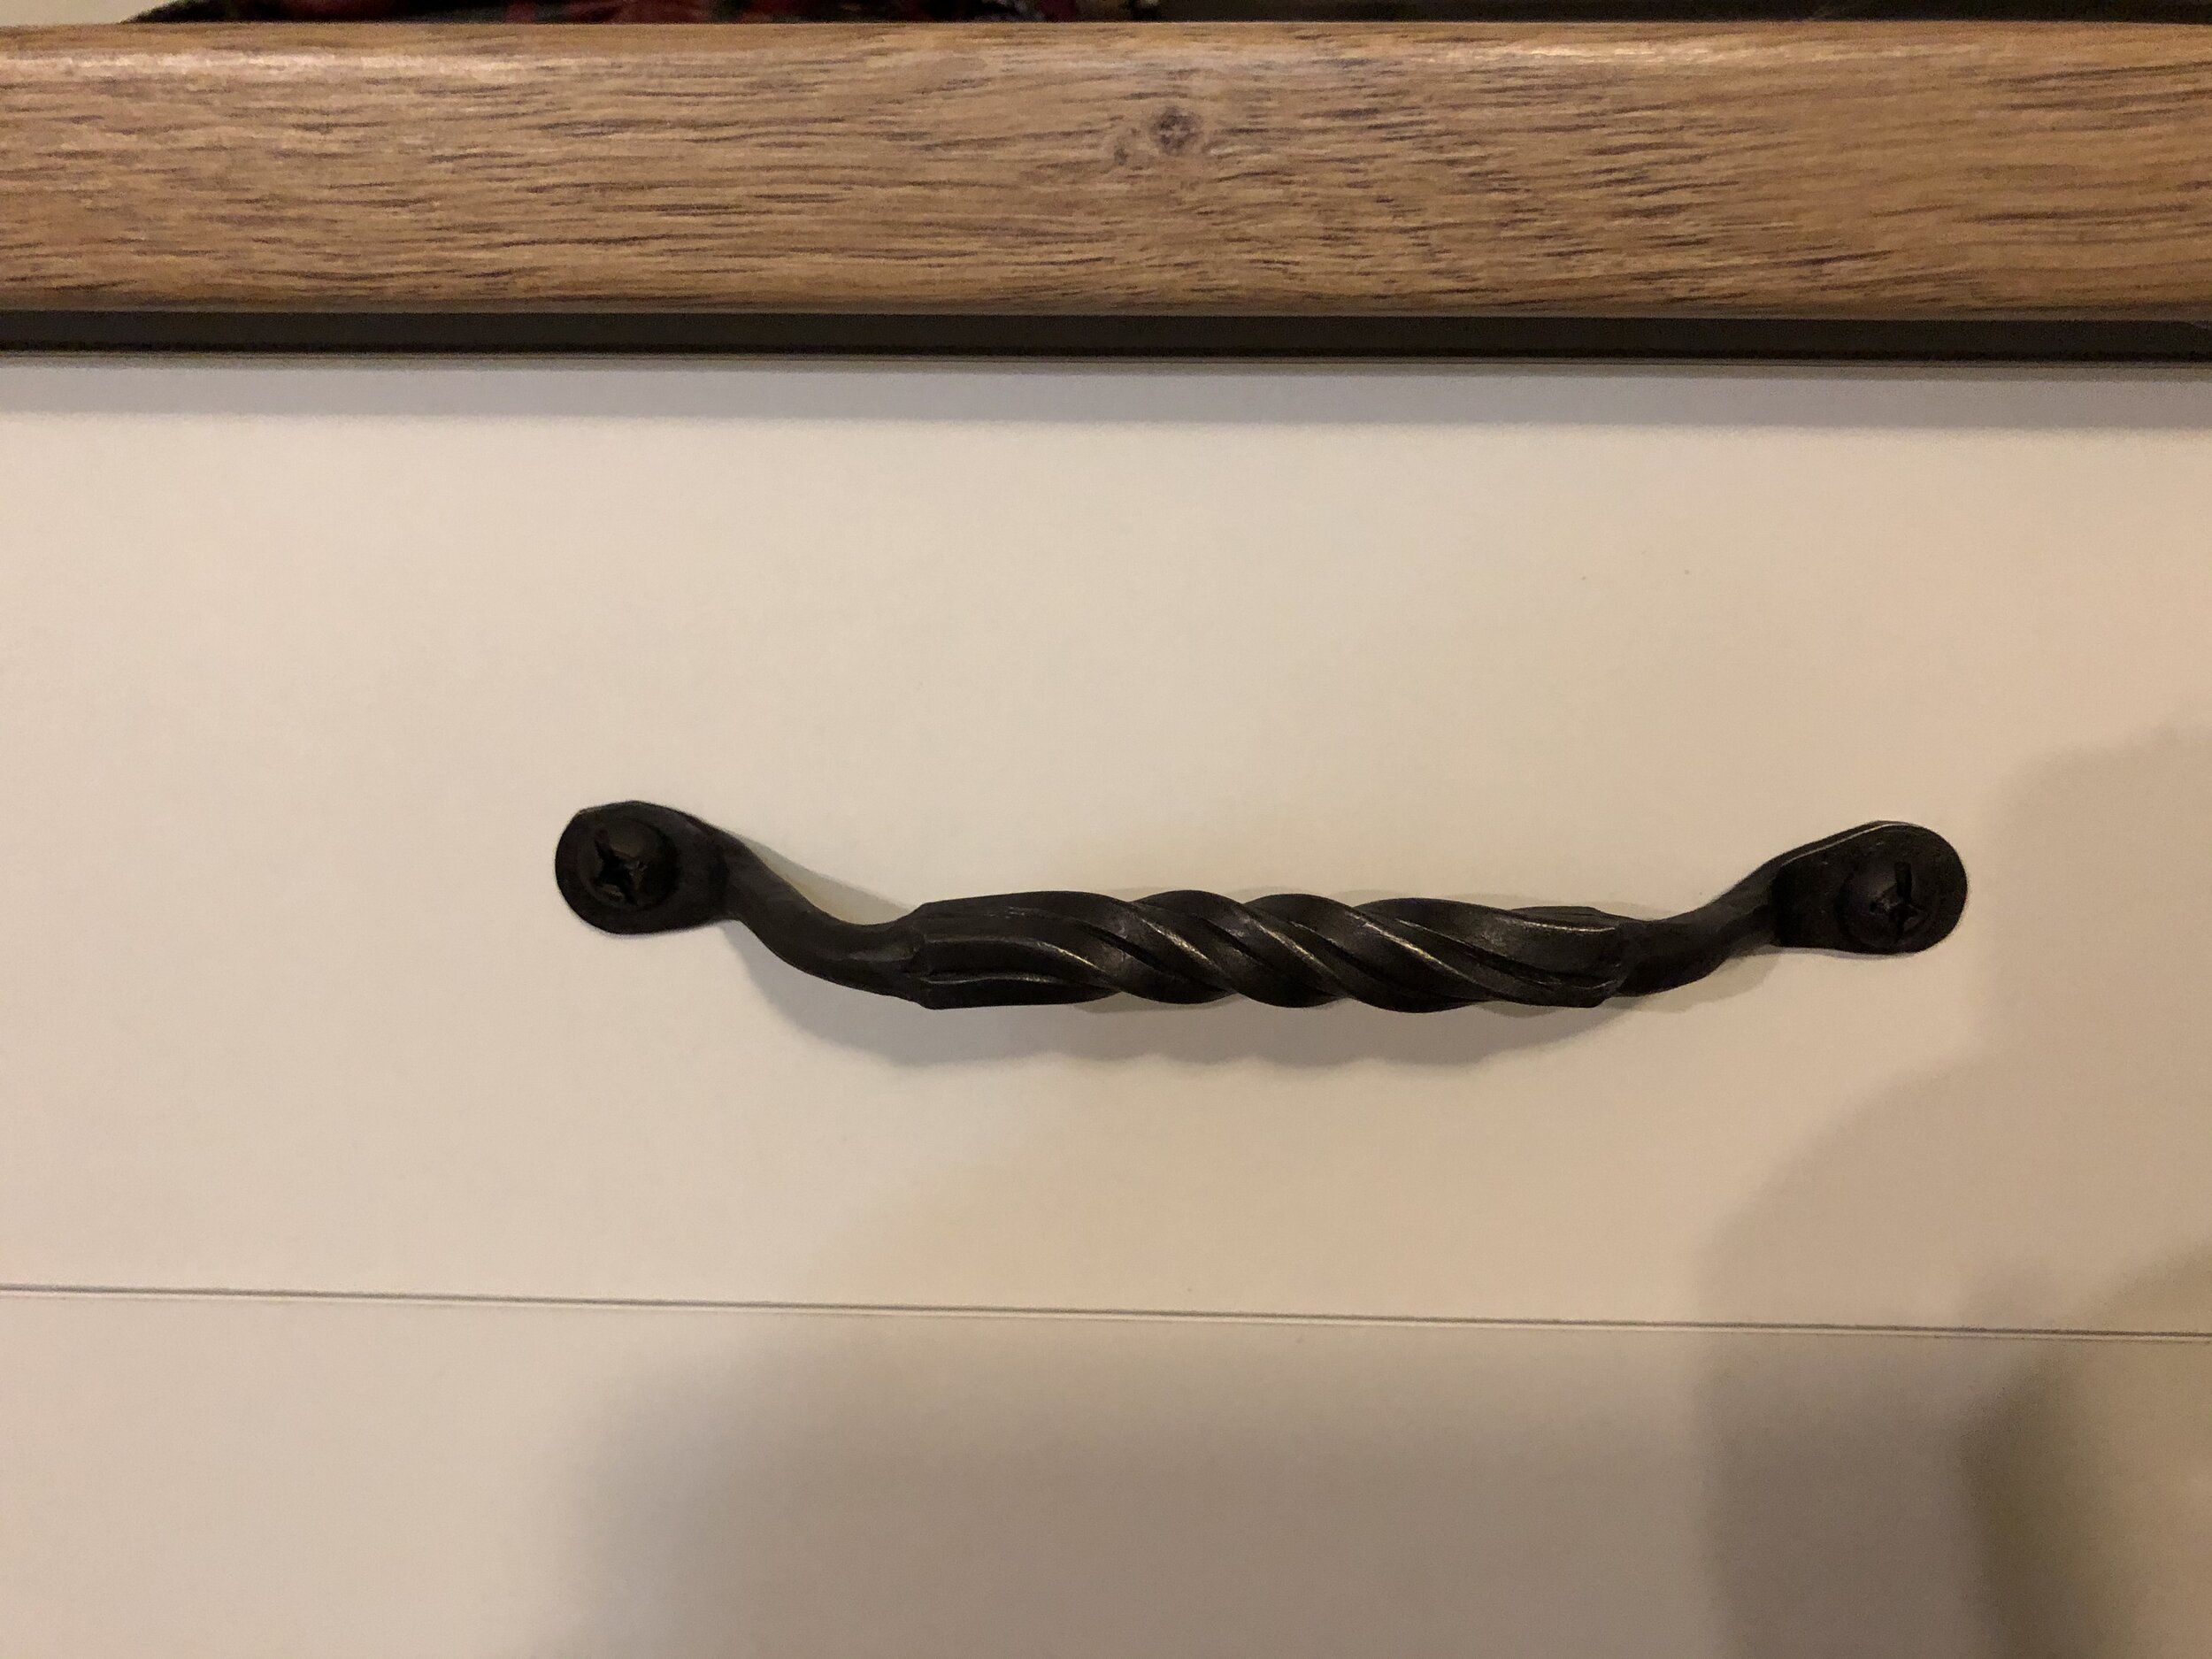
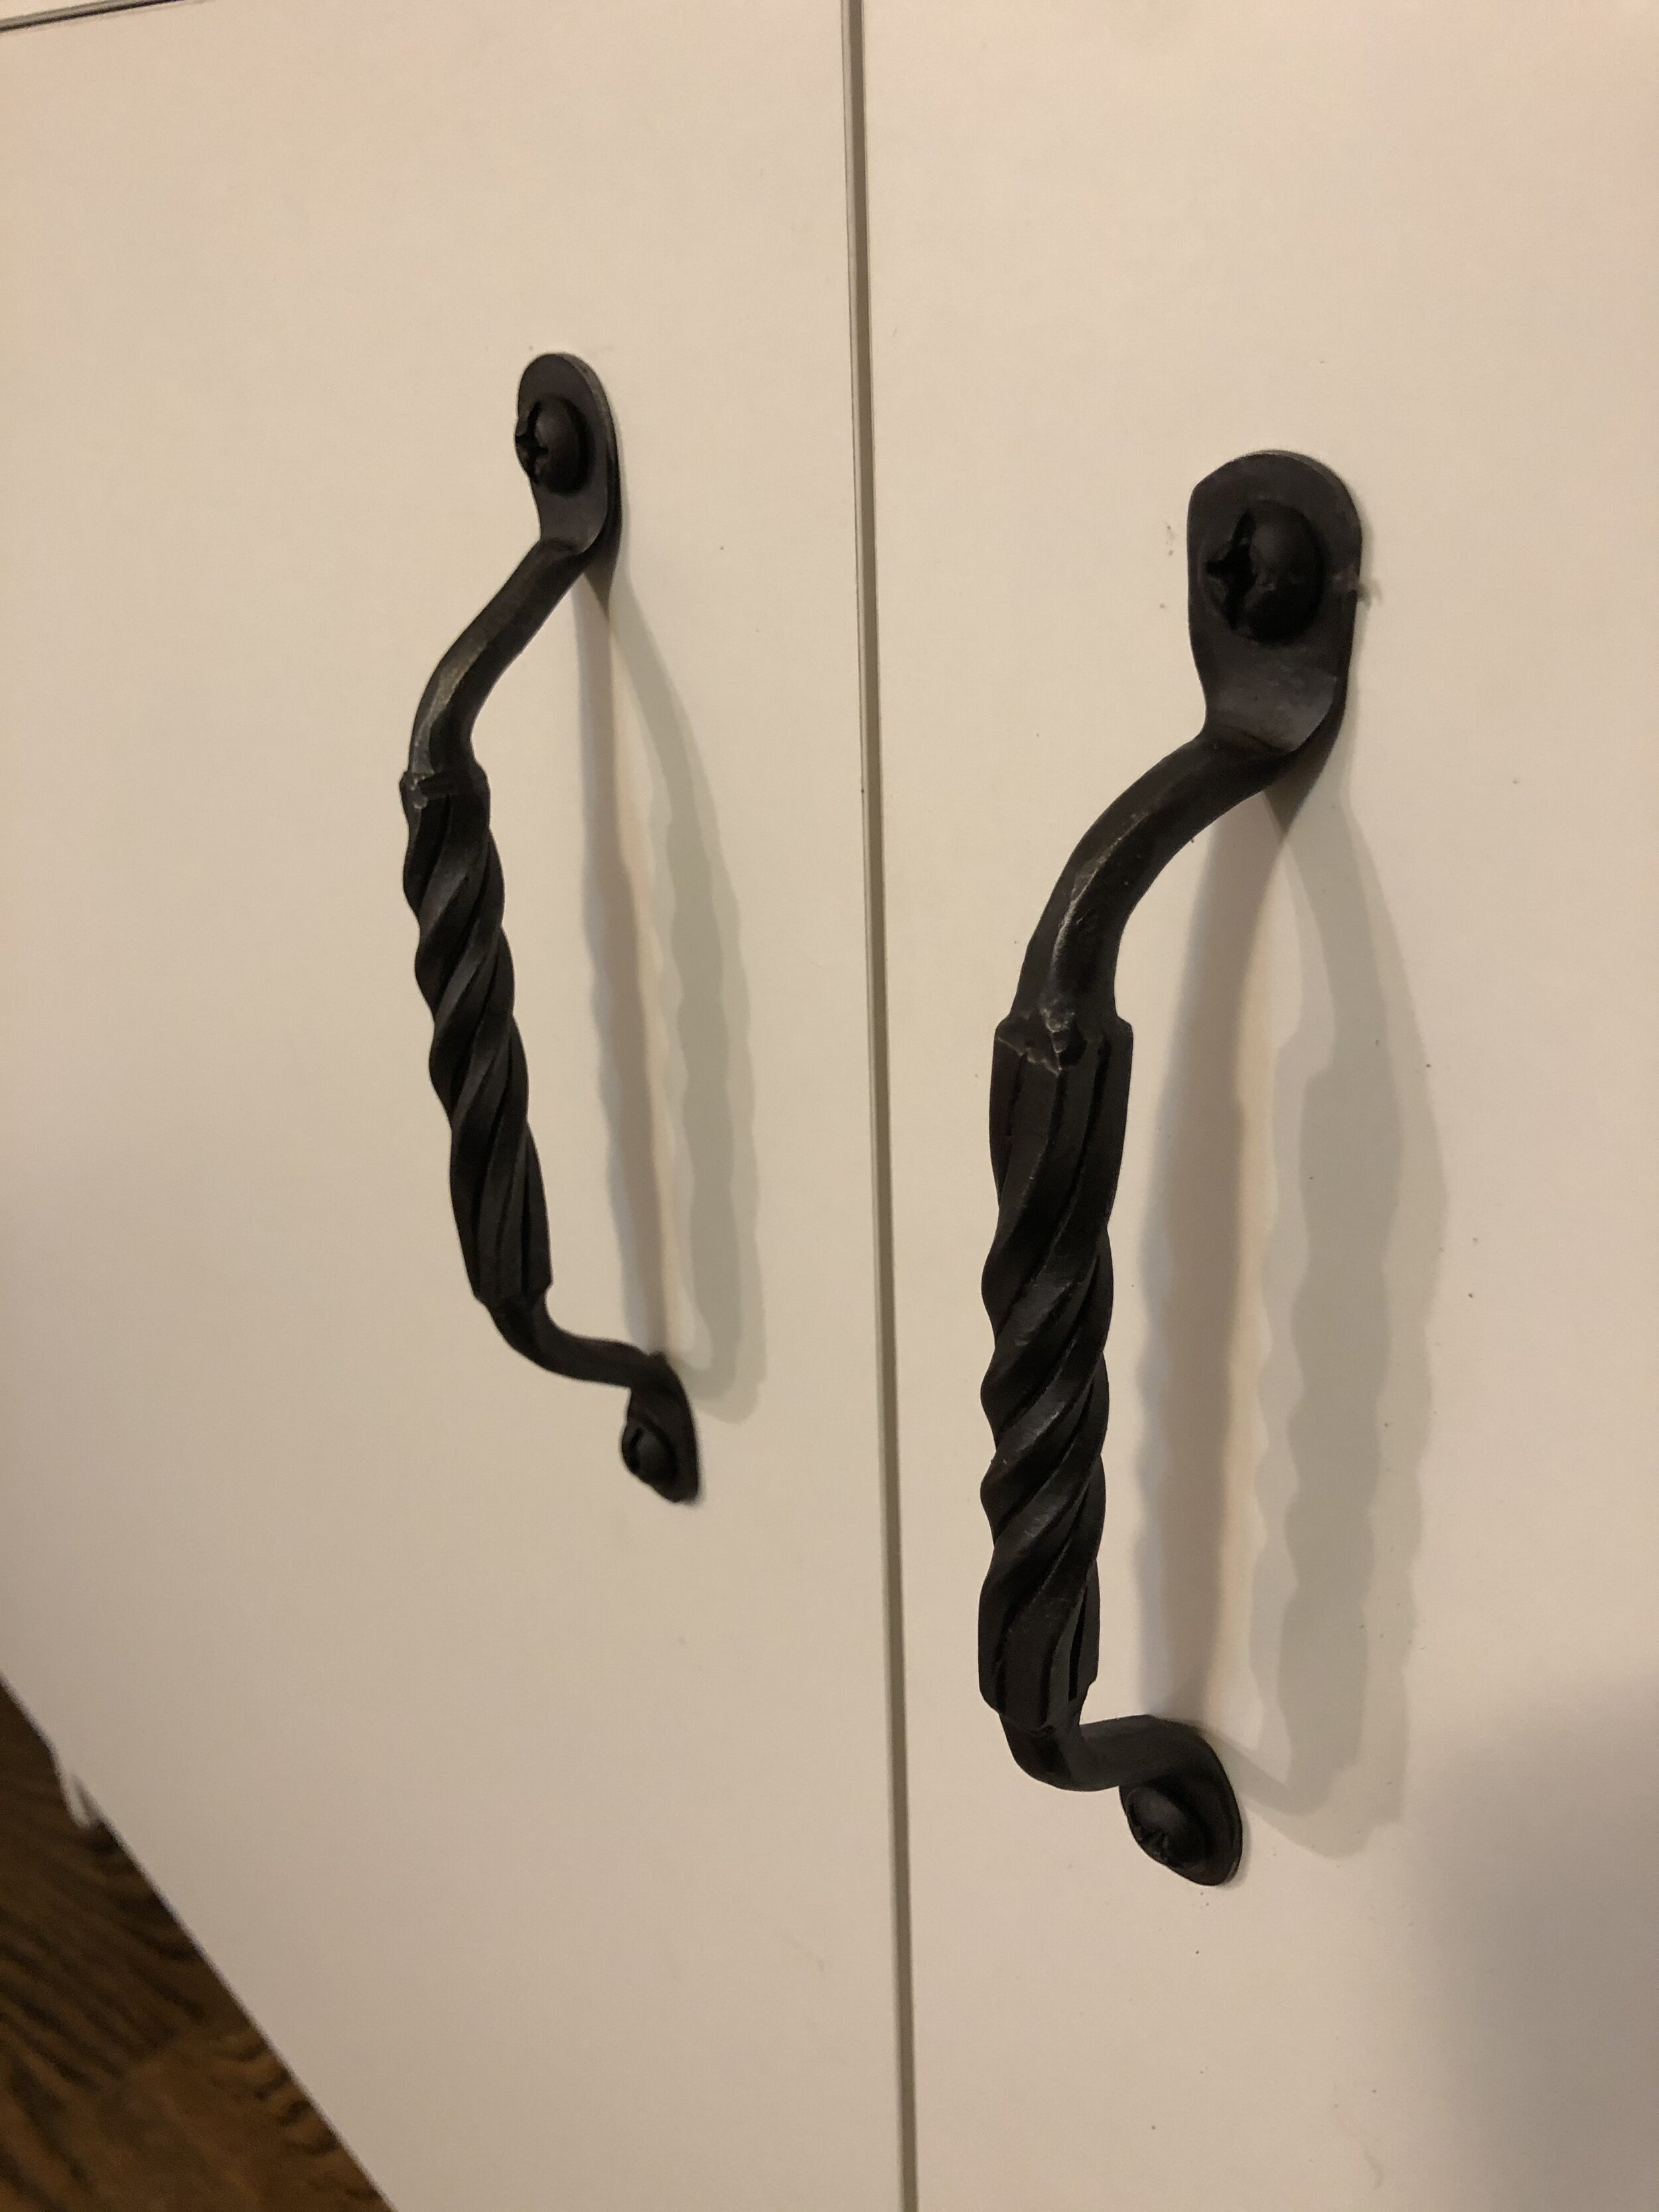
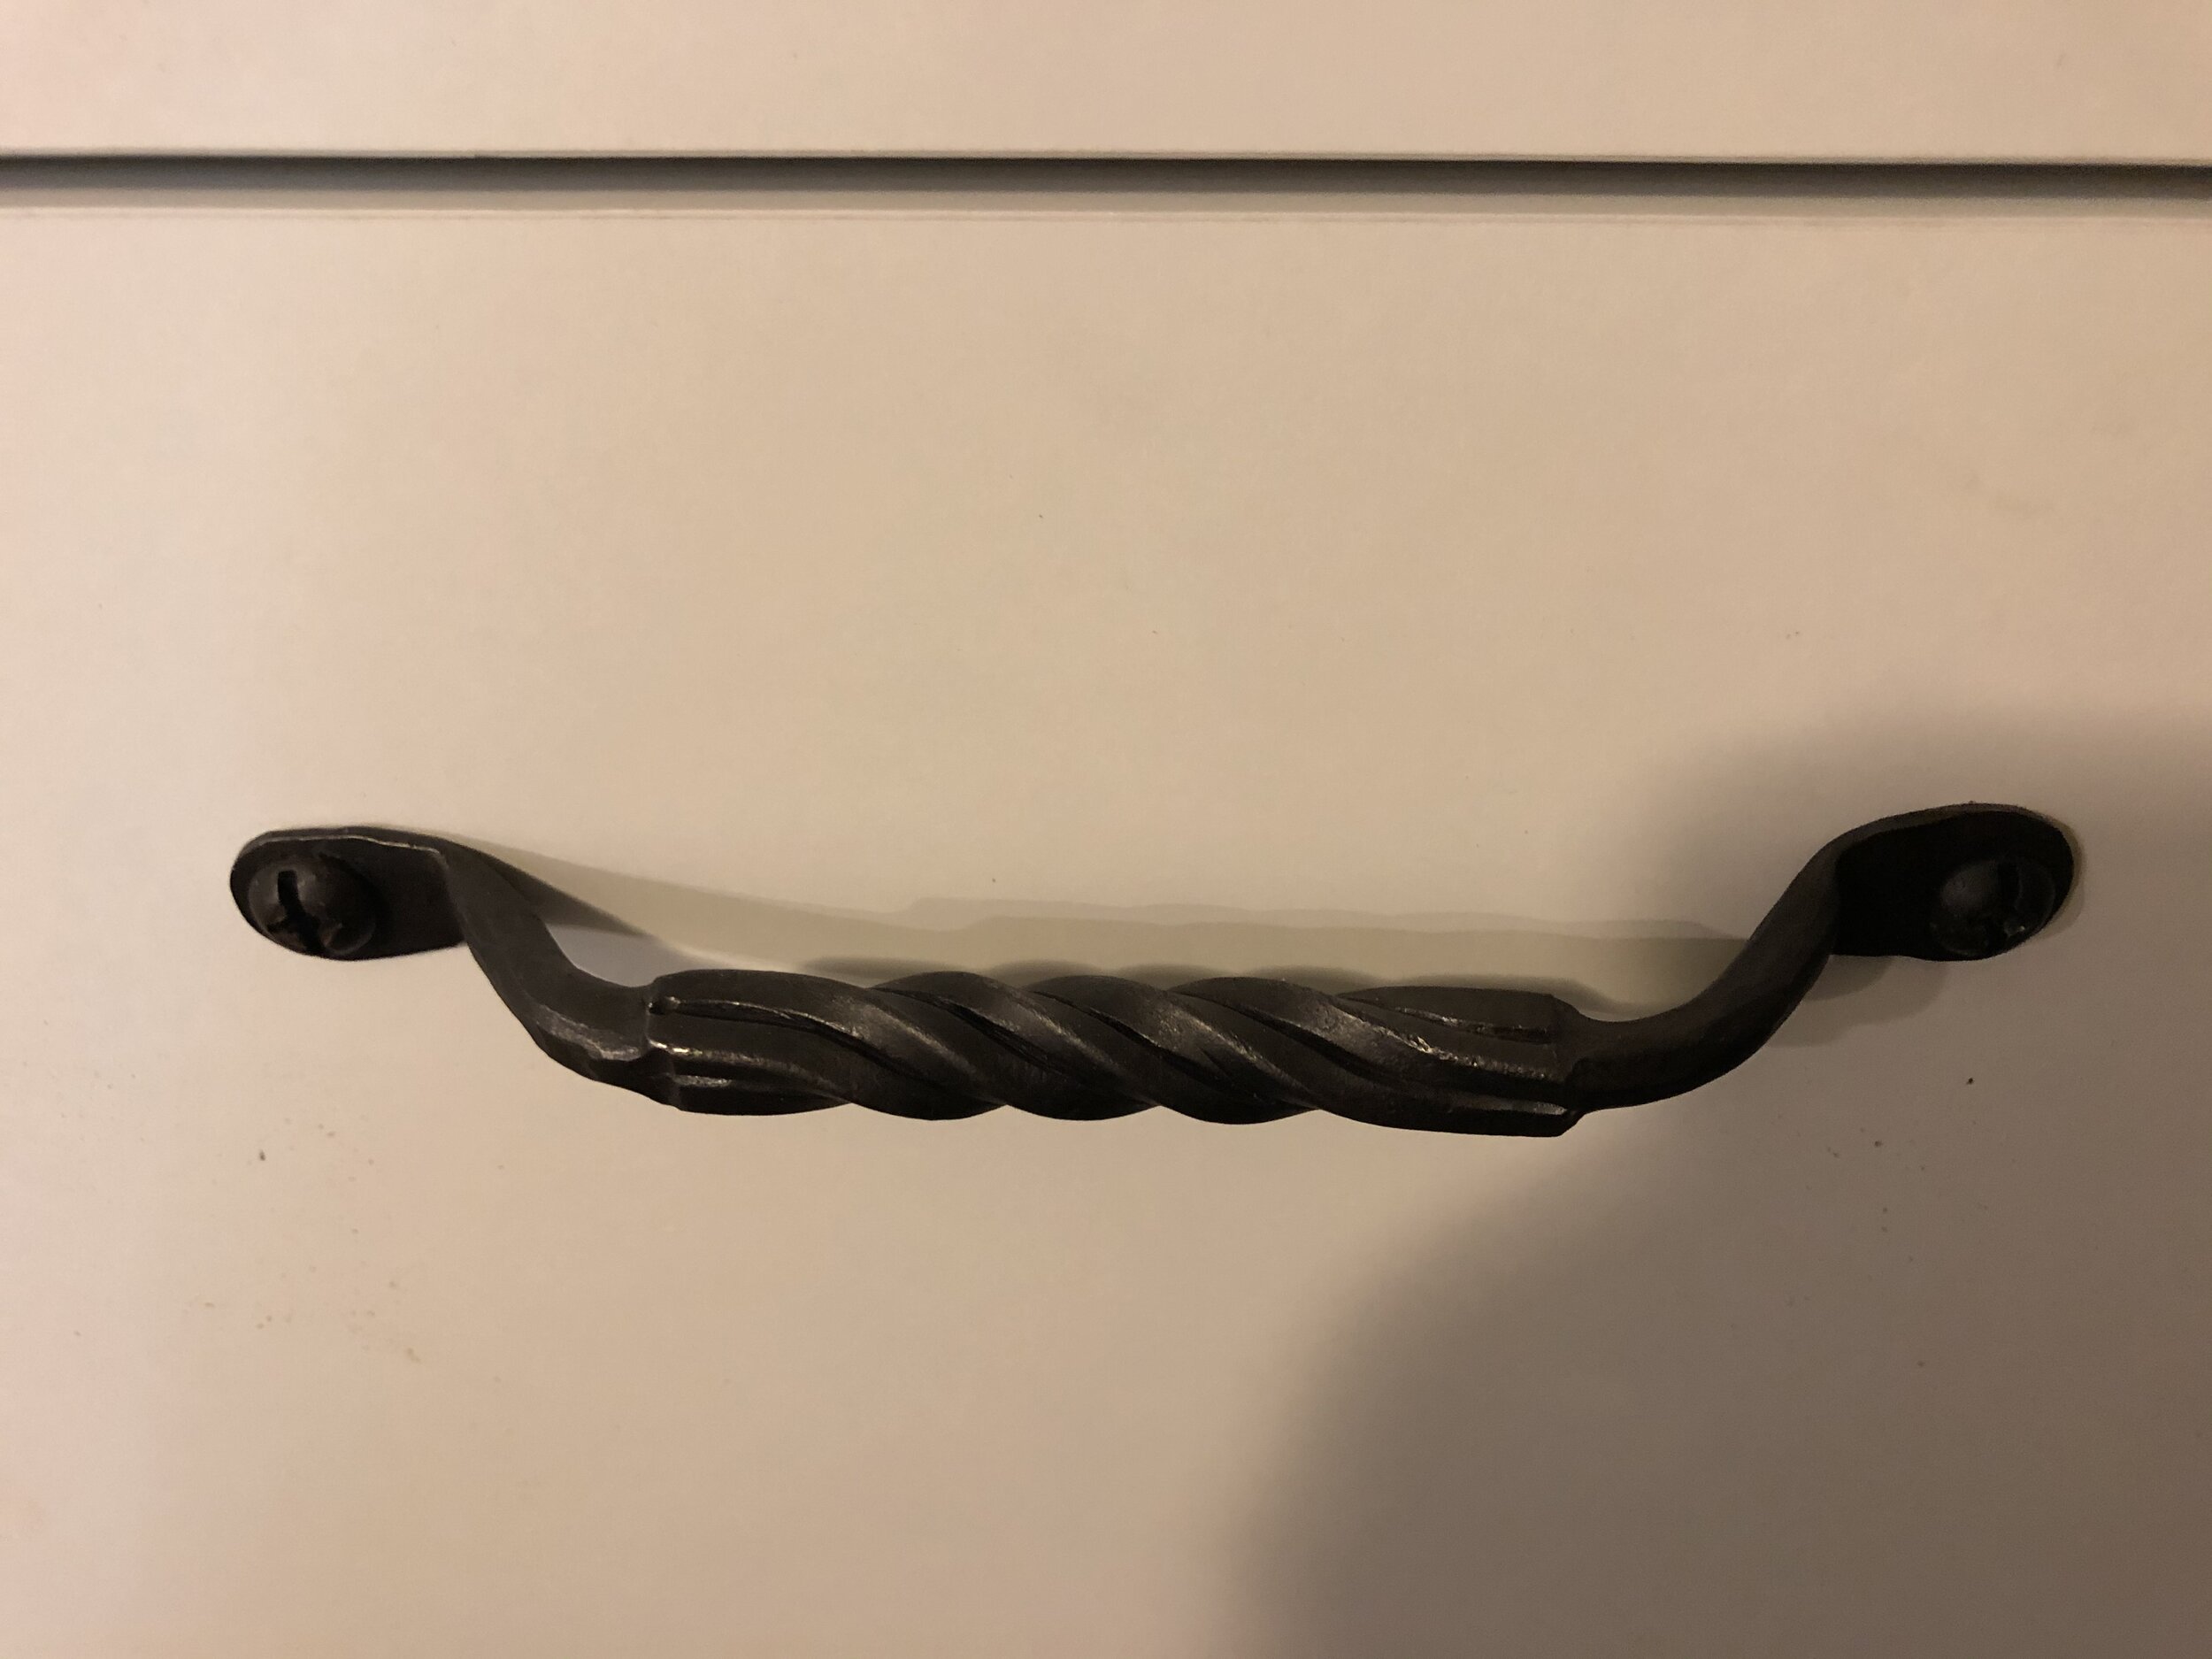
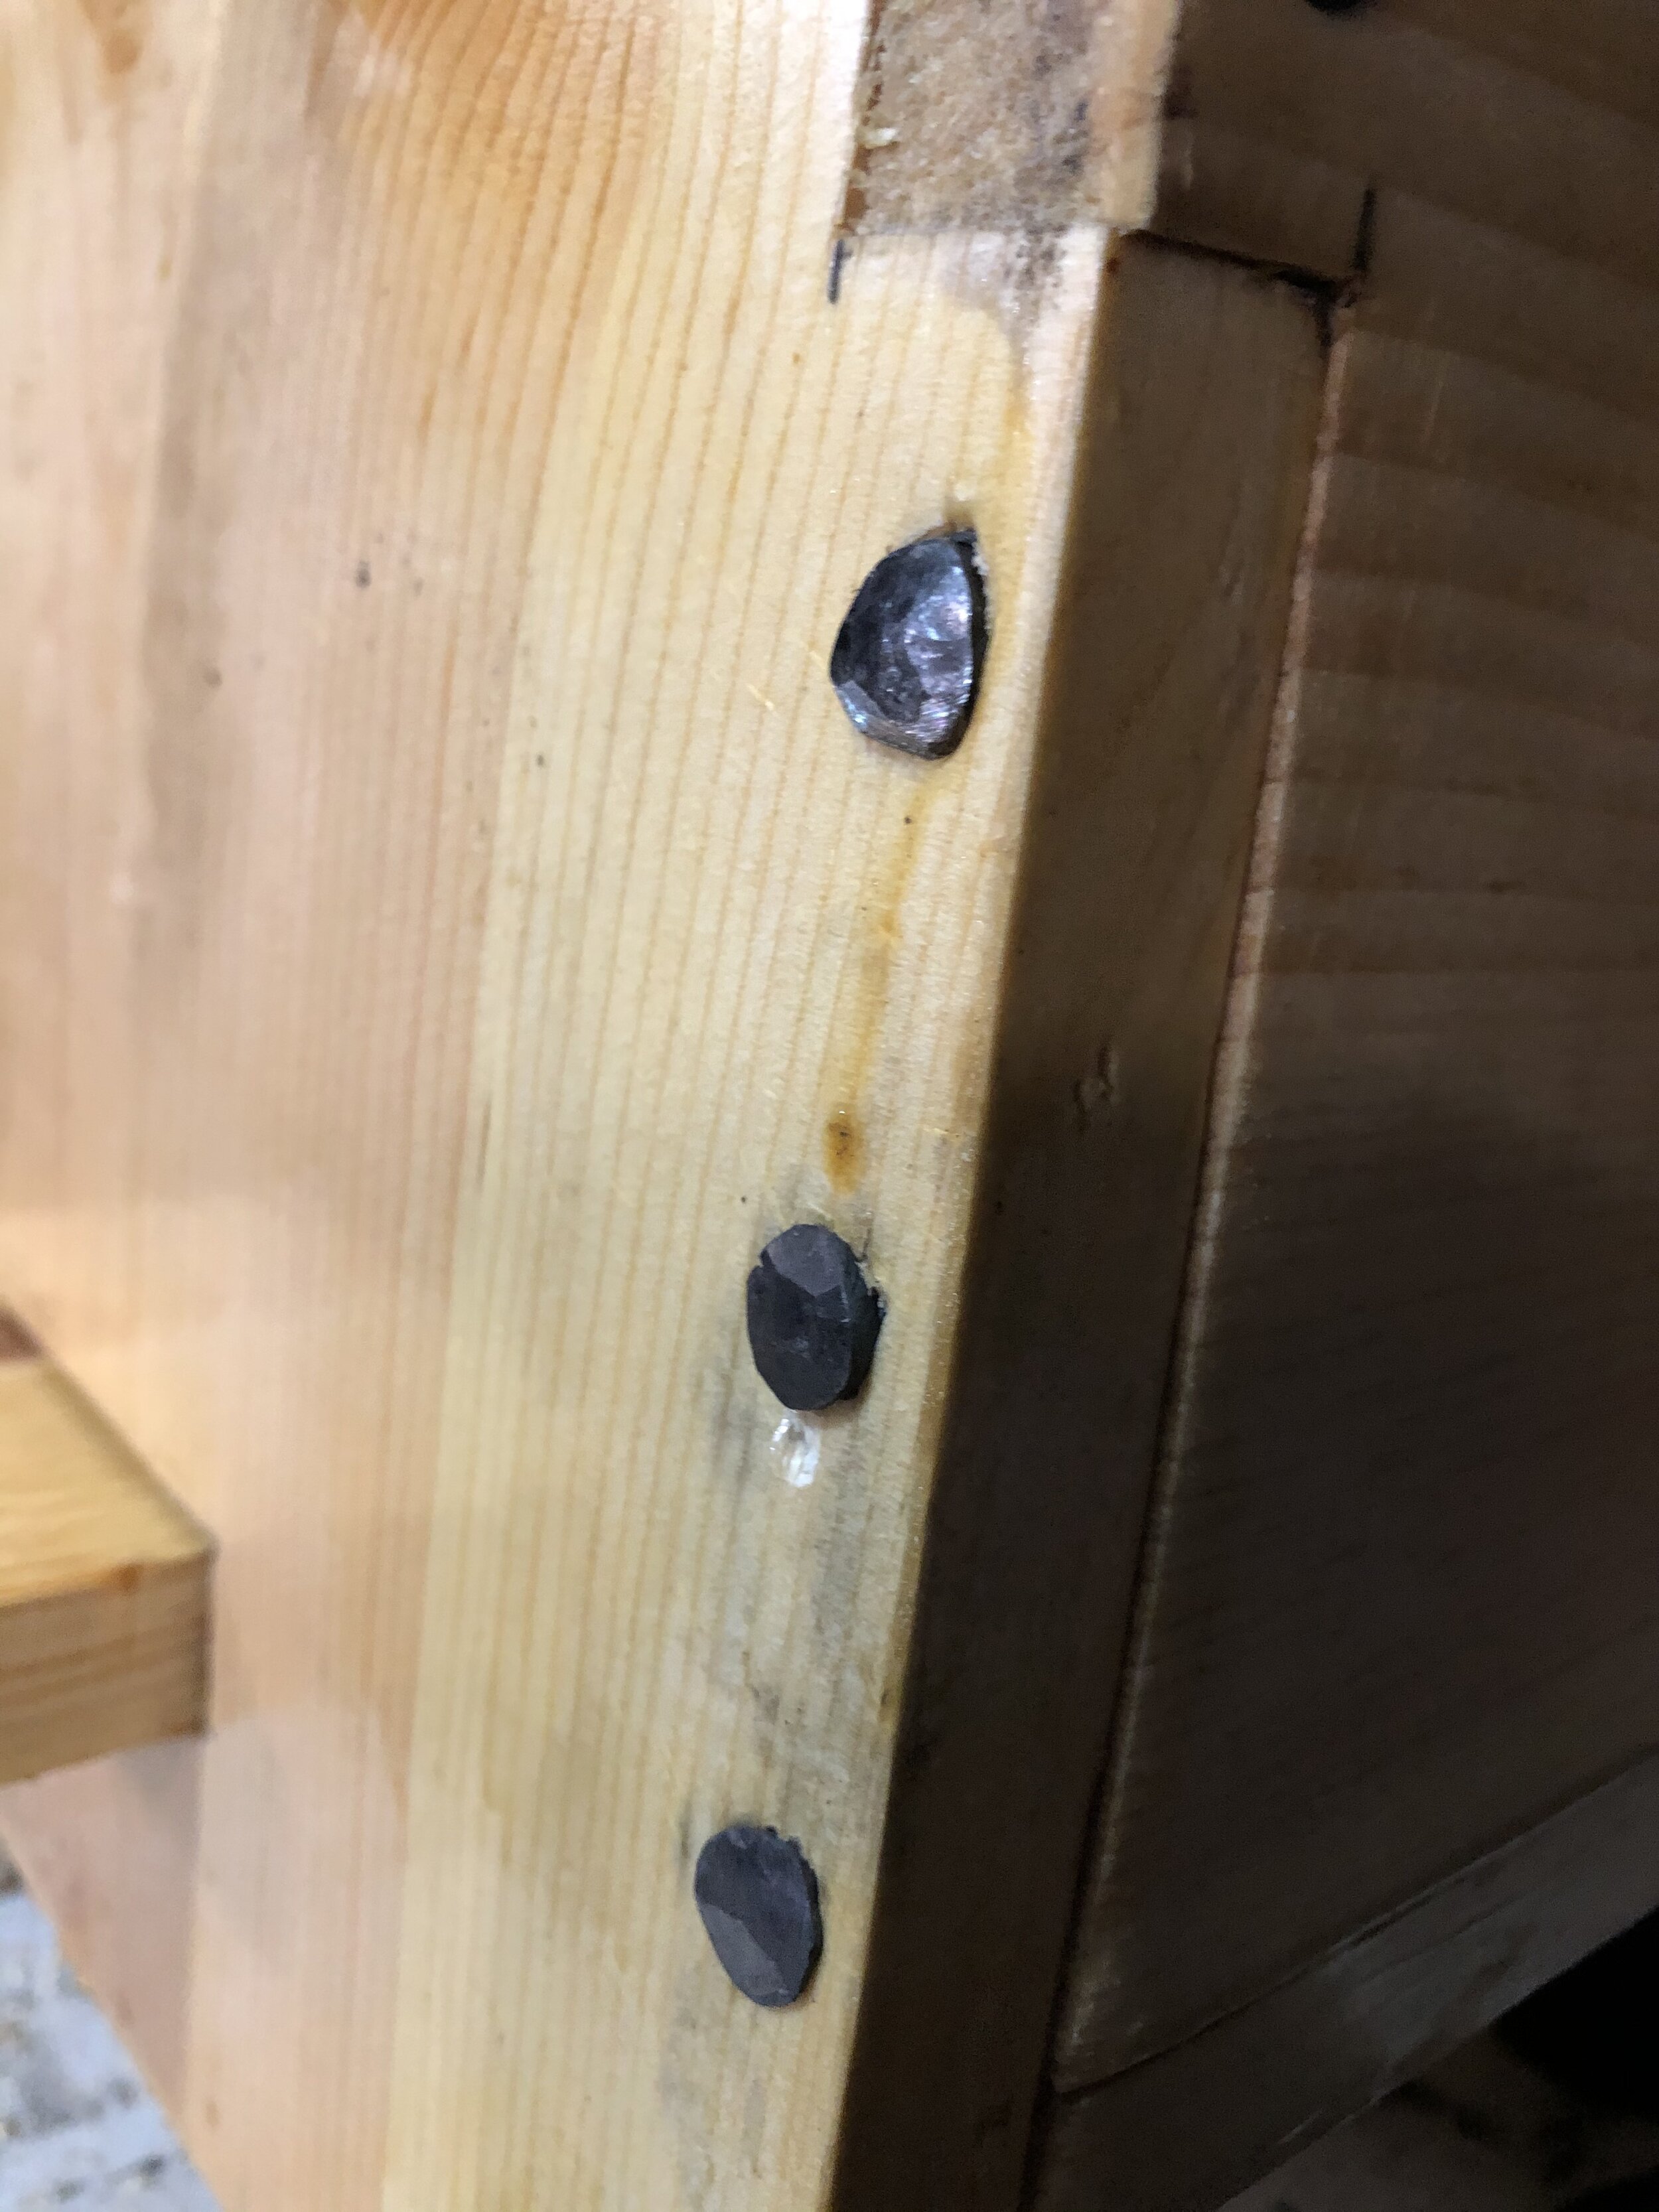
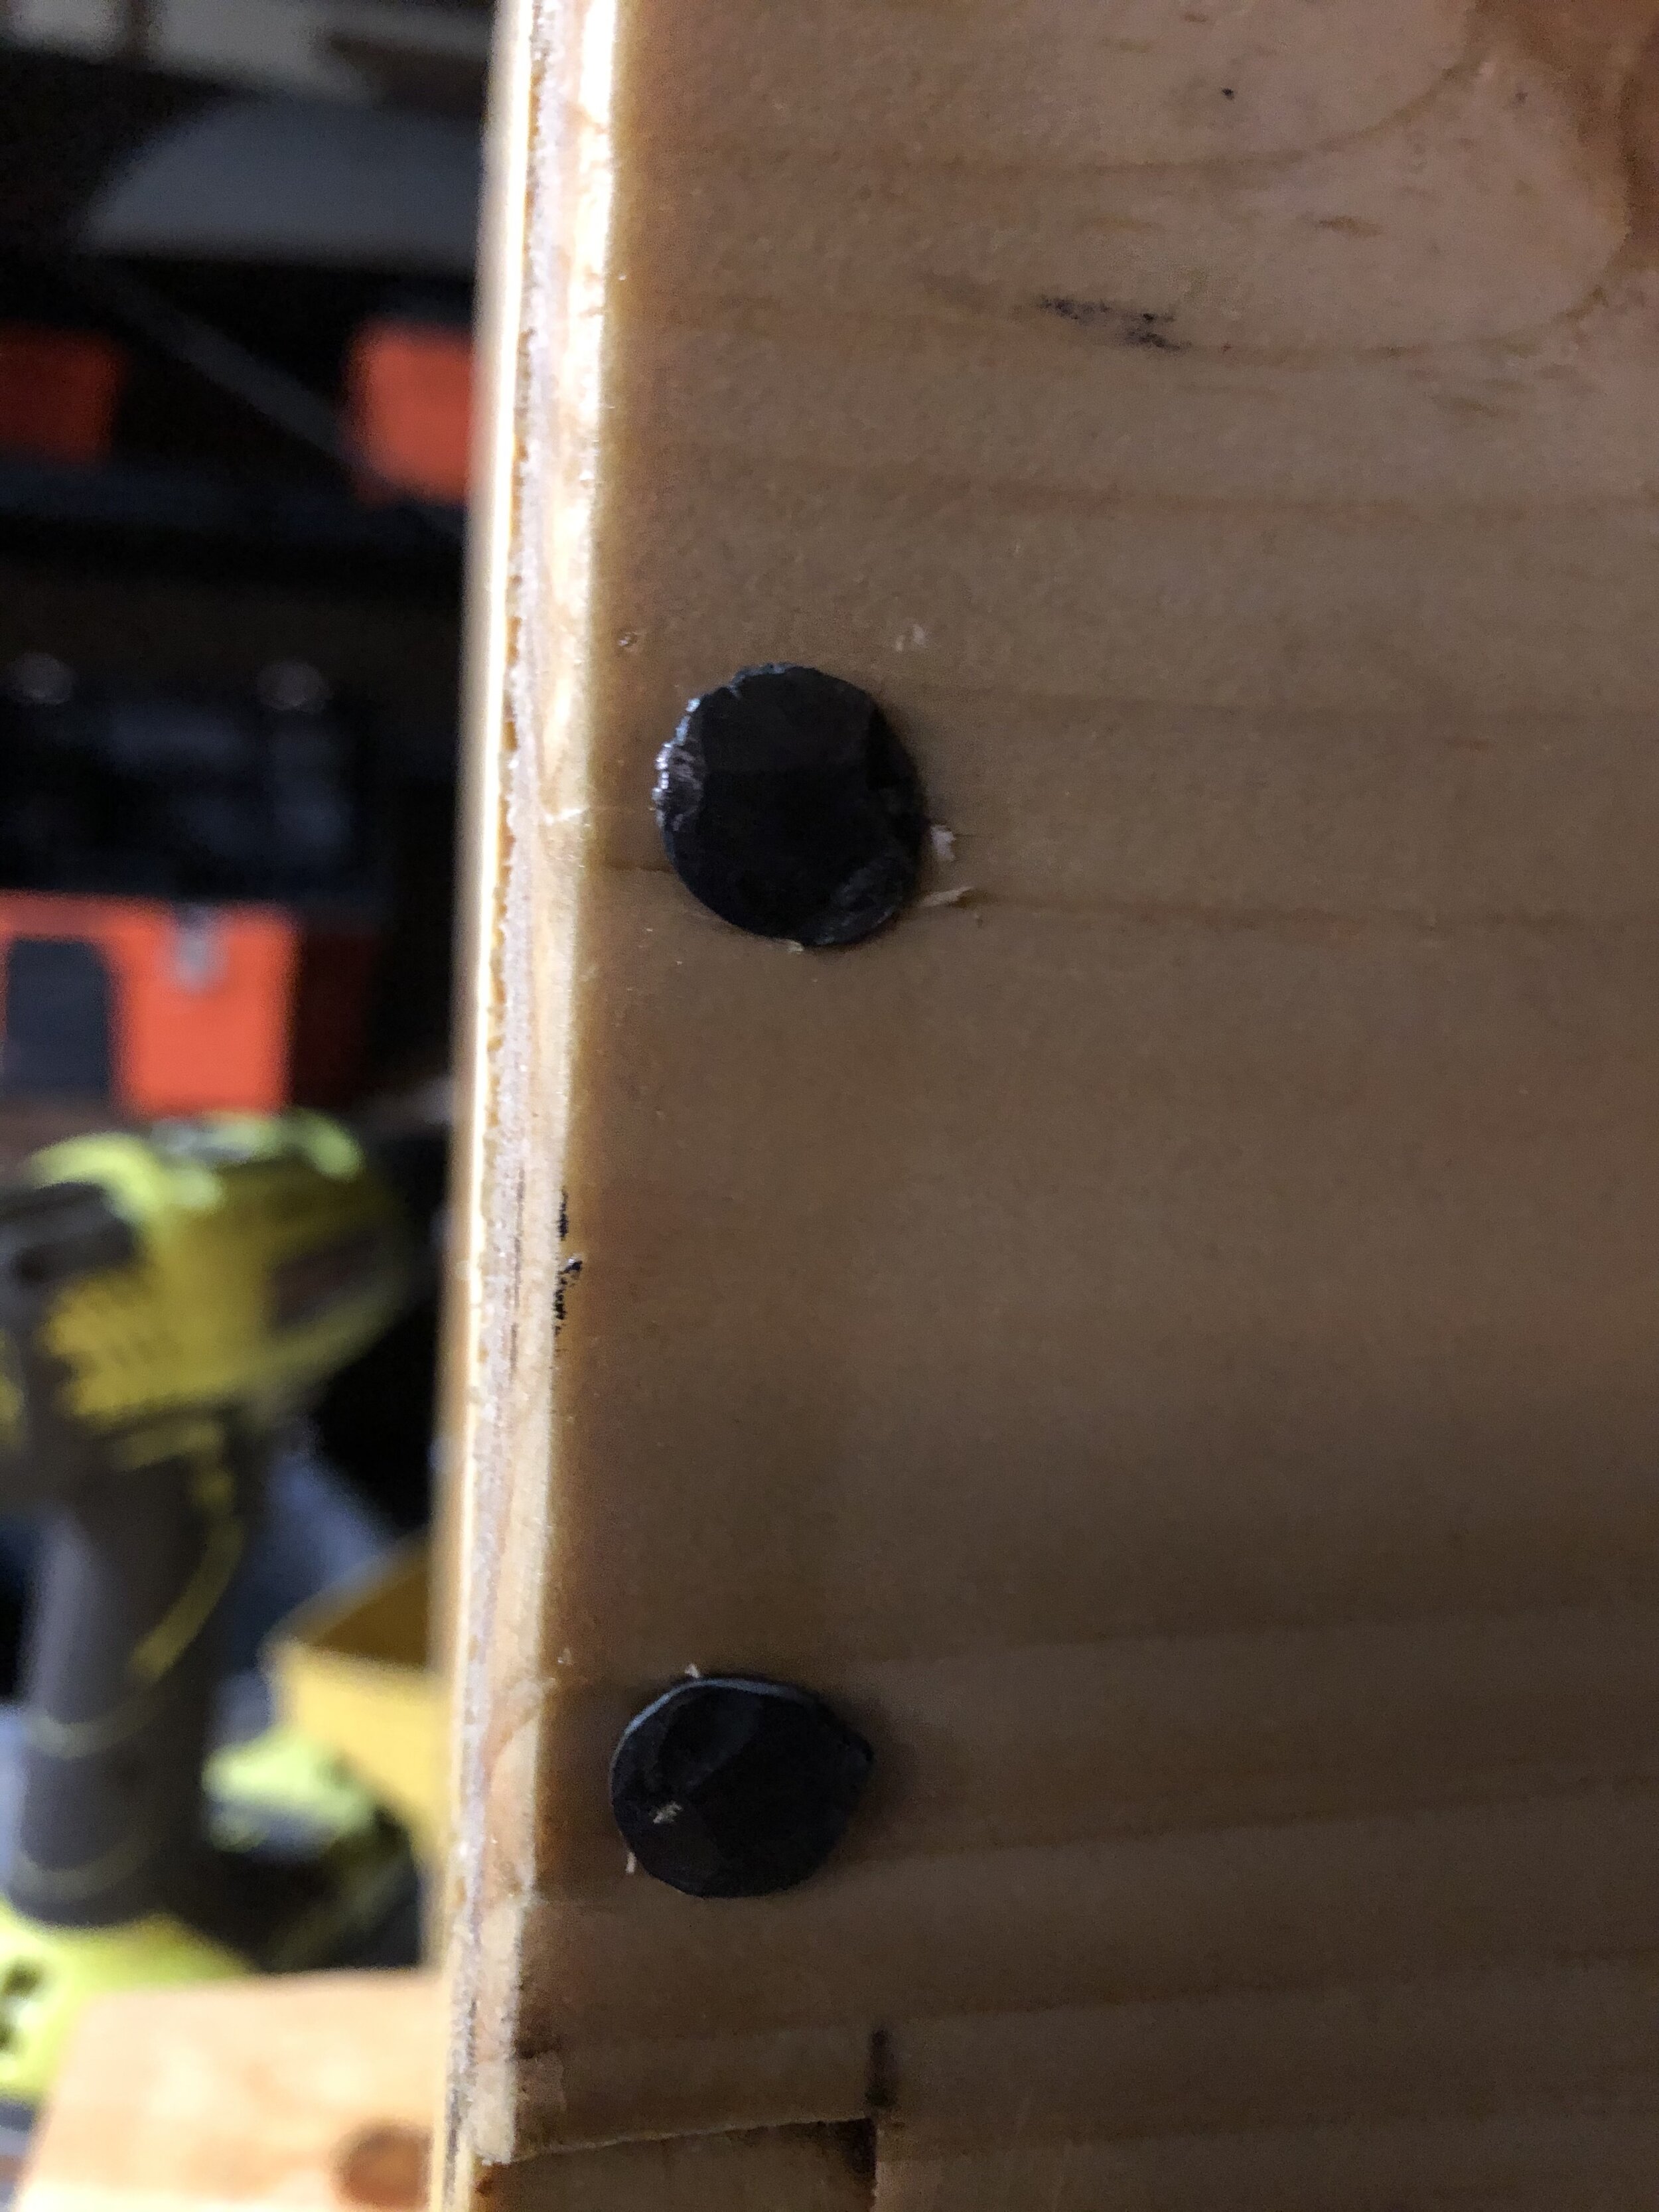
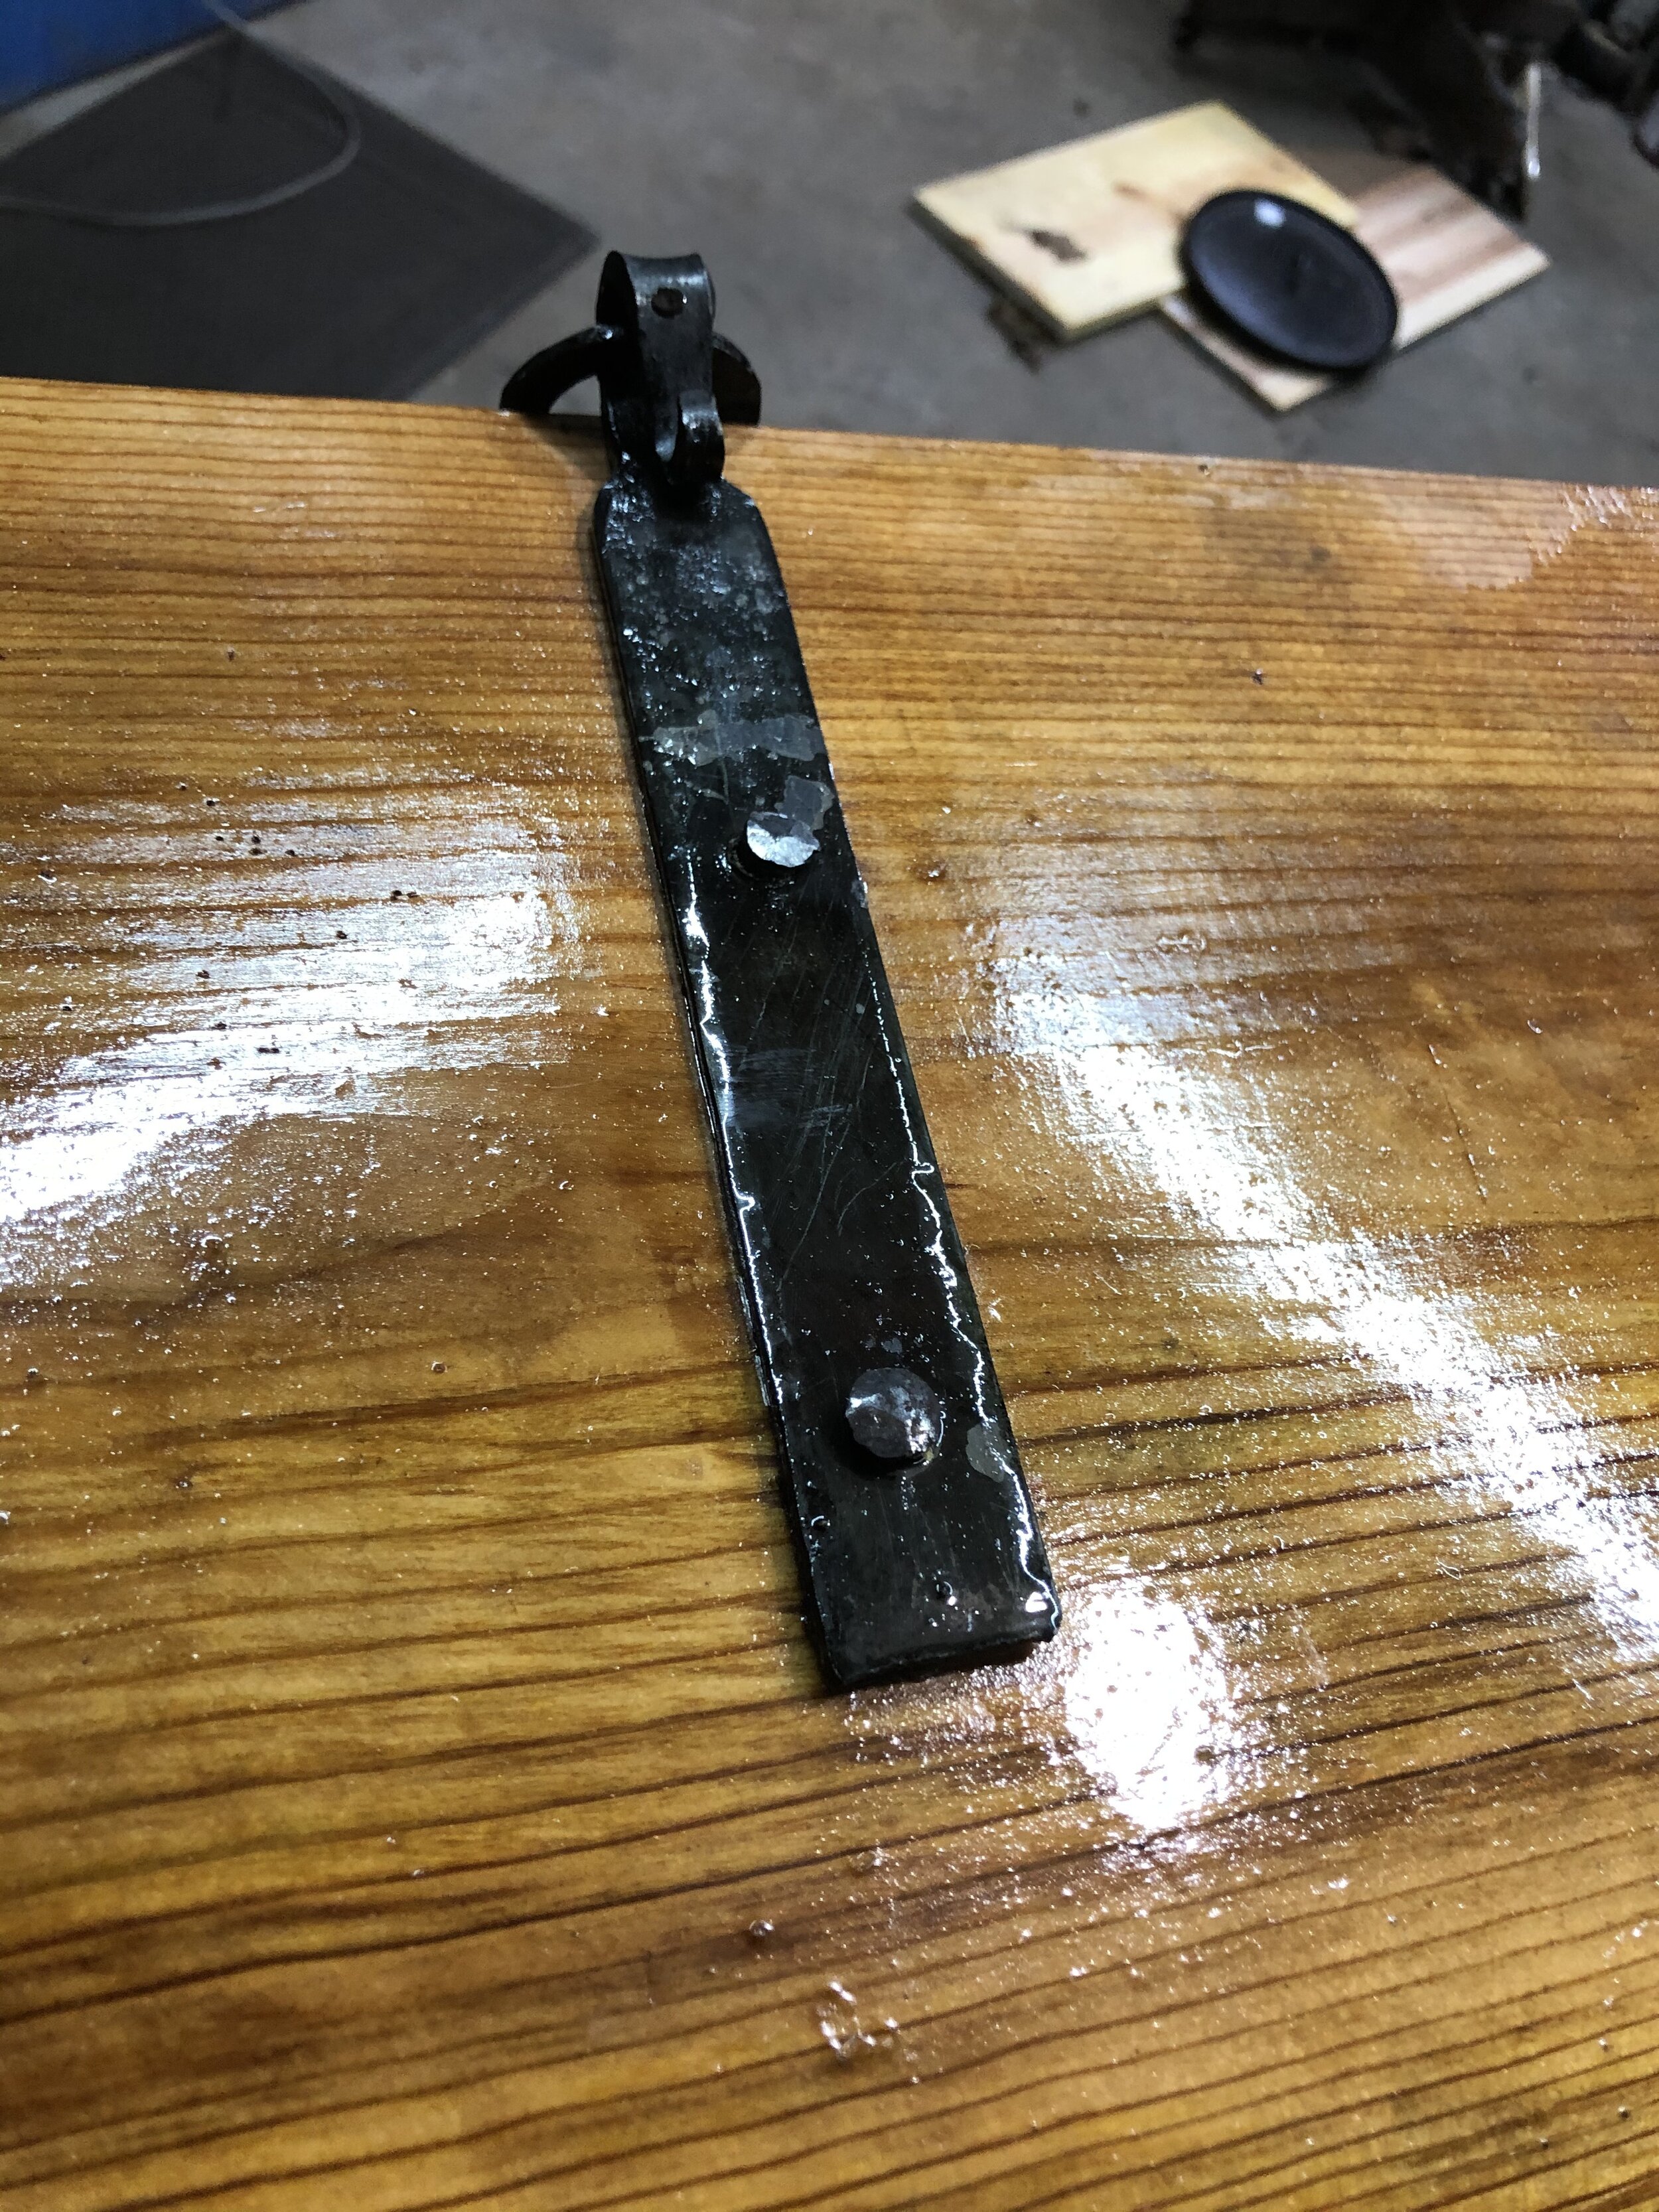
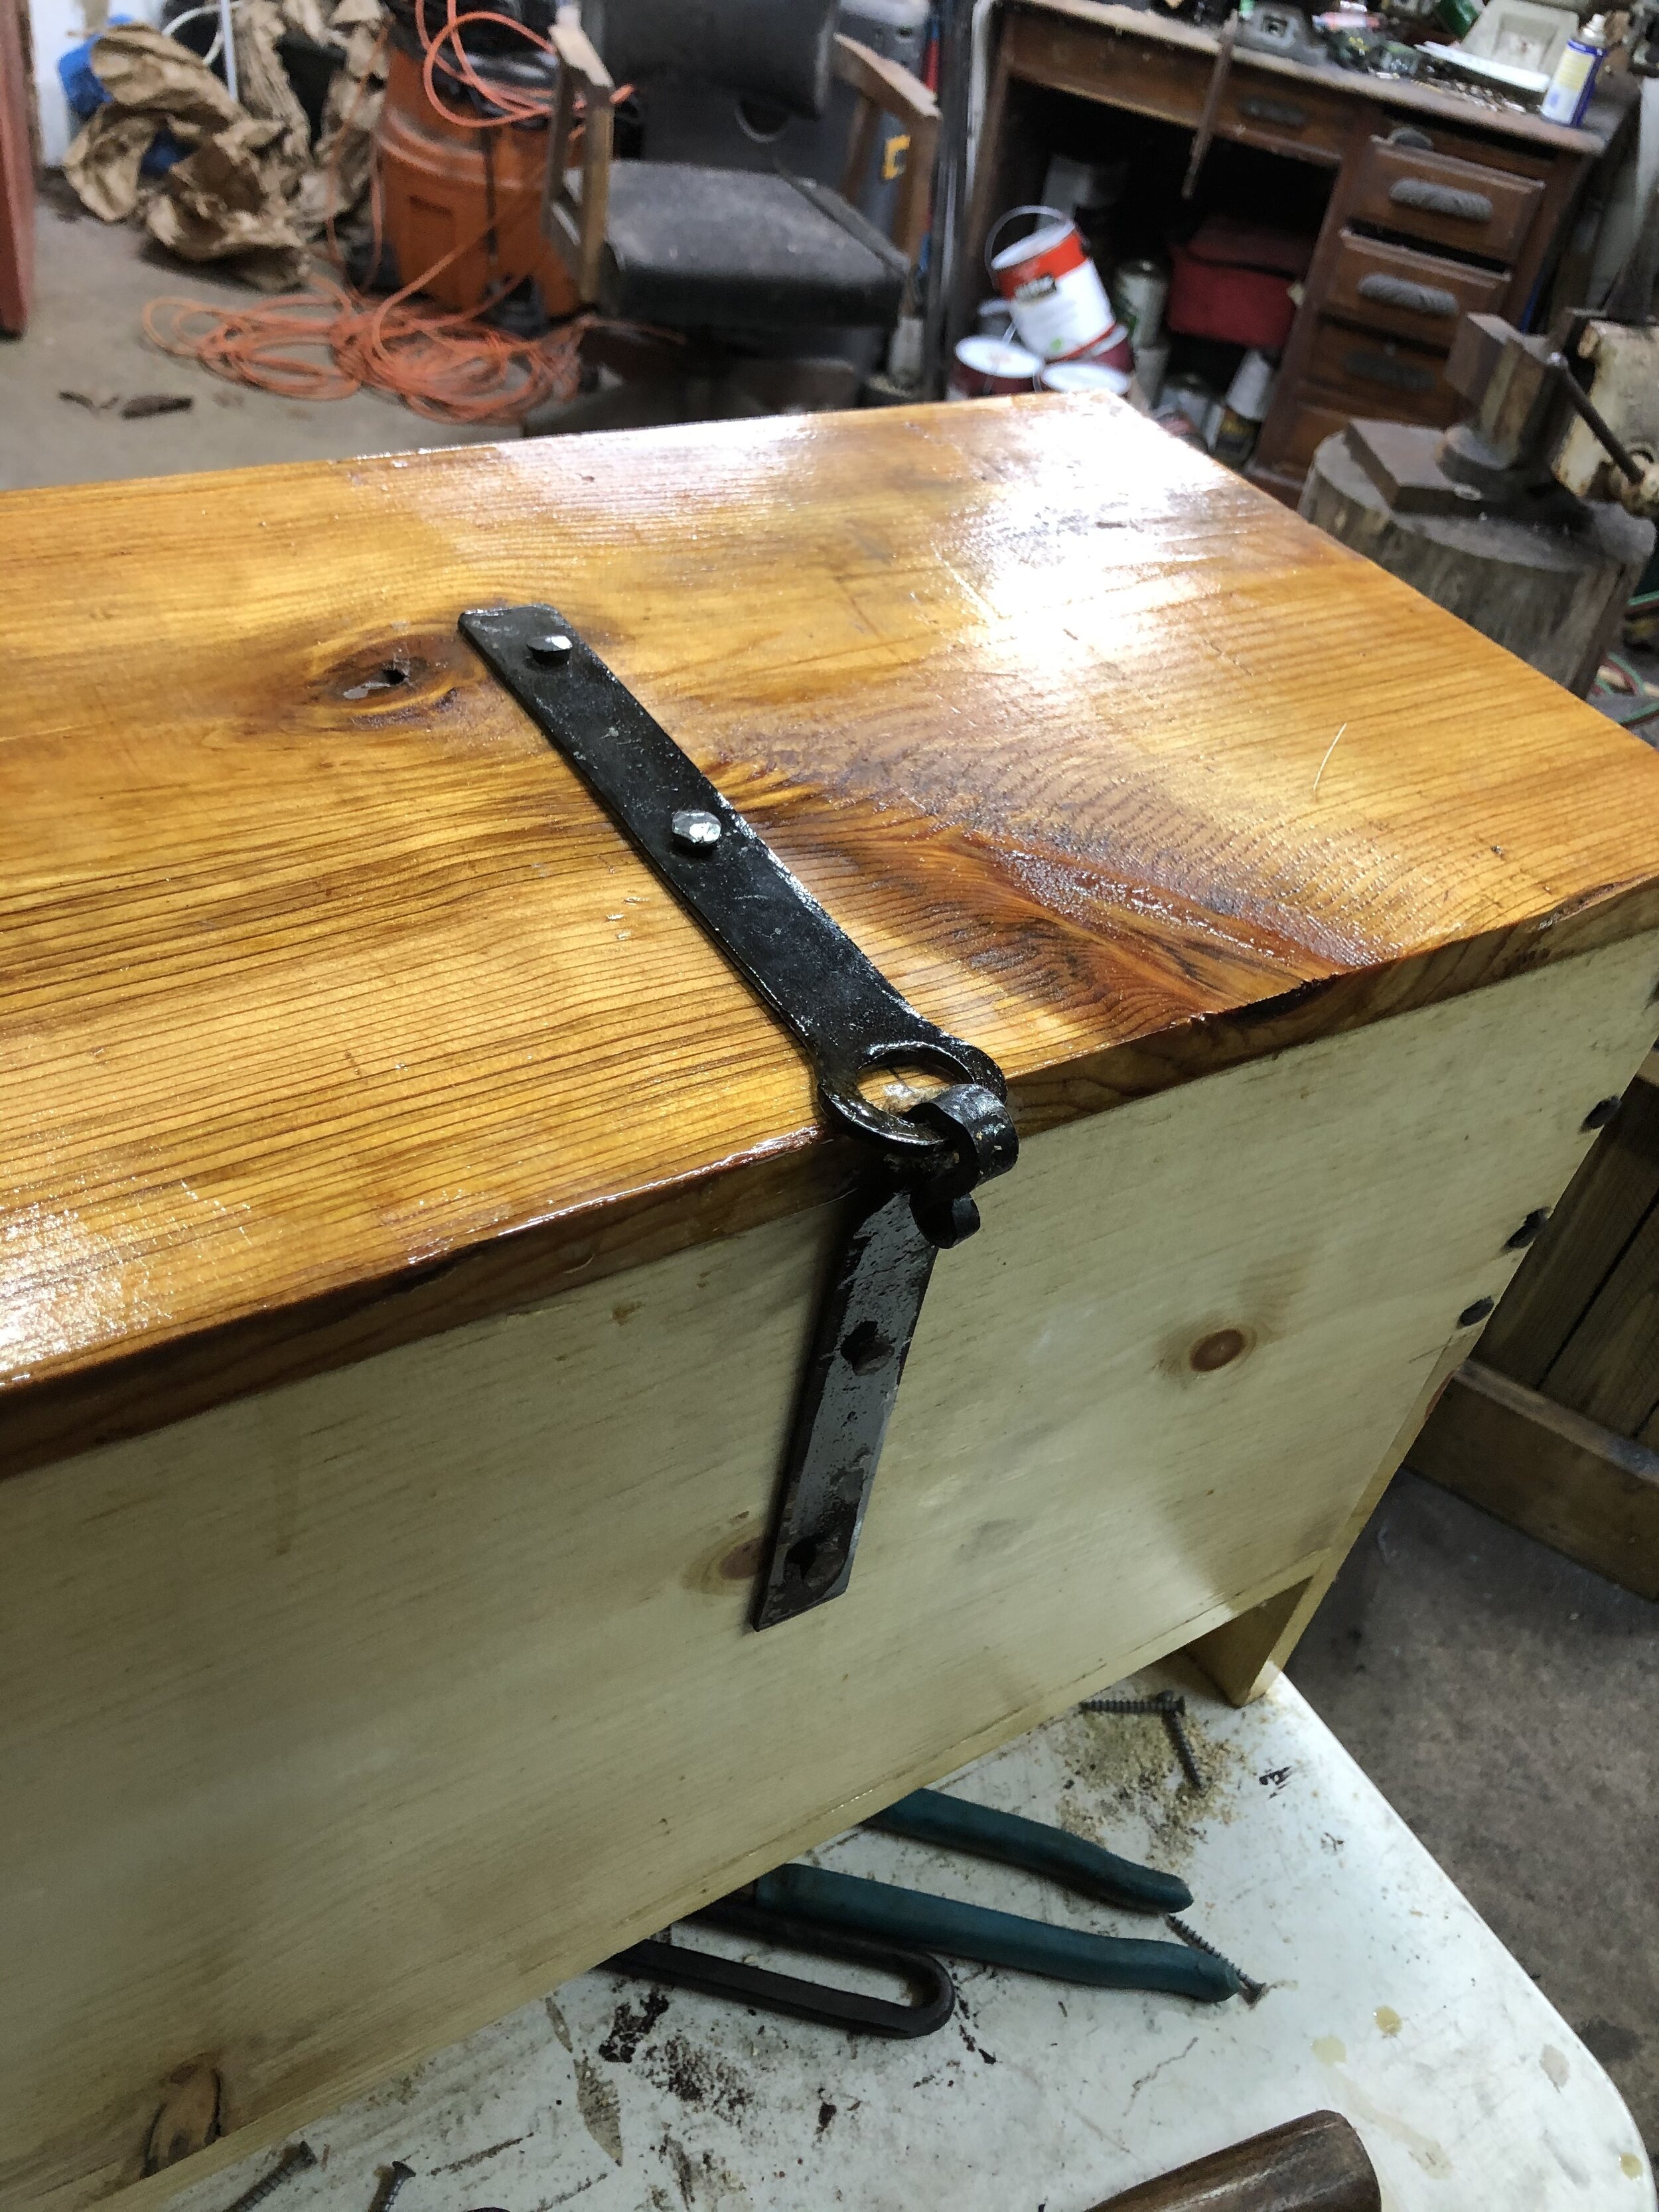
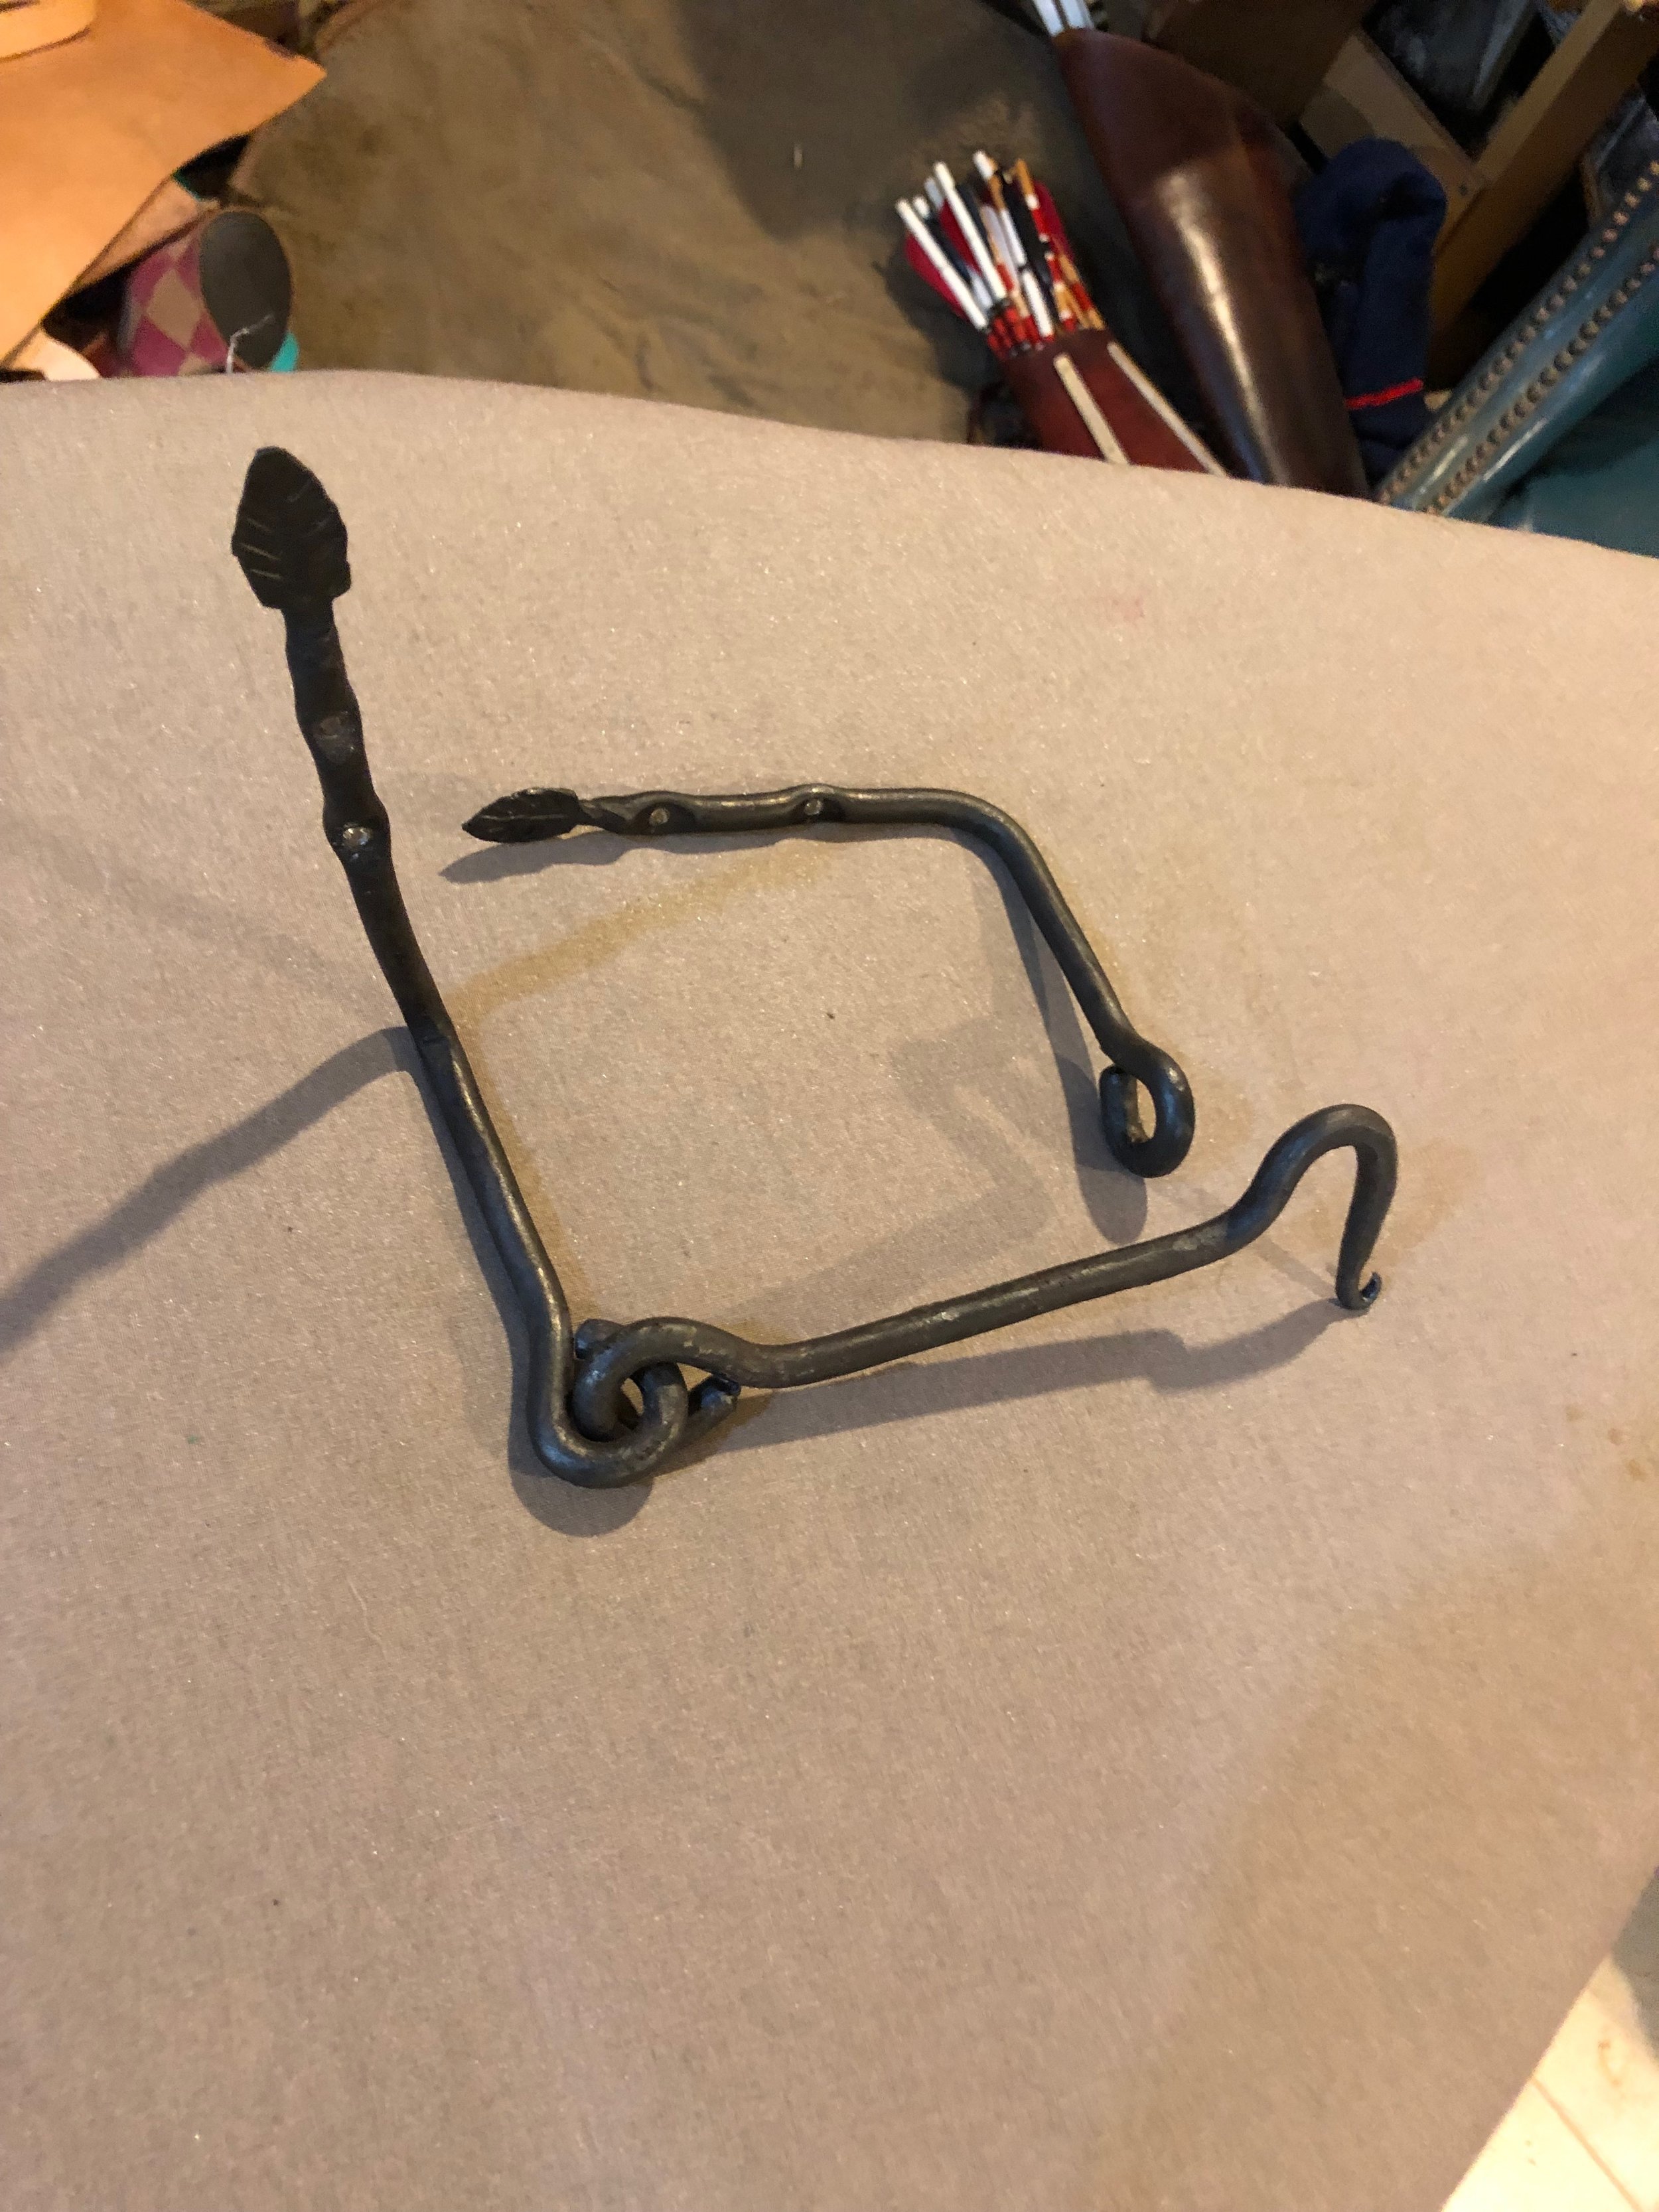
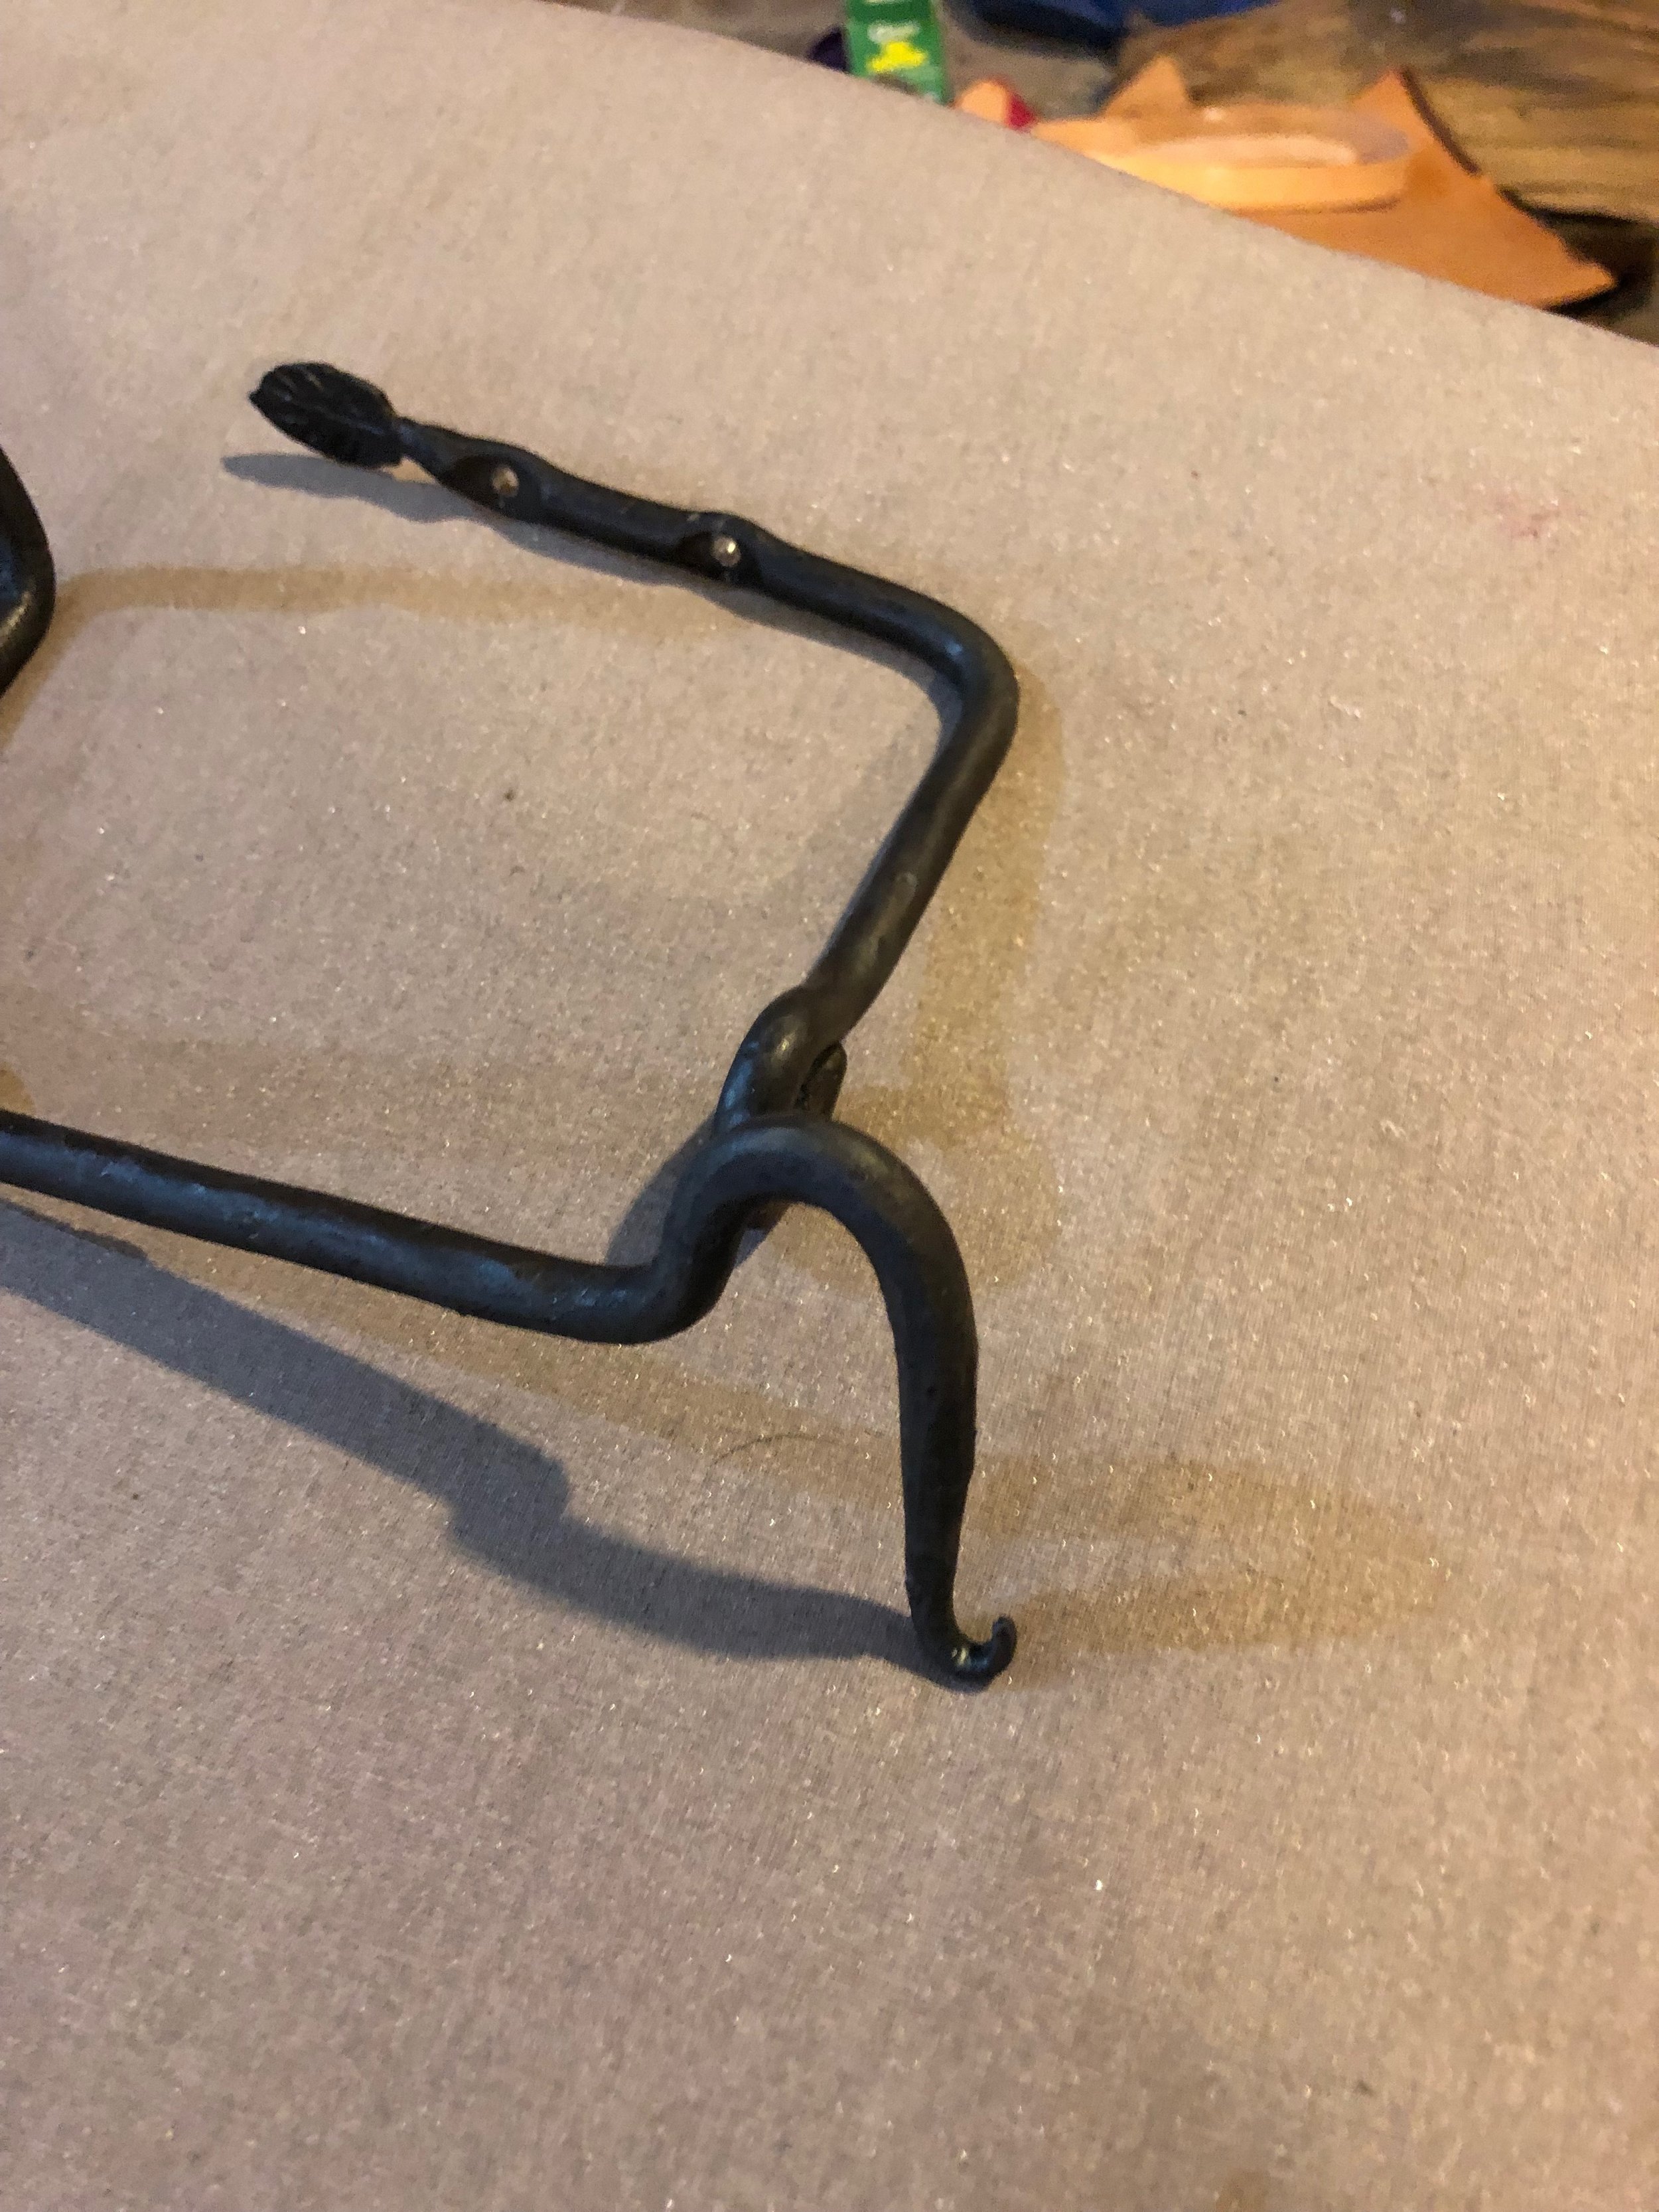
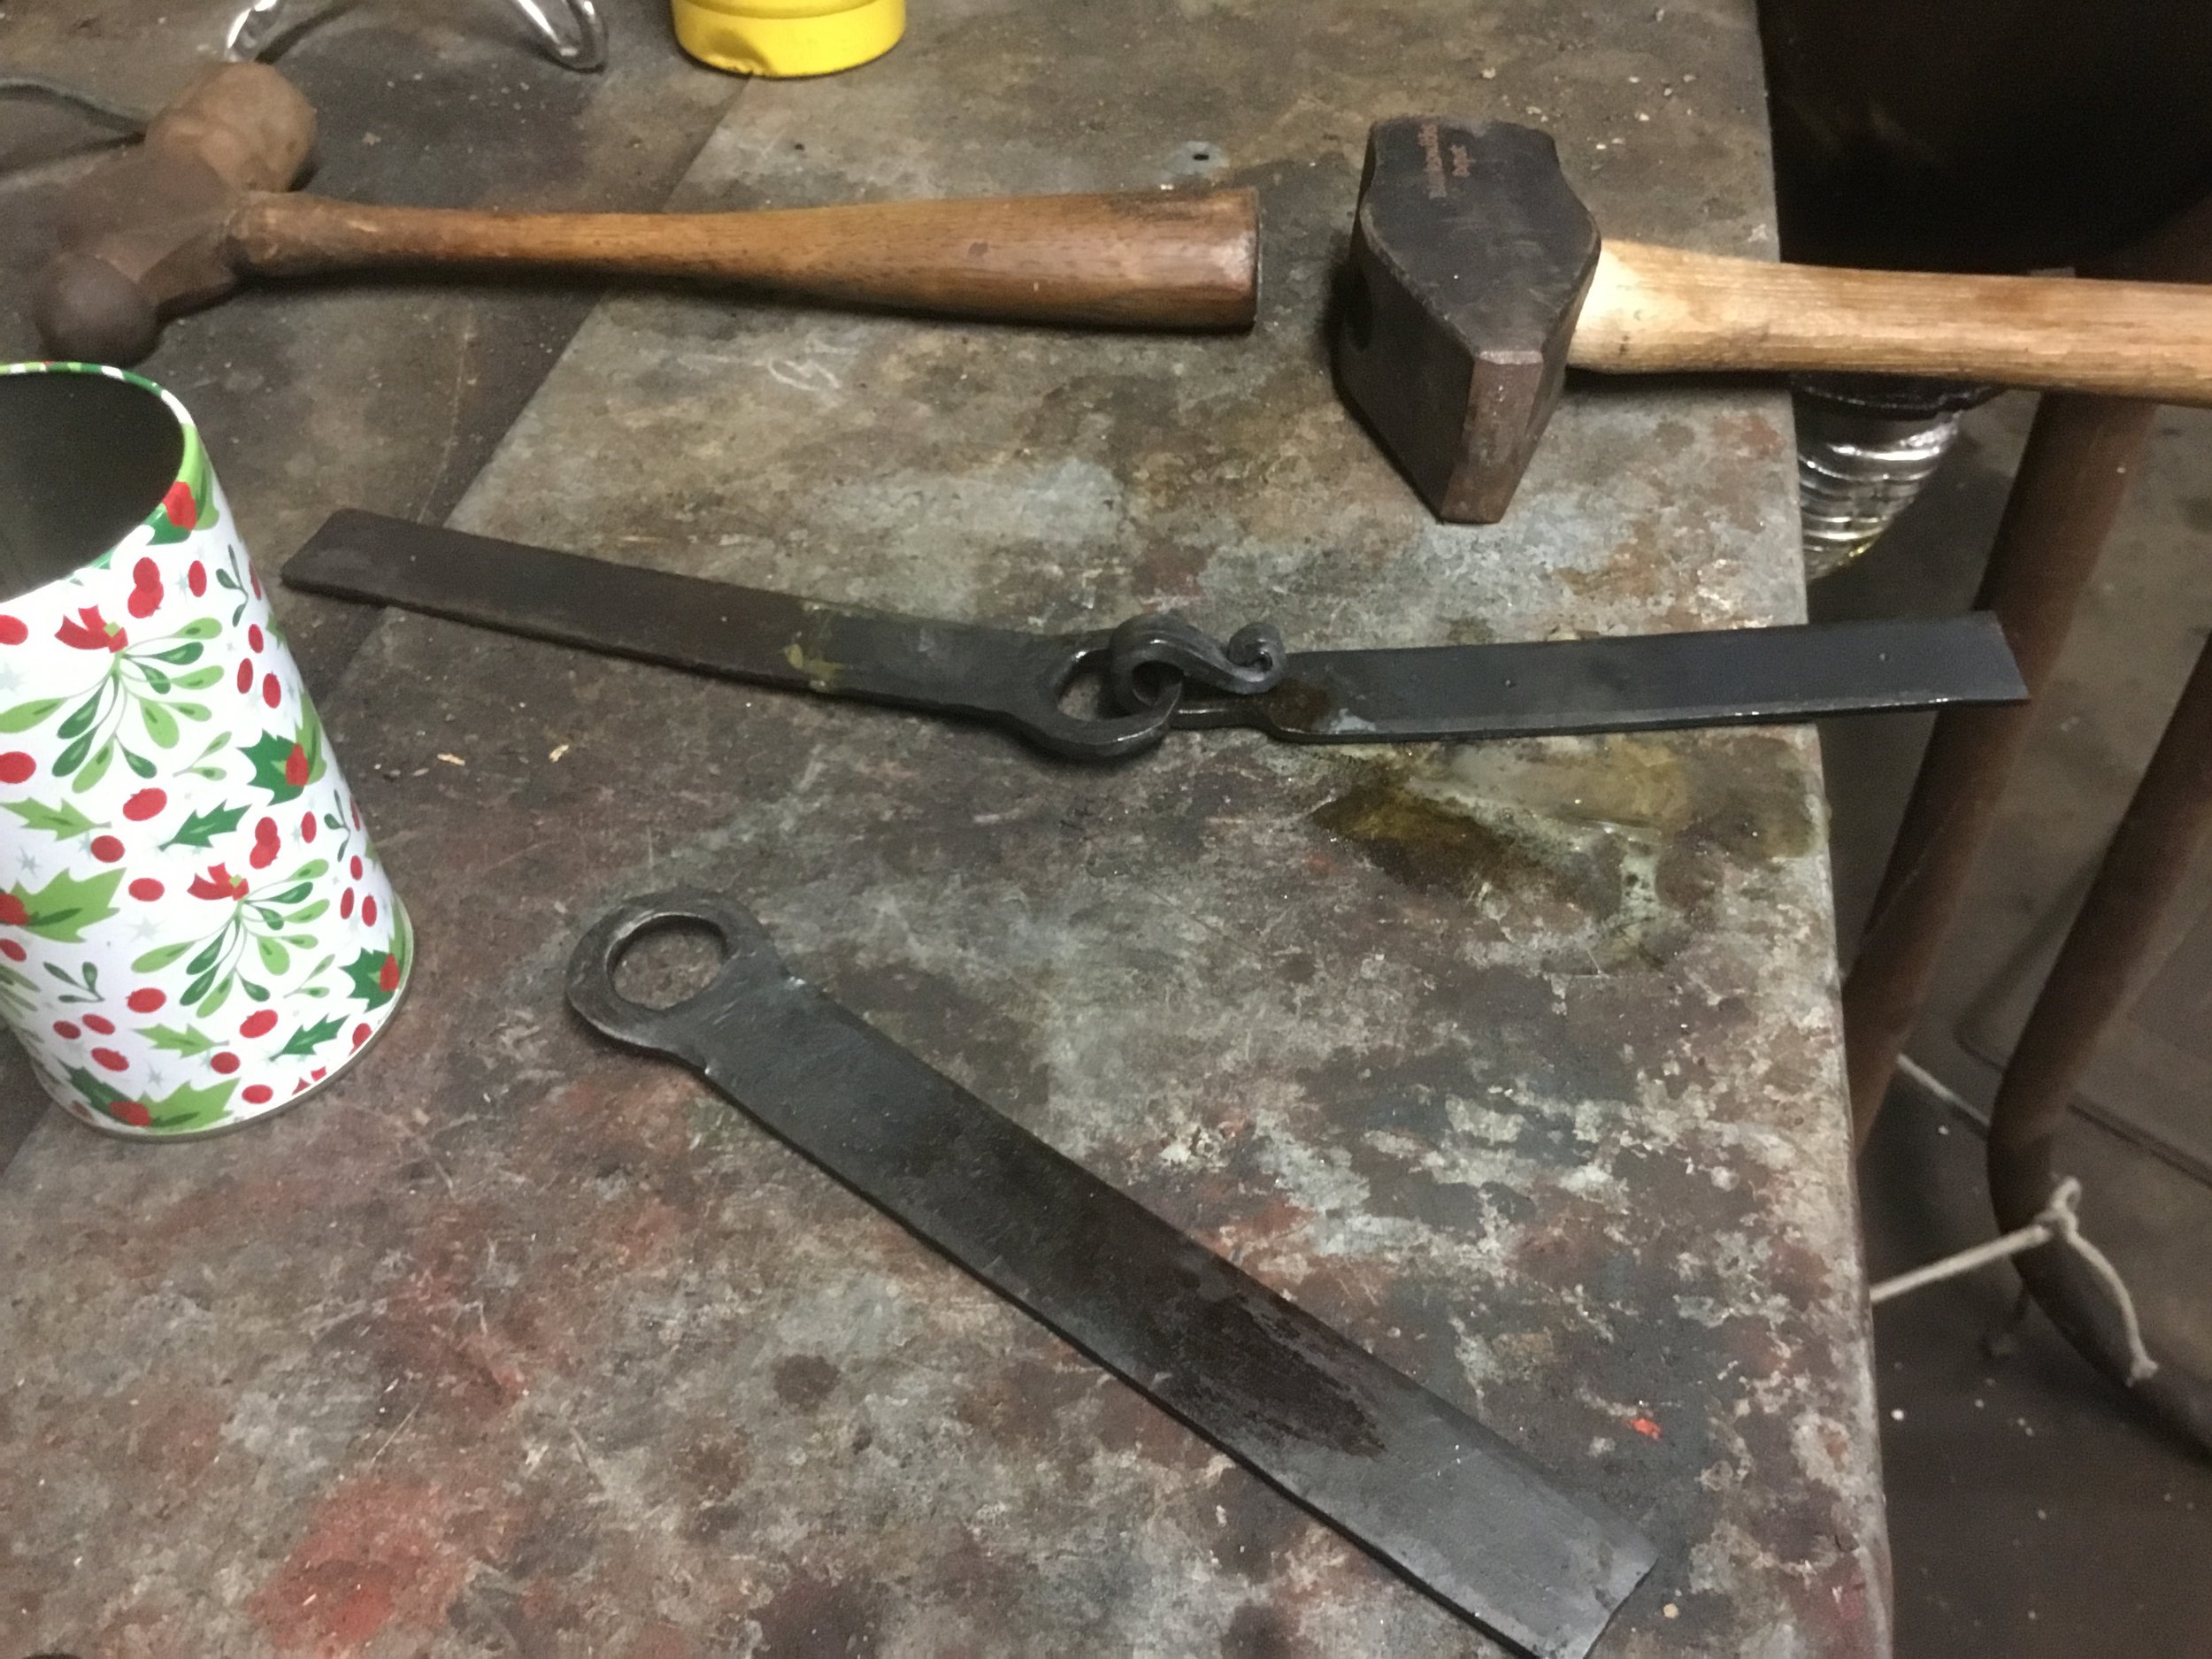
With fatigue knocking at the door, I set myself the task of creating 1 pinon for the fireplace anirons:

Working on this also included making a monkey tool holder to allow me to drive the metal into the monkey tool instead of hammering the monkey tool onto the rods.

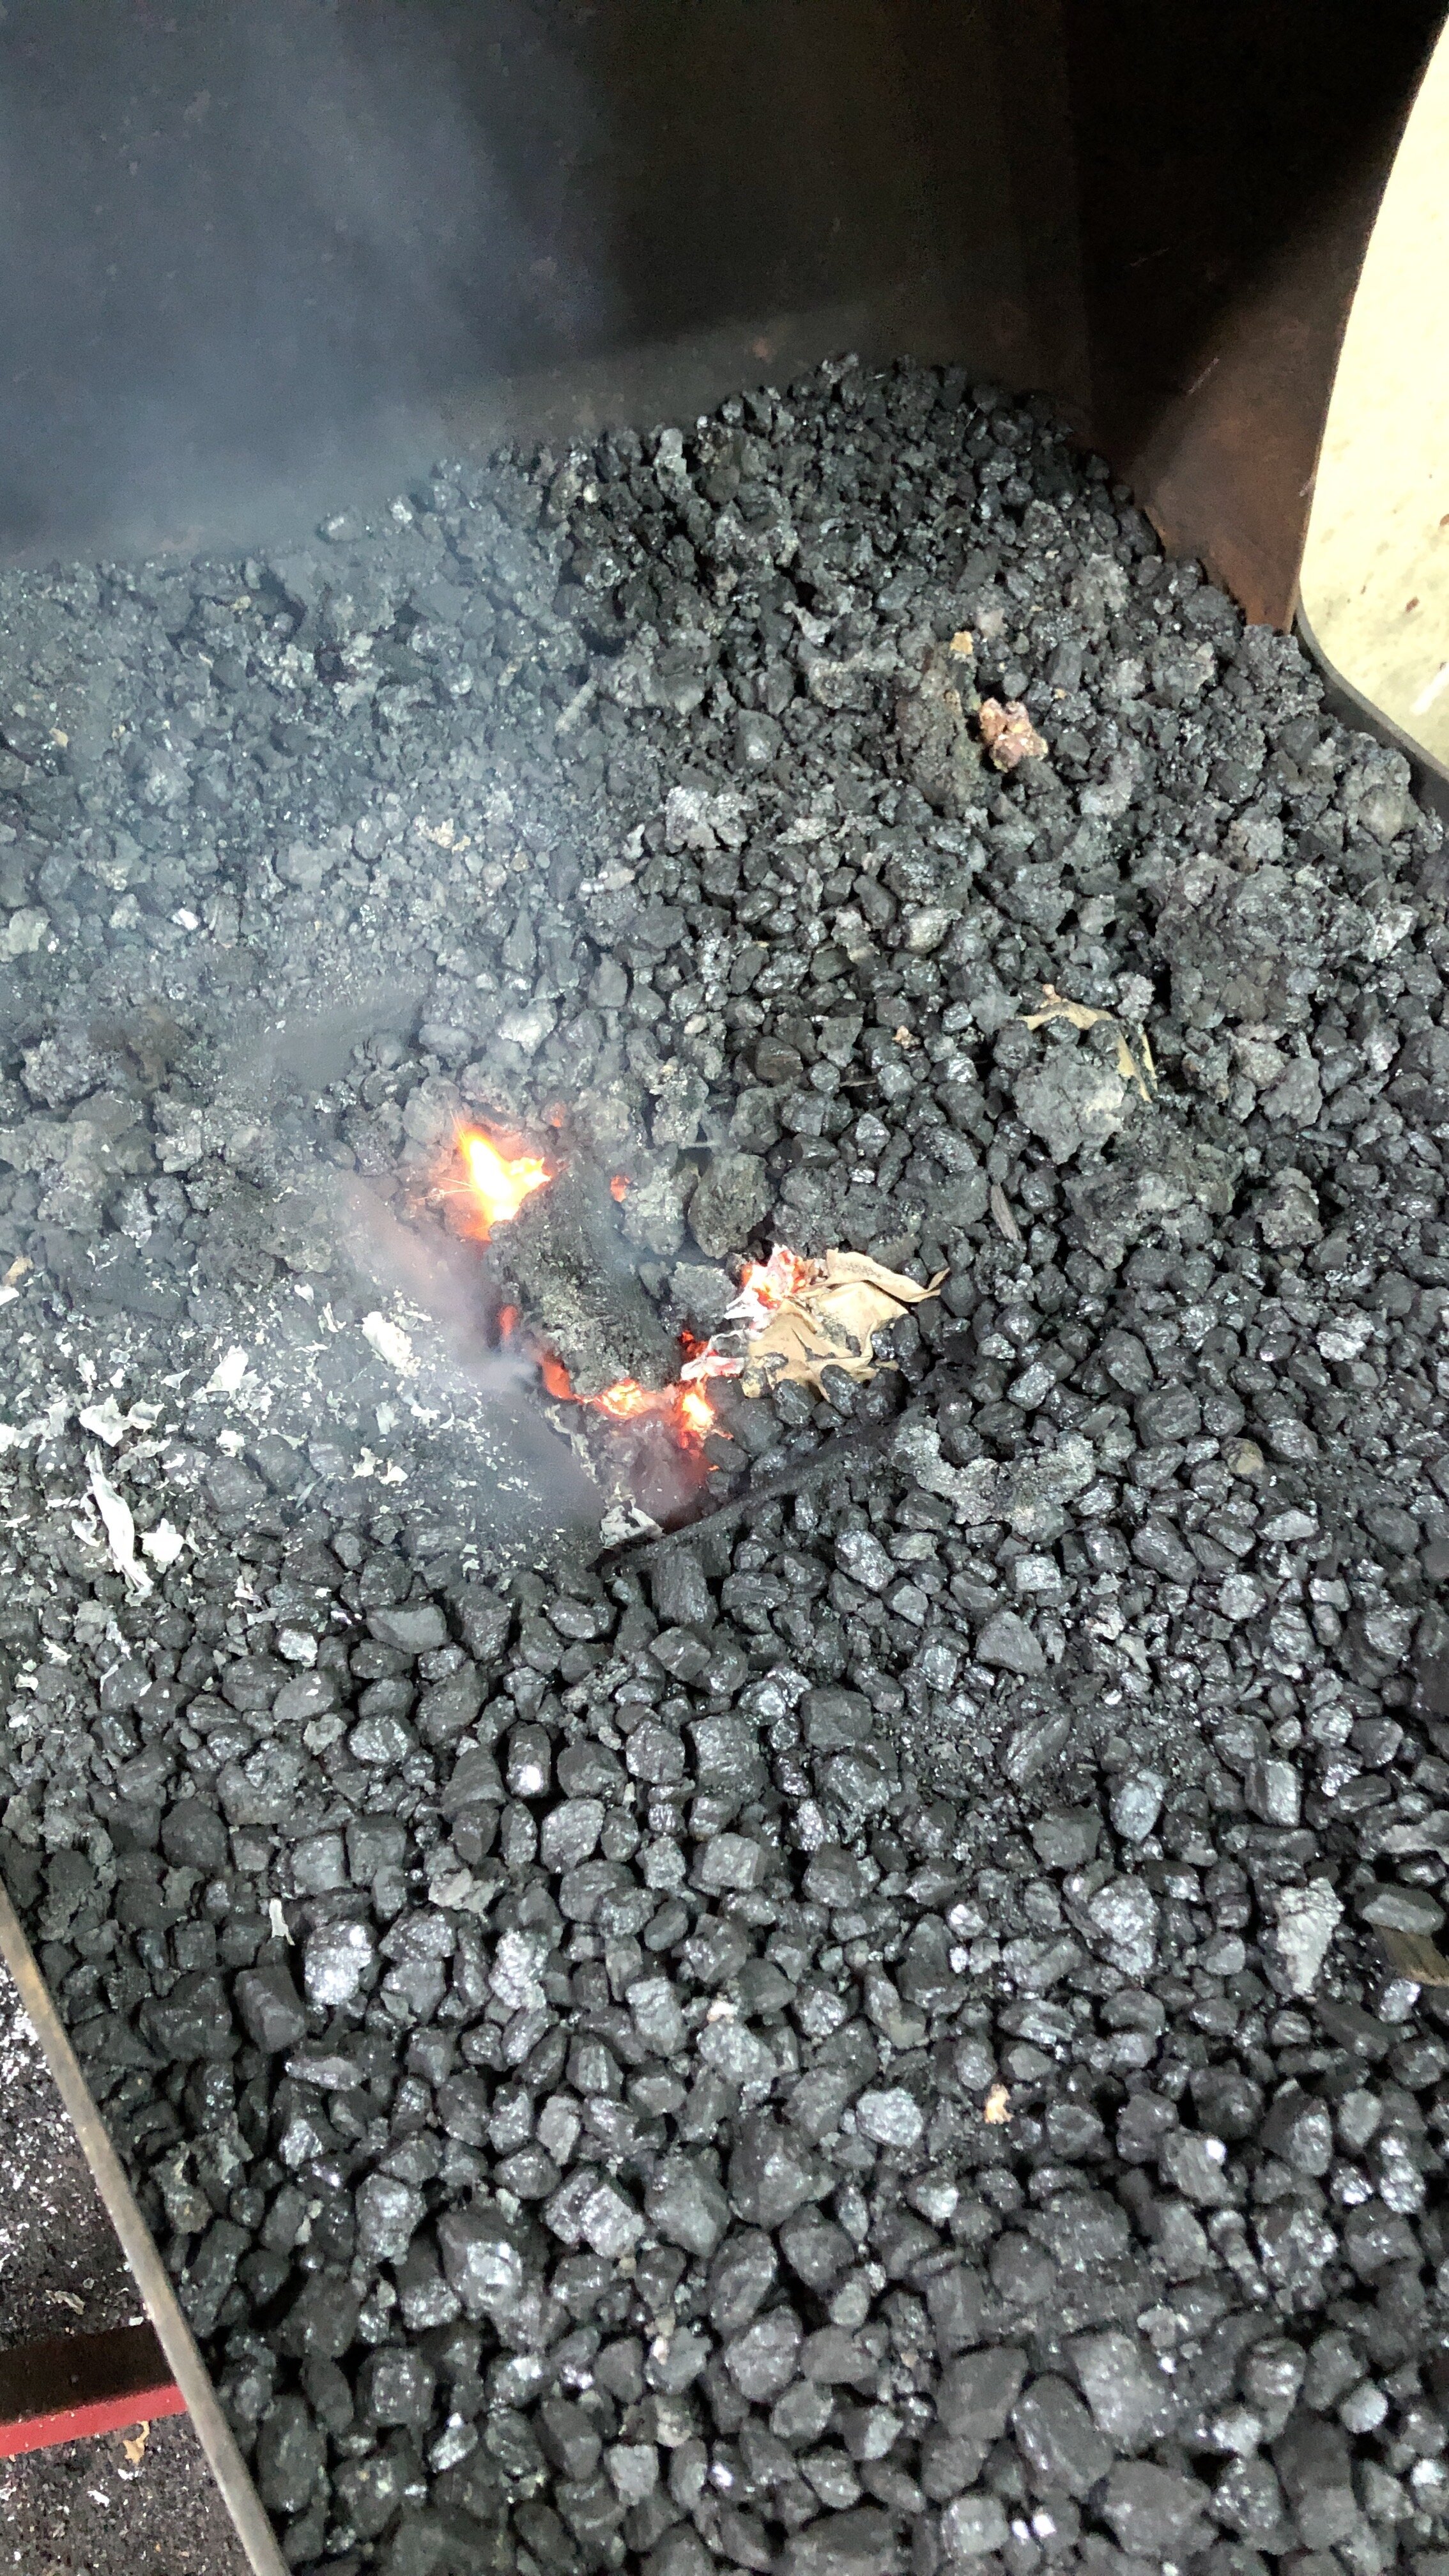
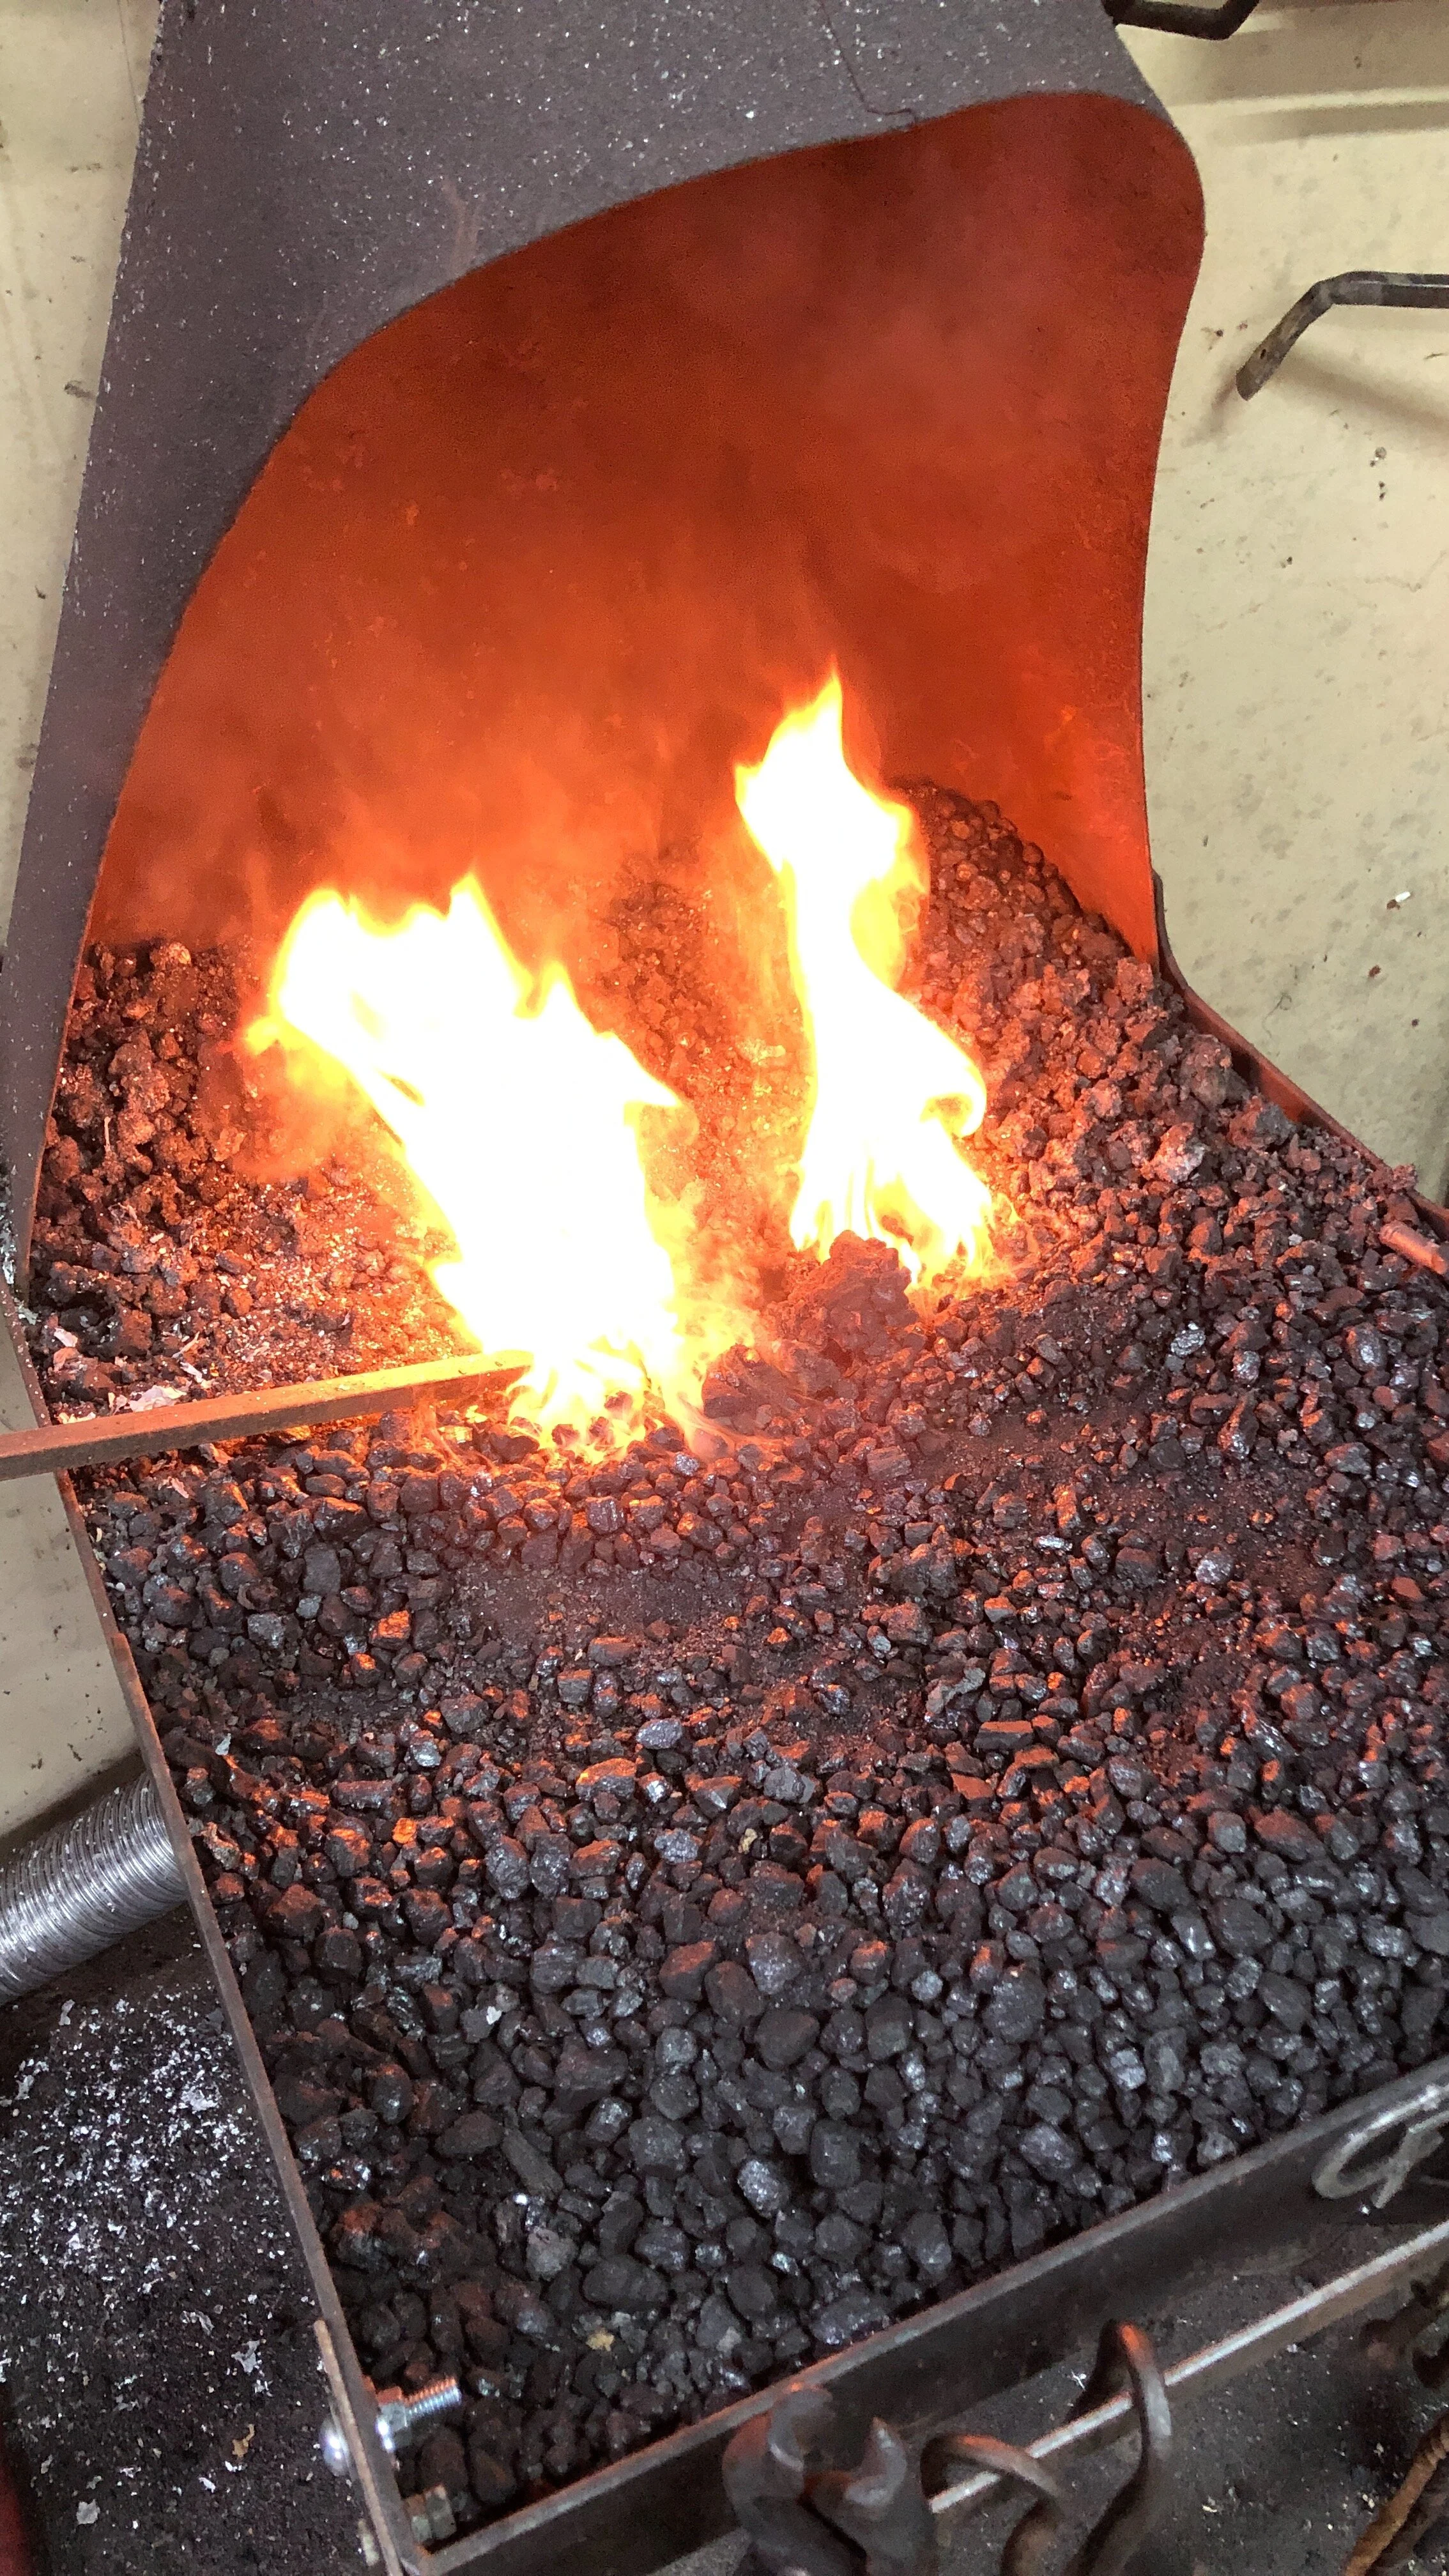
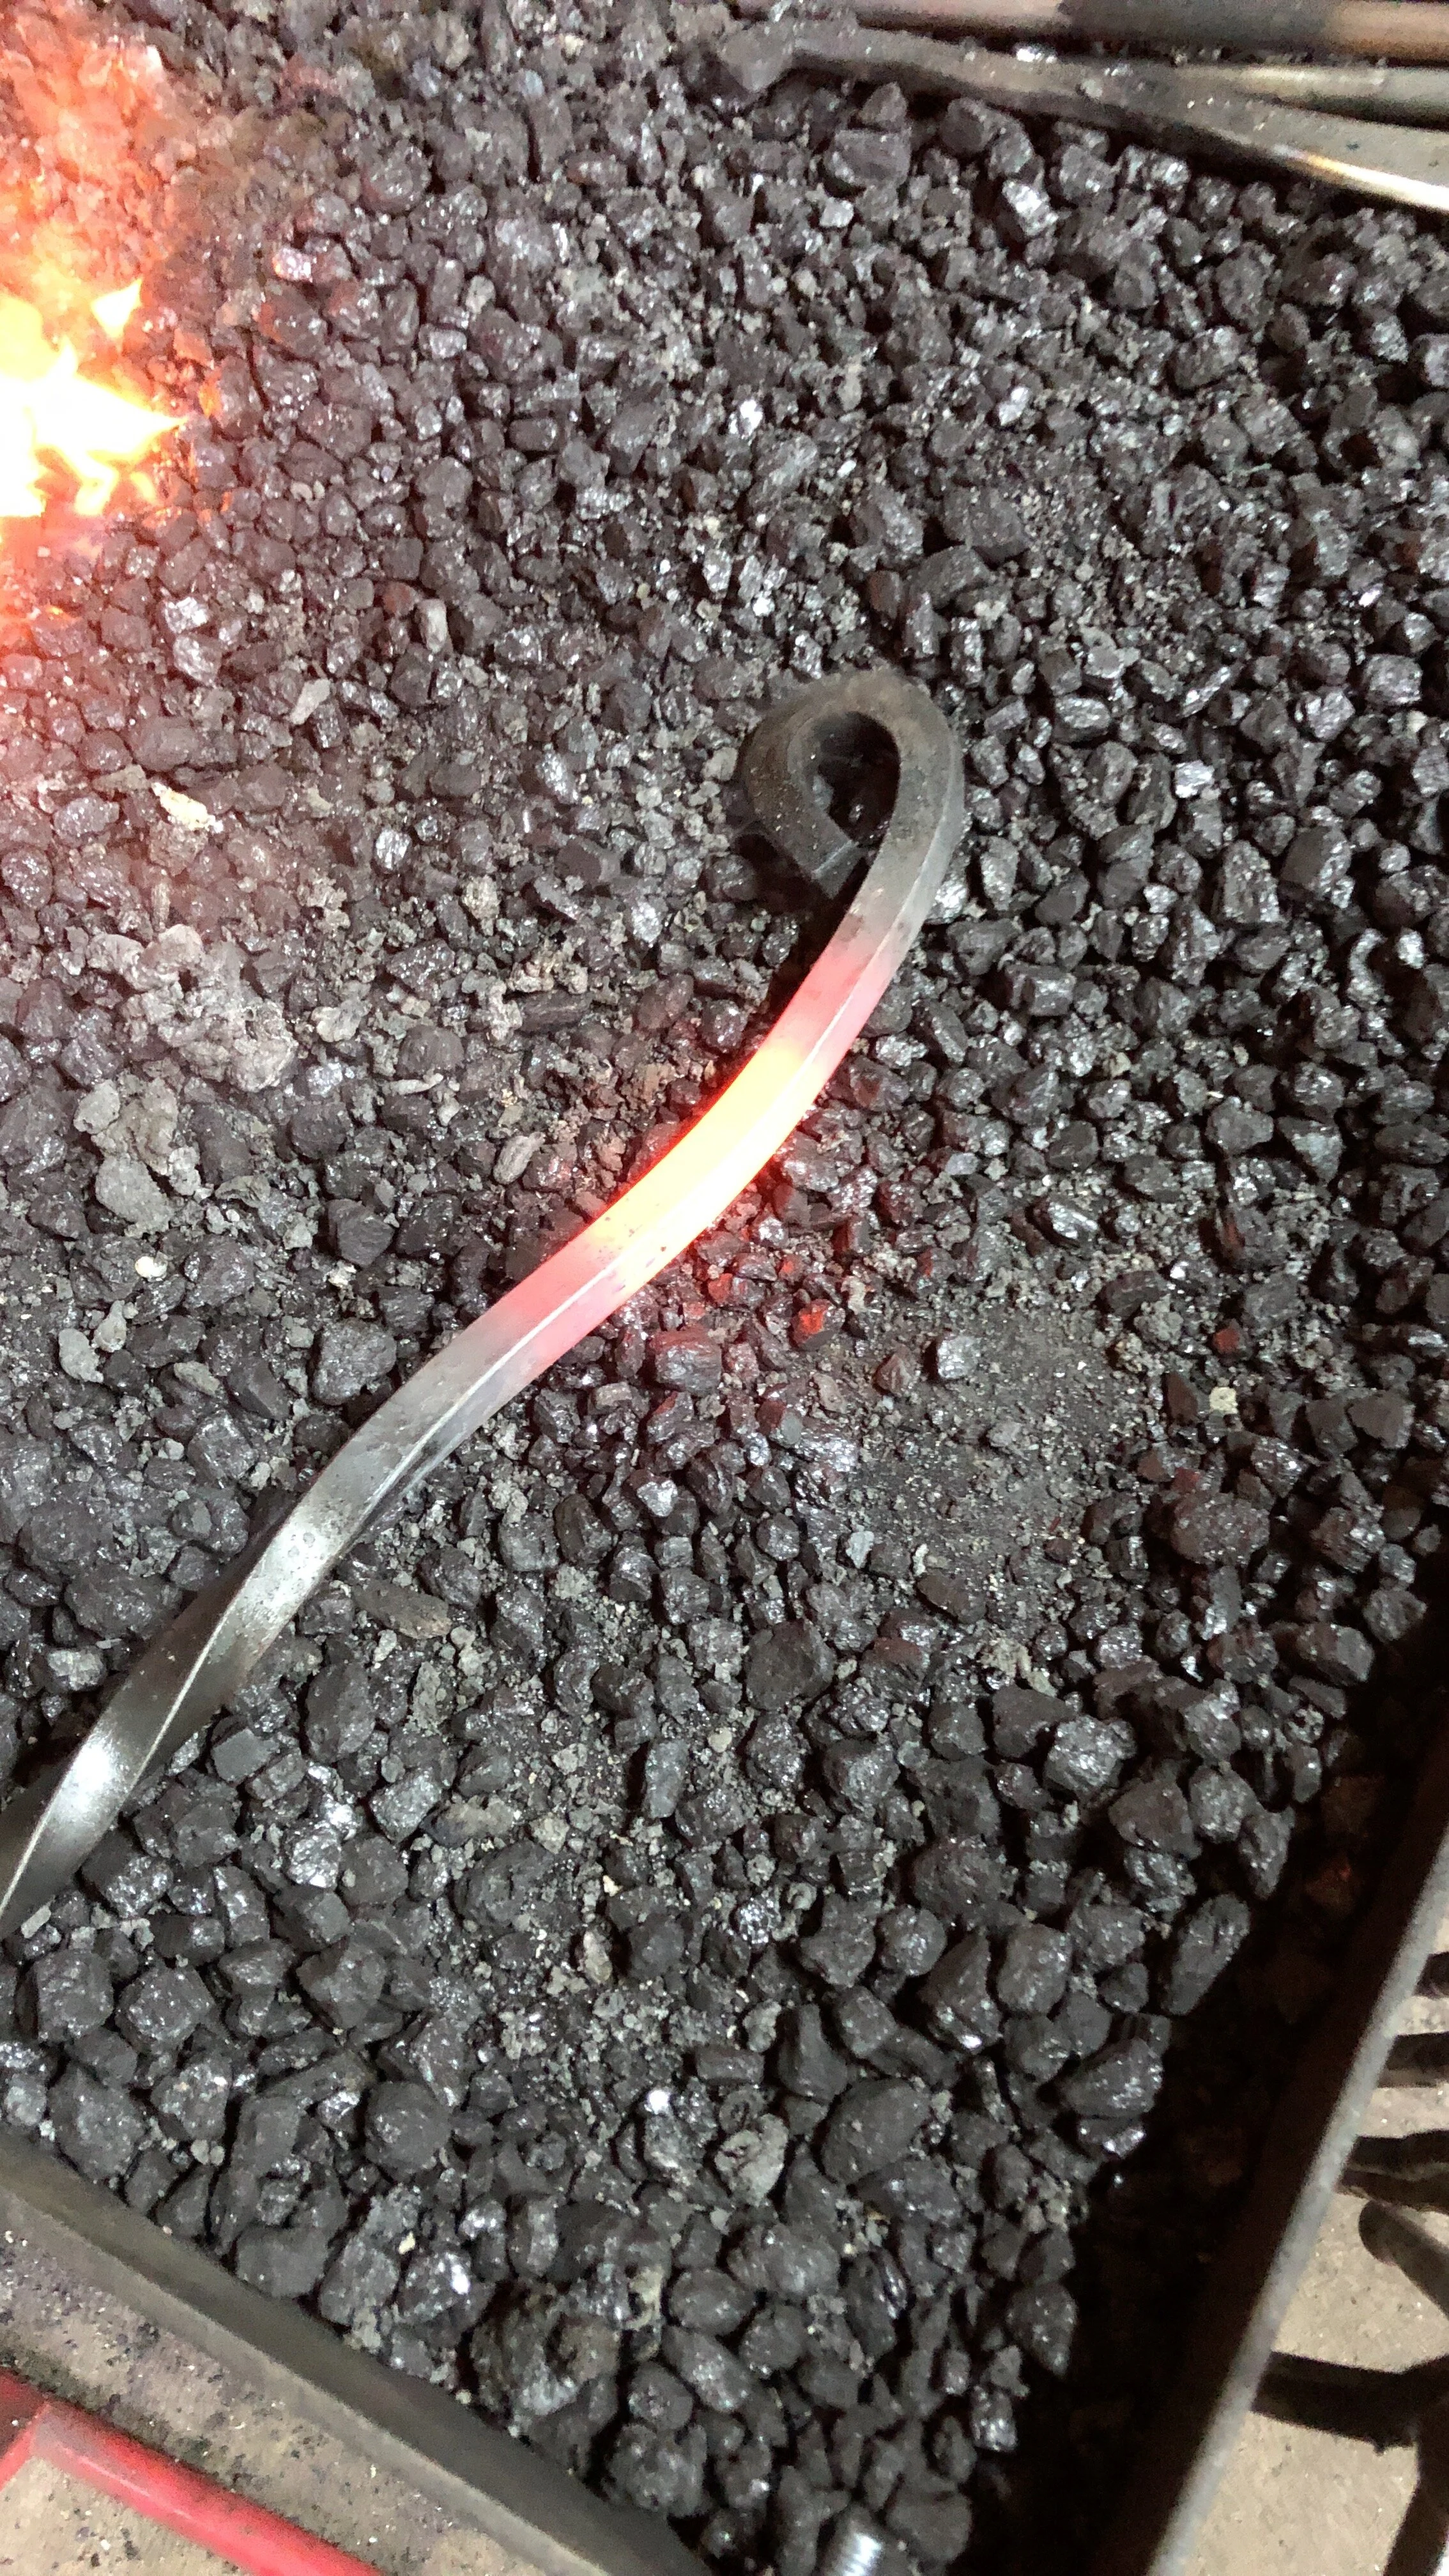
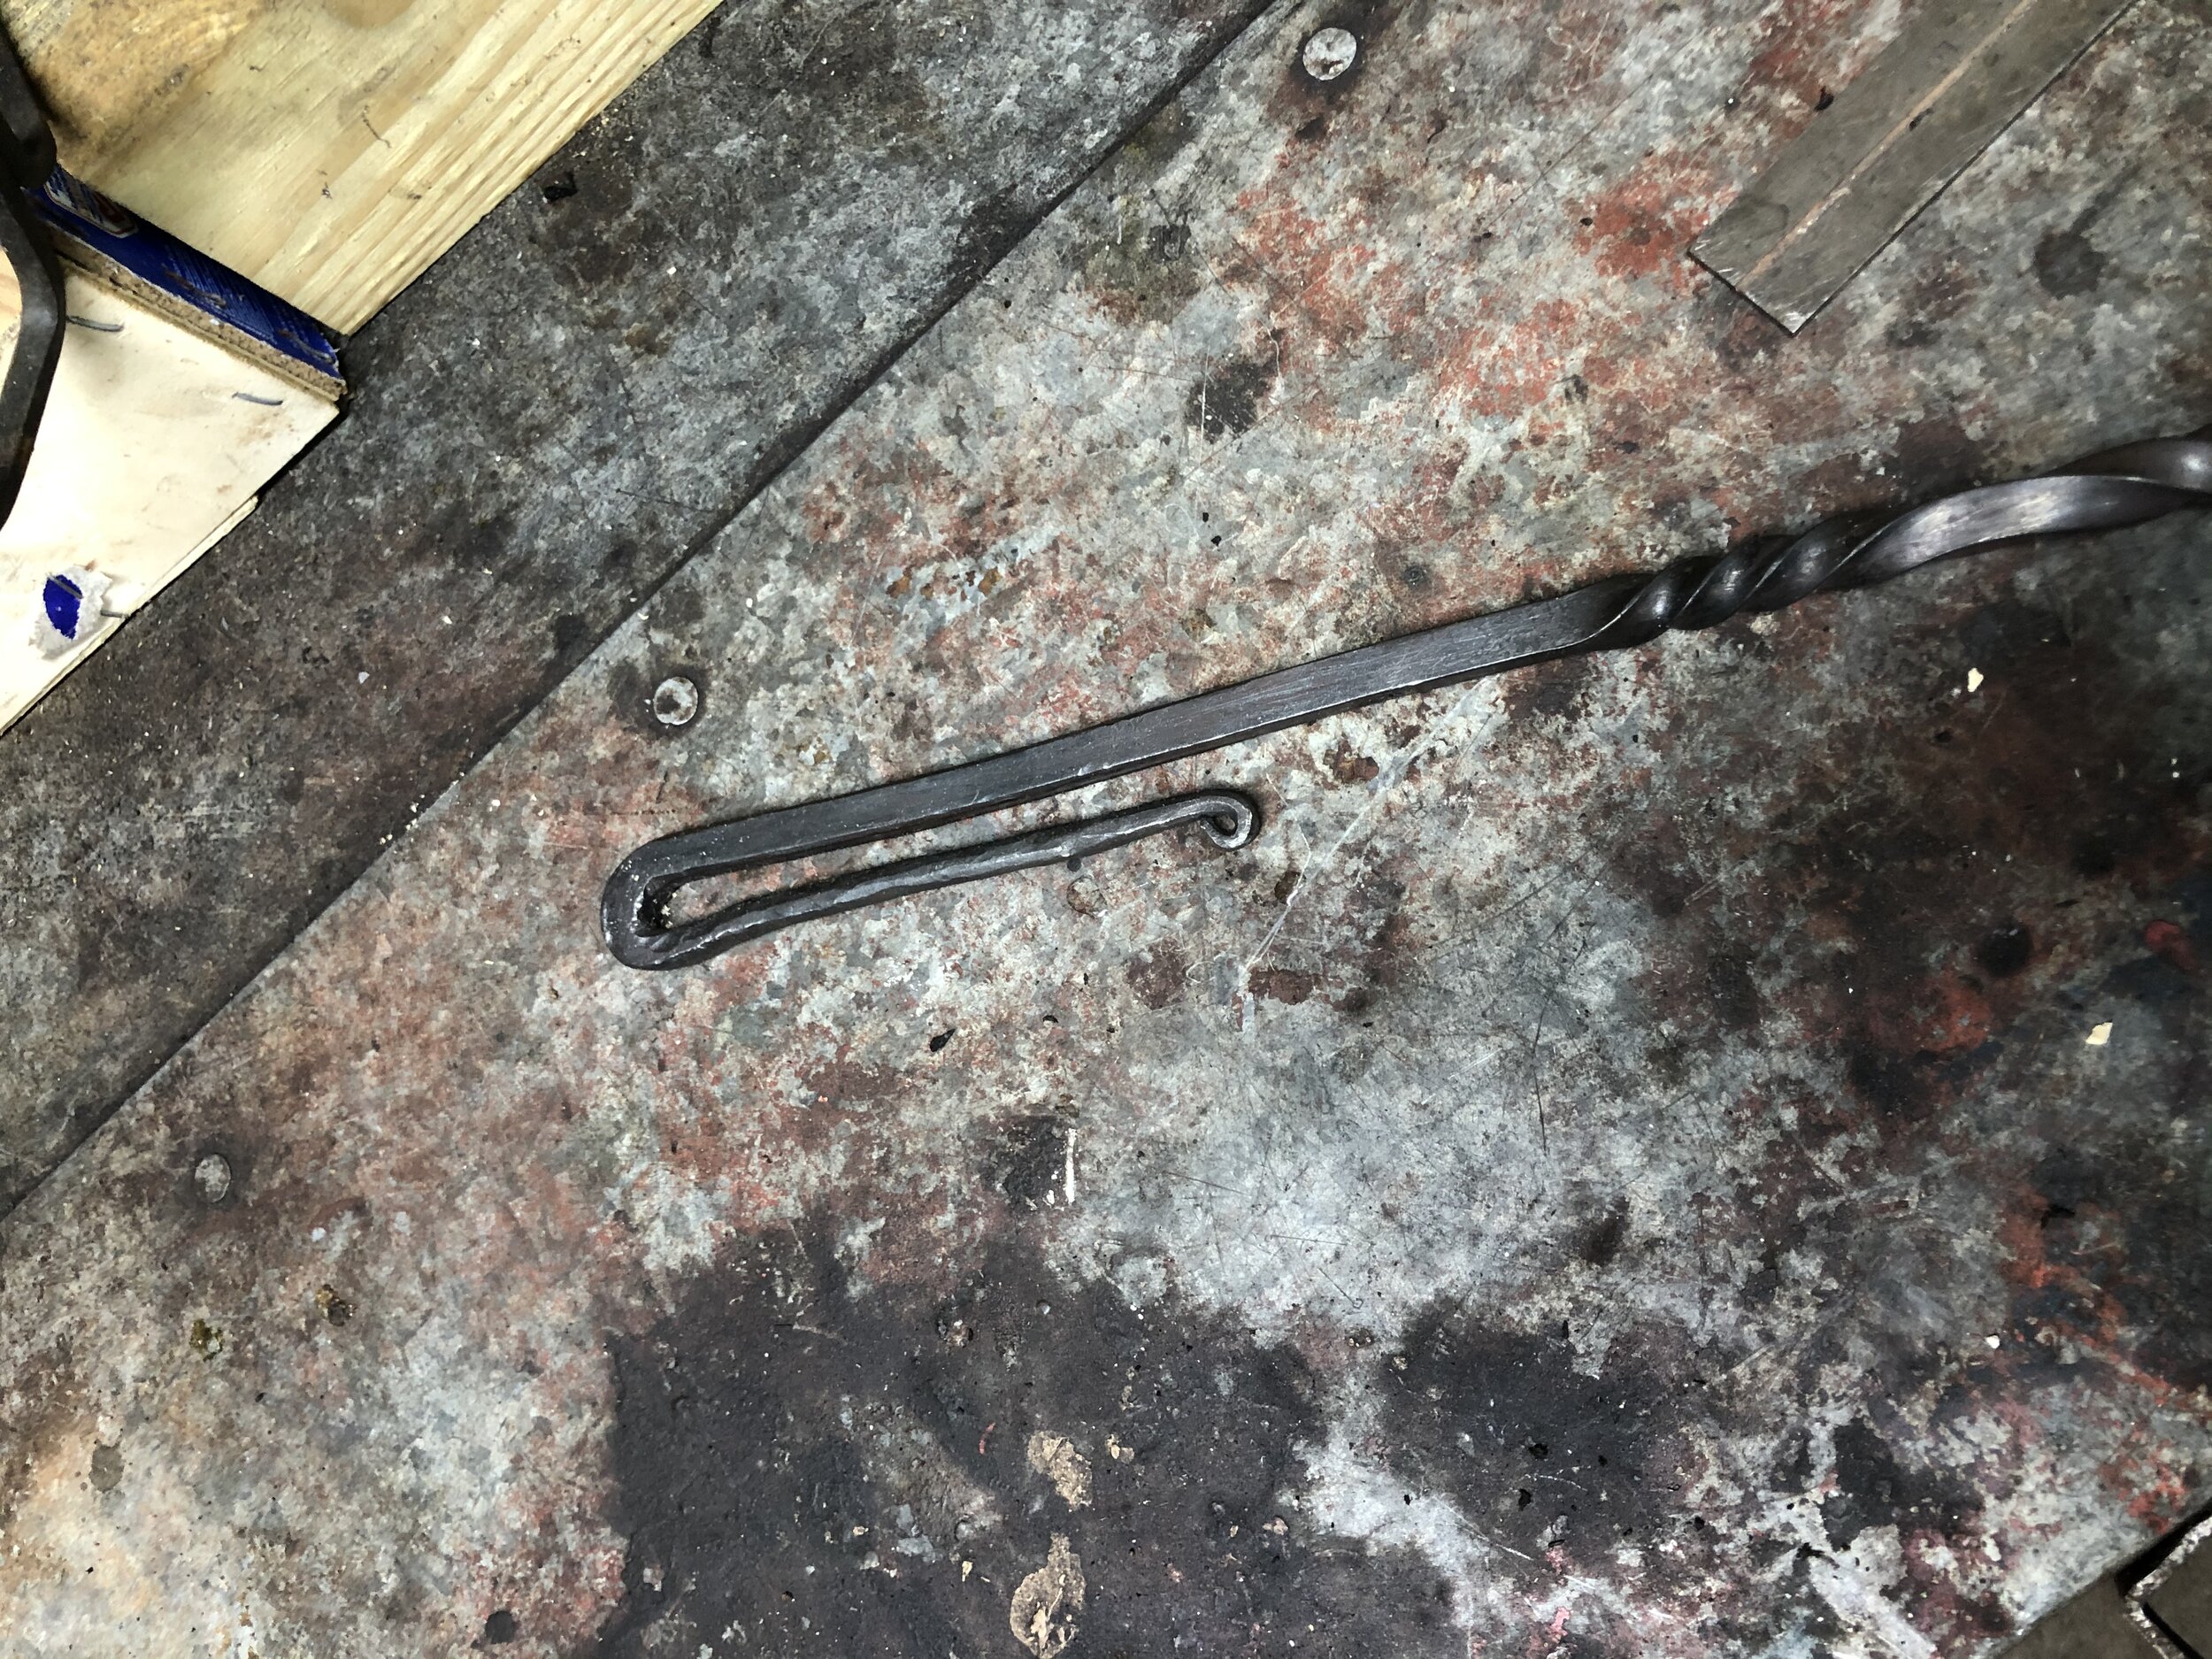
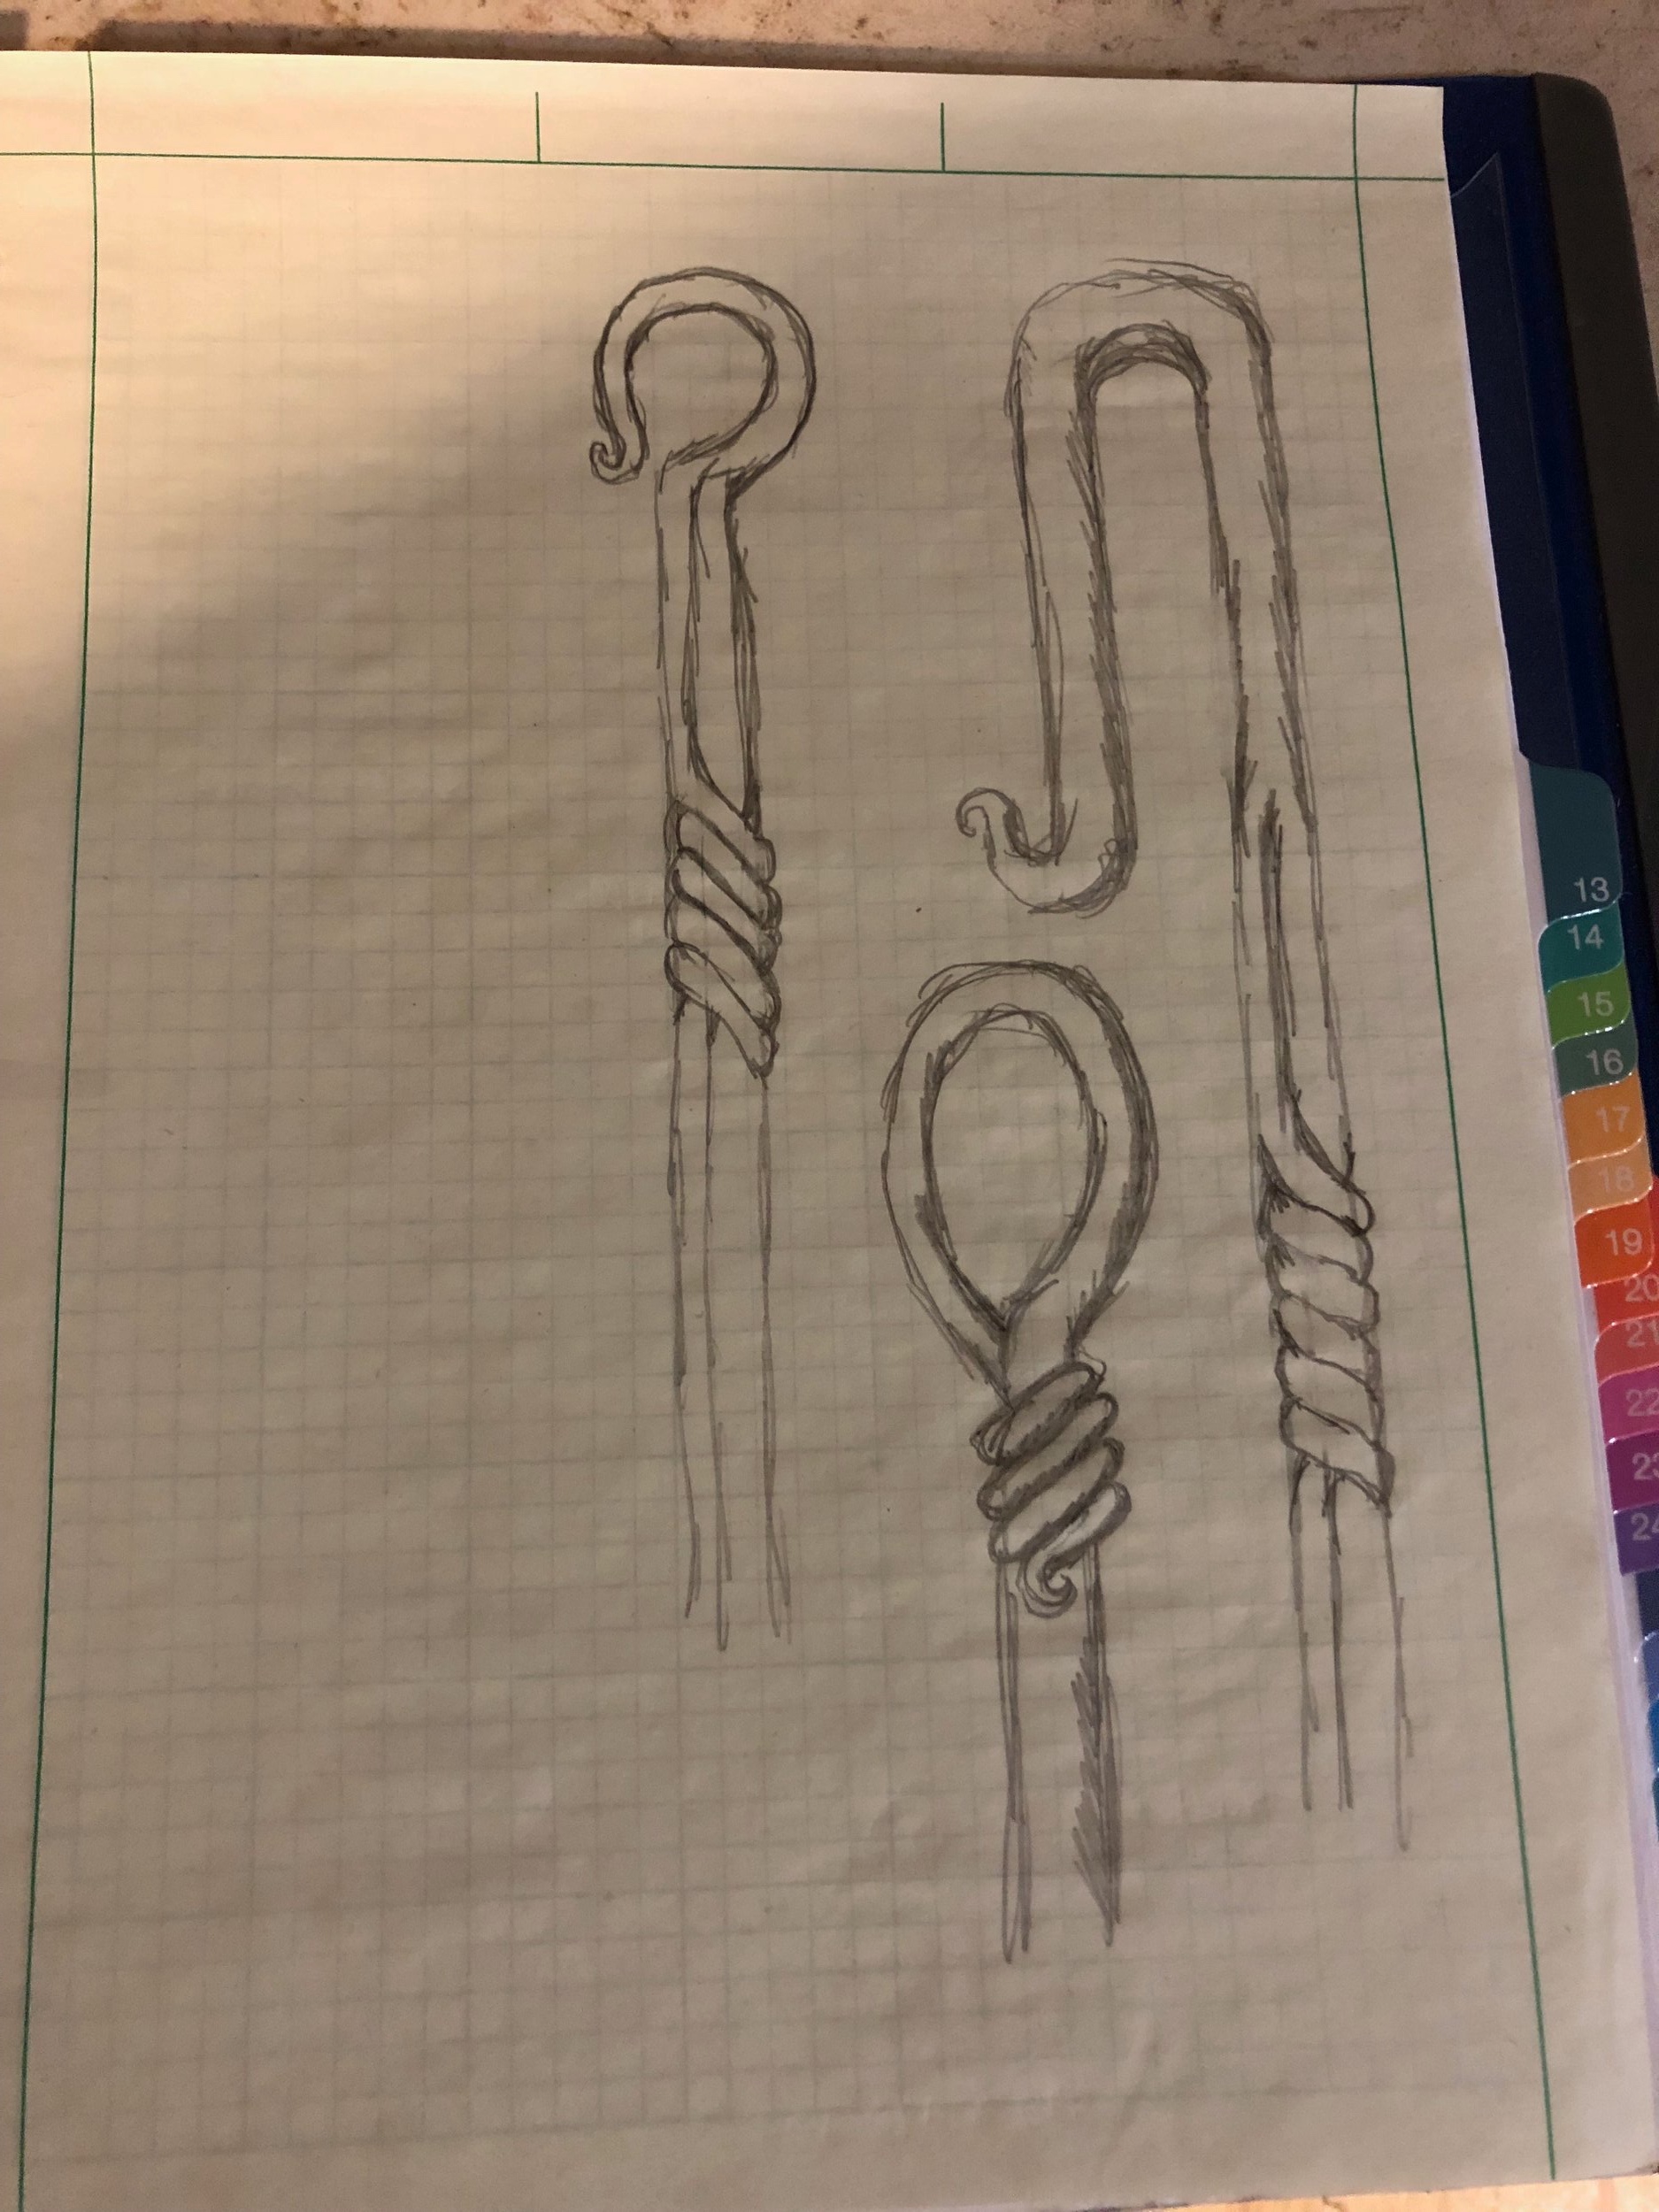
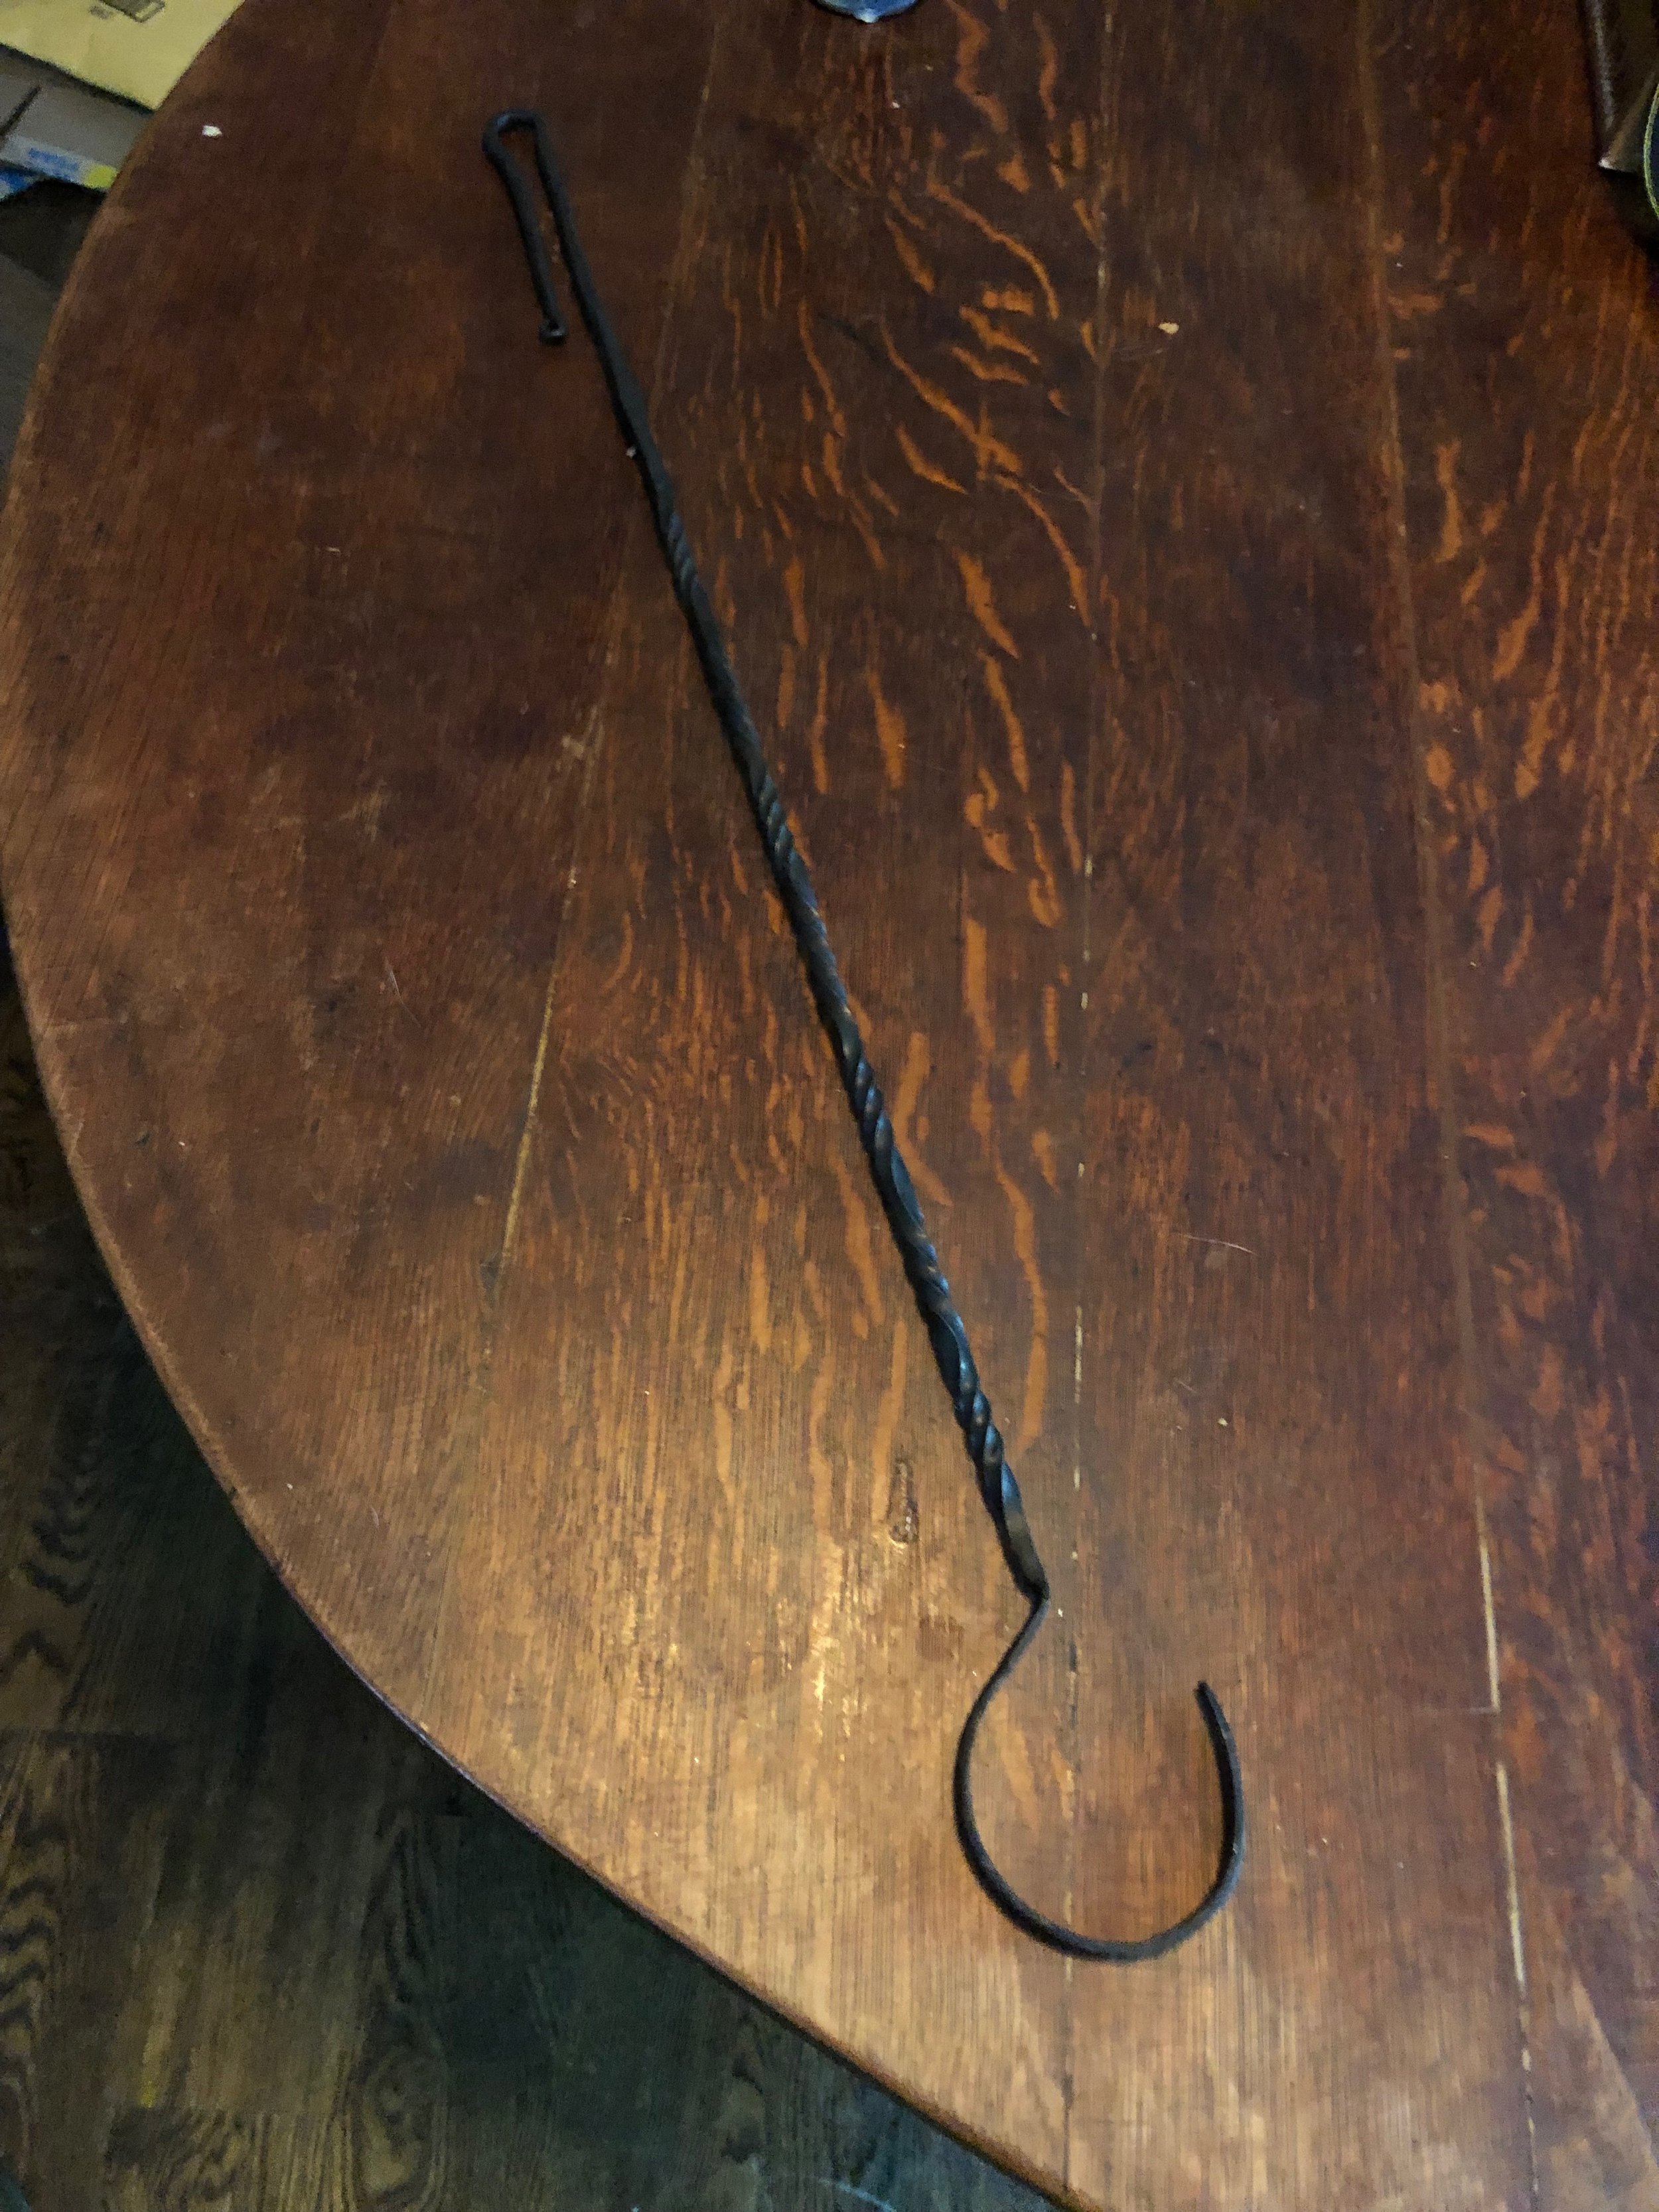
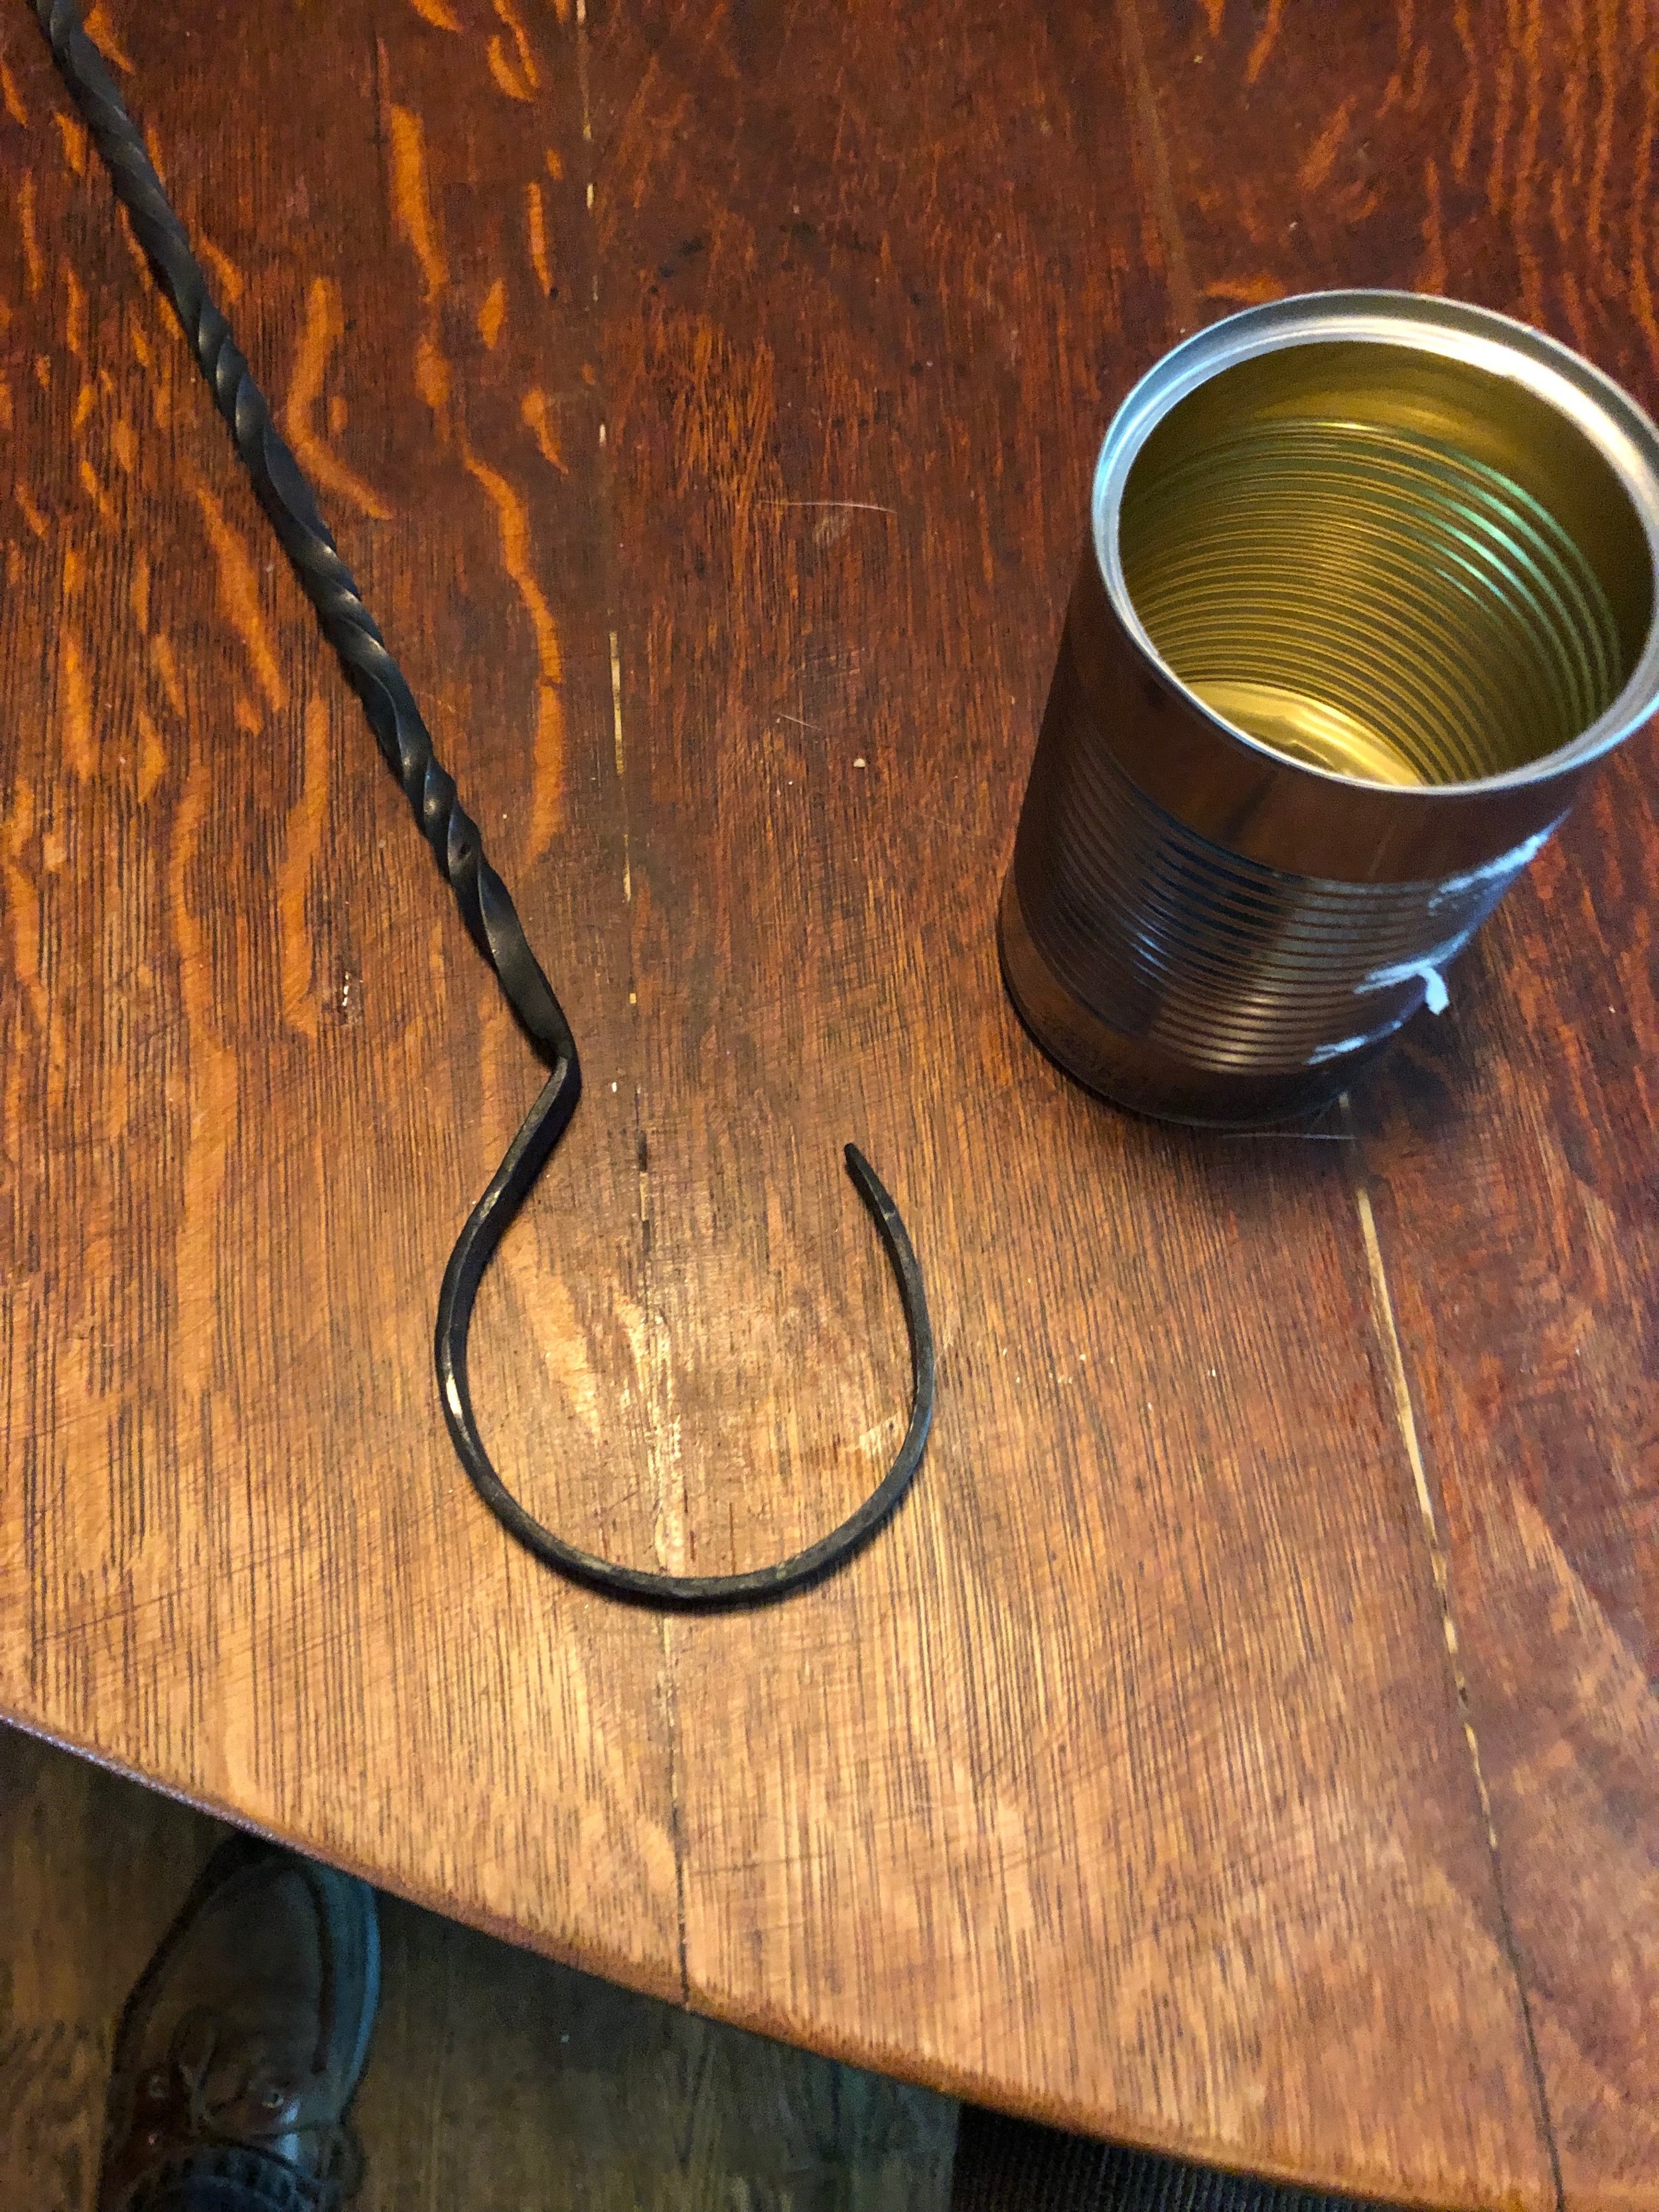
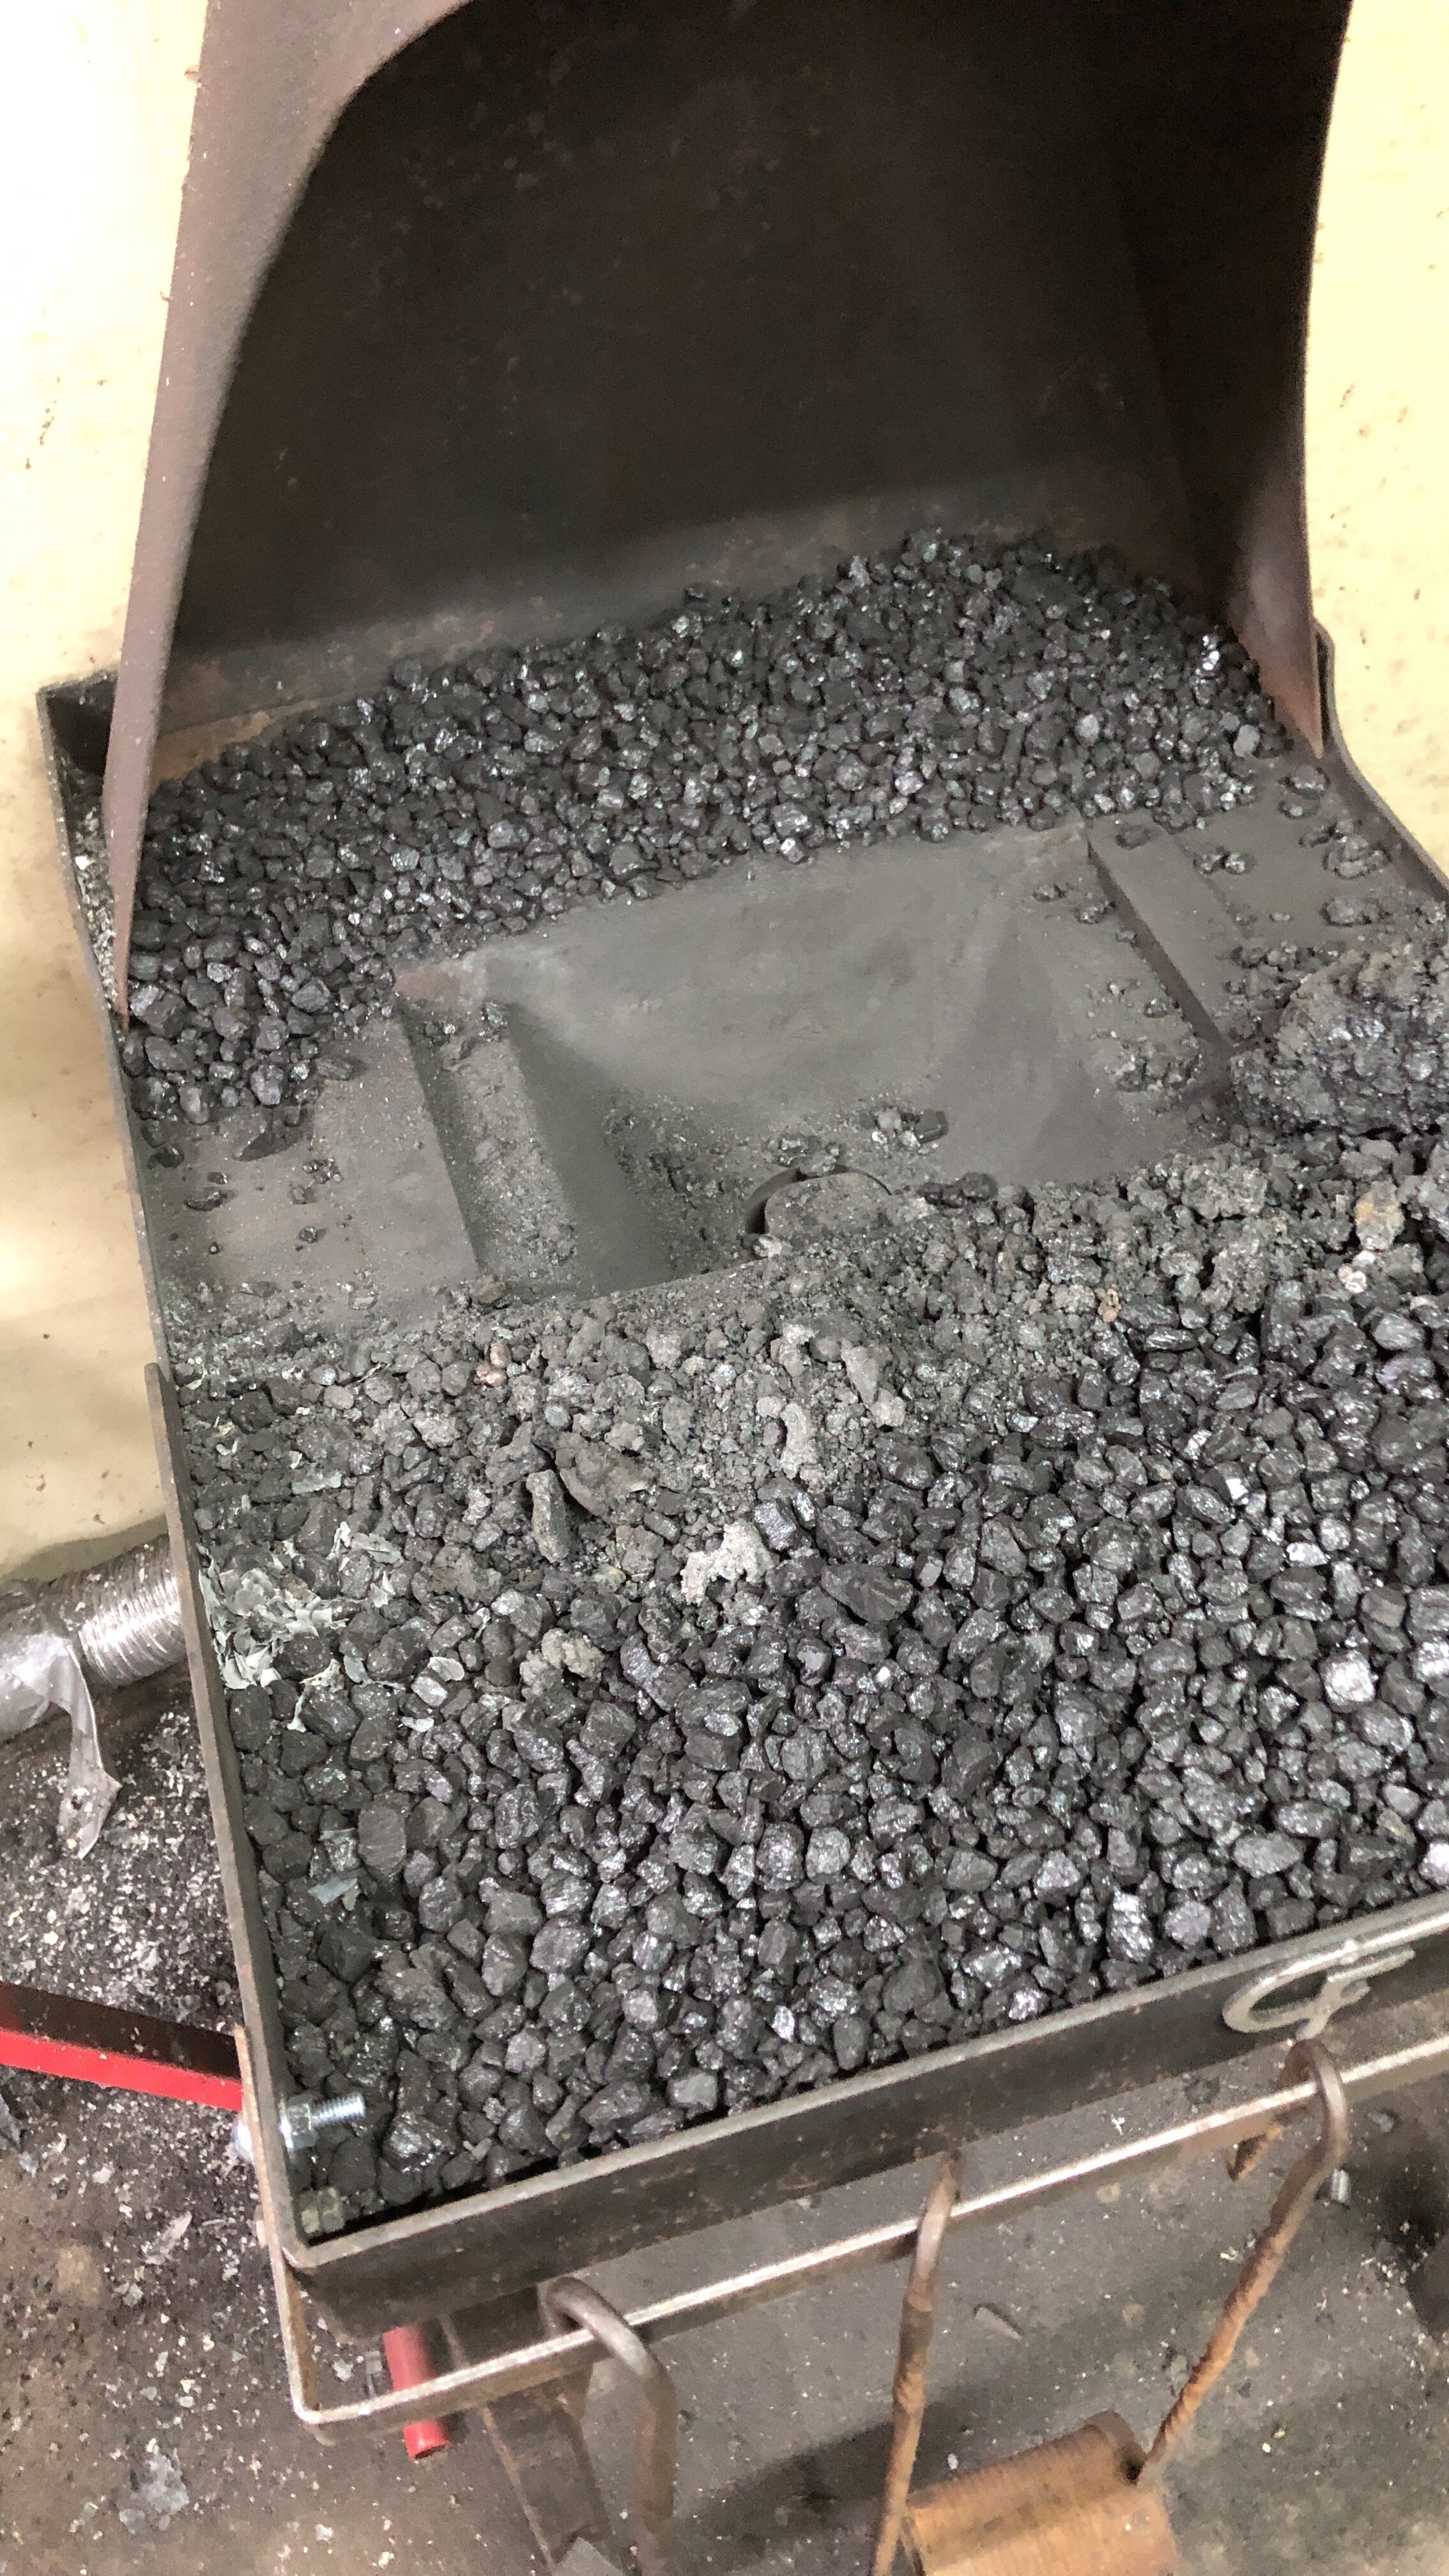
Mow, with my few remaining hammer blows, it was time to work on making a closed loop on the end of a 1/4 in rod. The books and videos claim this is easy as pie, but i must question the accuracy of this statement. It might have just been my weakened state, or possibly the dirty-ness of a fire that had been going for hours, but this was a dismal failure. By the 3rd try, i was able to get some of the metal welded, but not enough to call it a success.

With this, I was DONE! There will be other days to forge…..

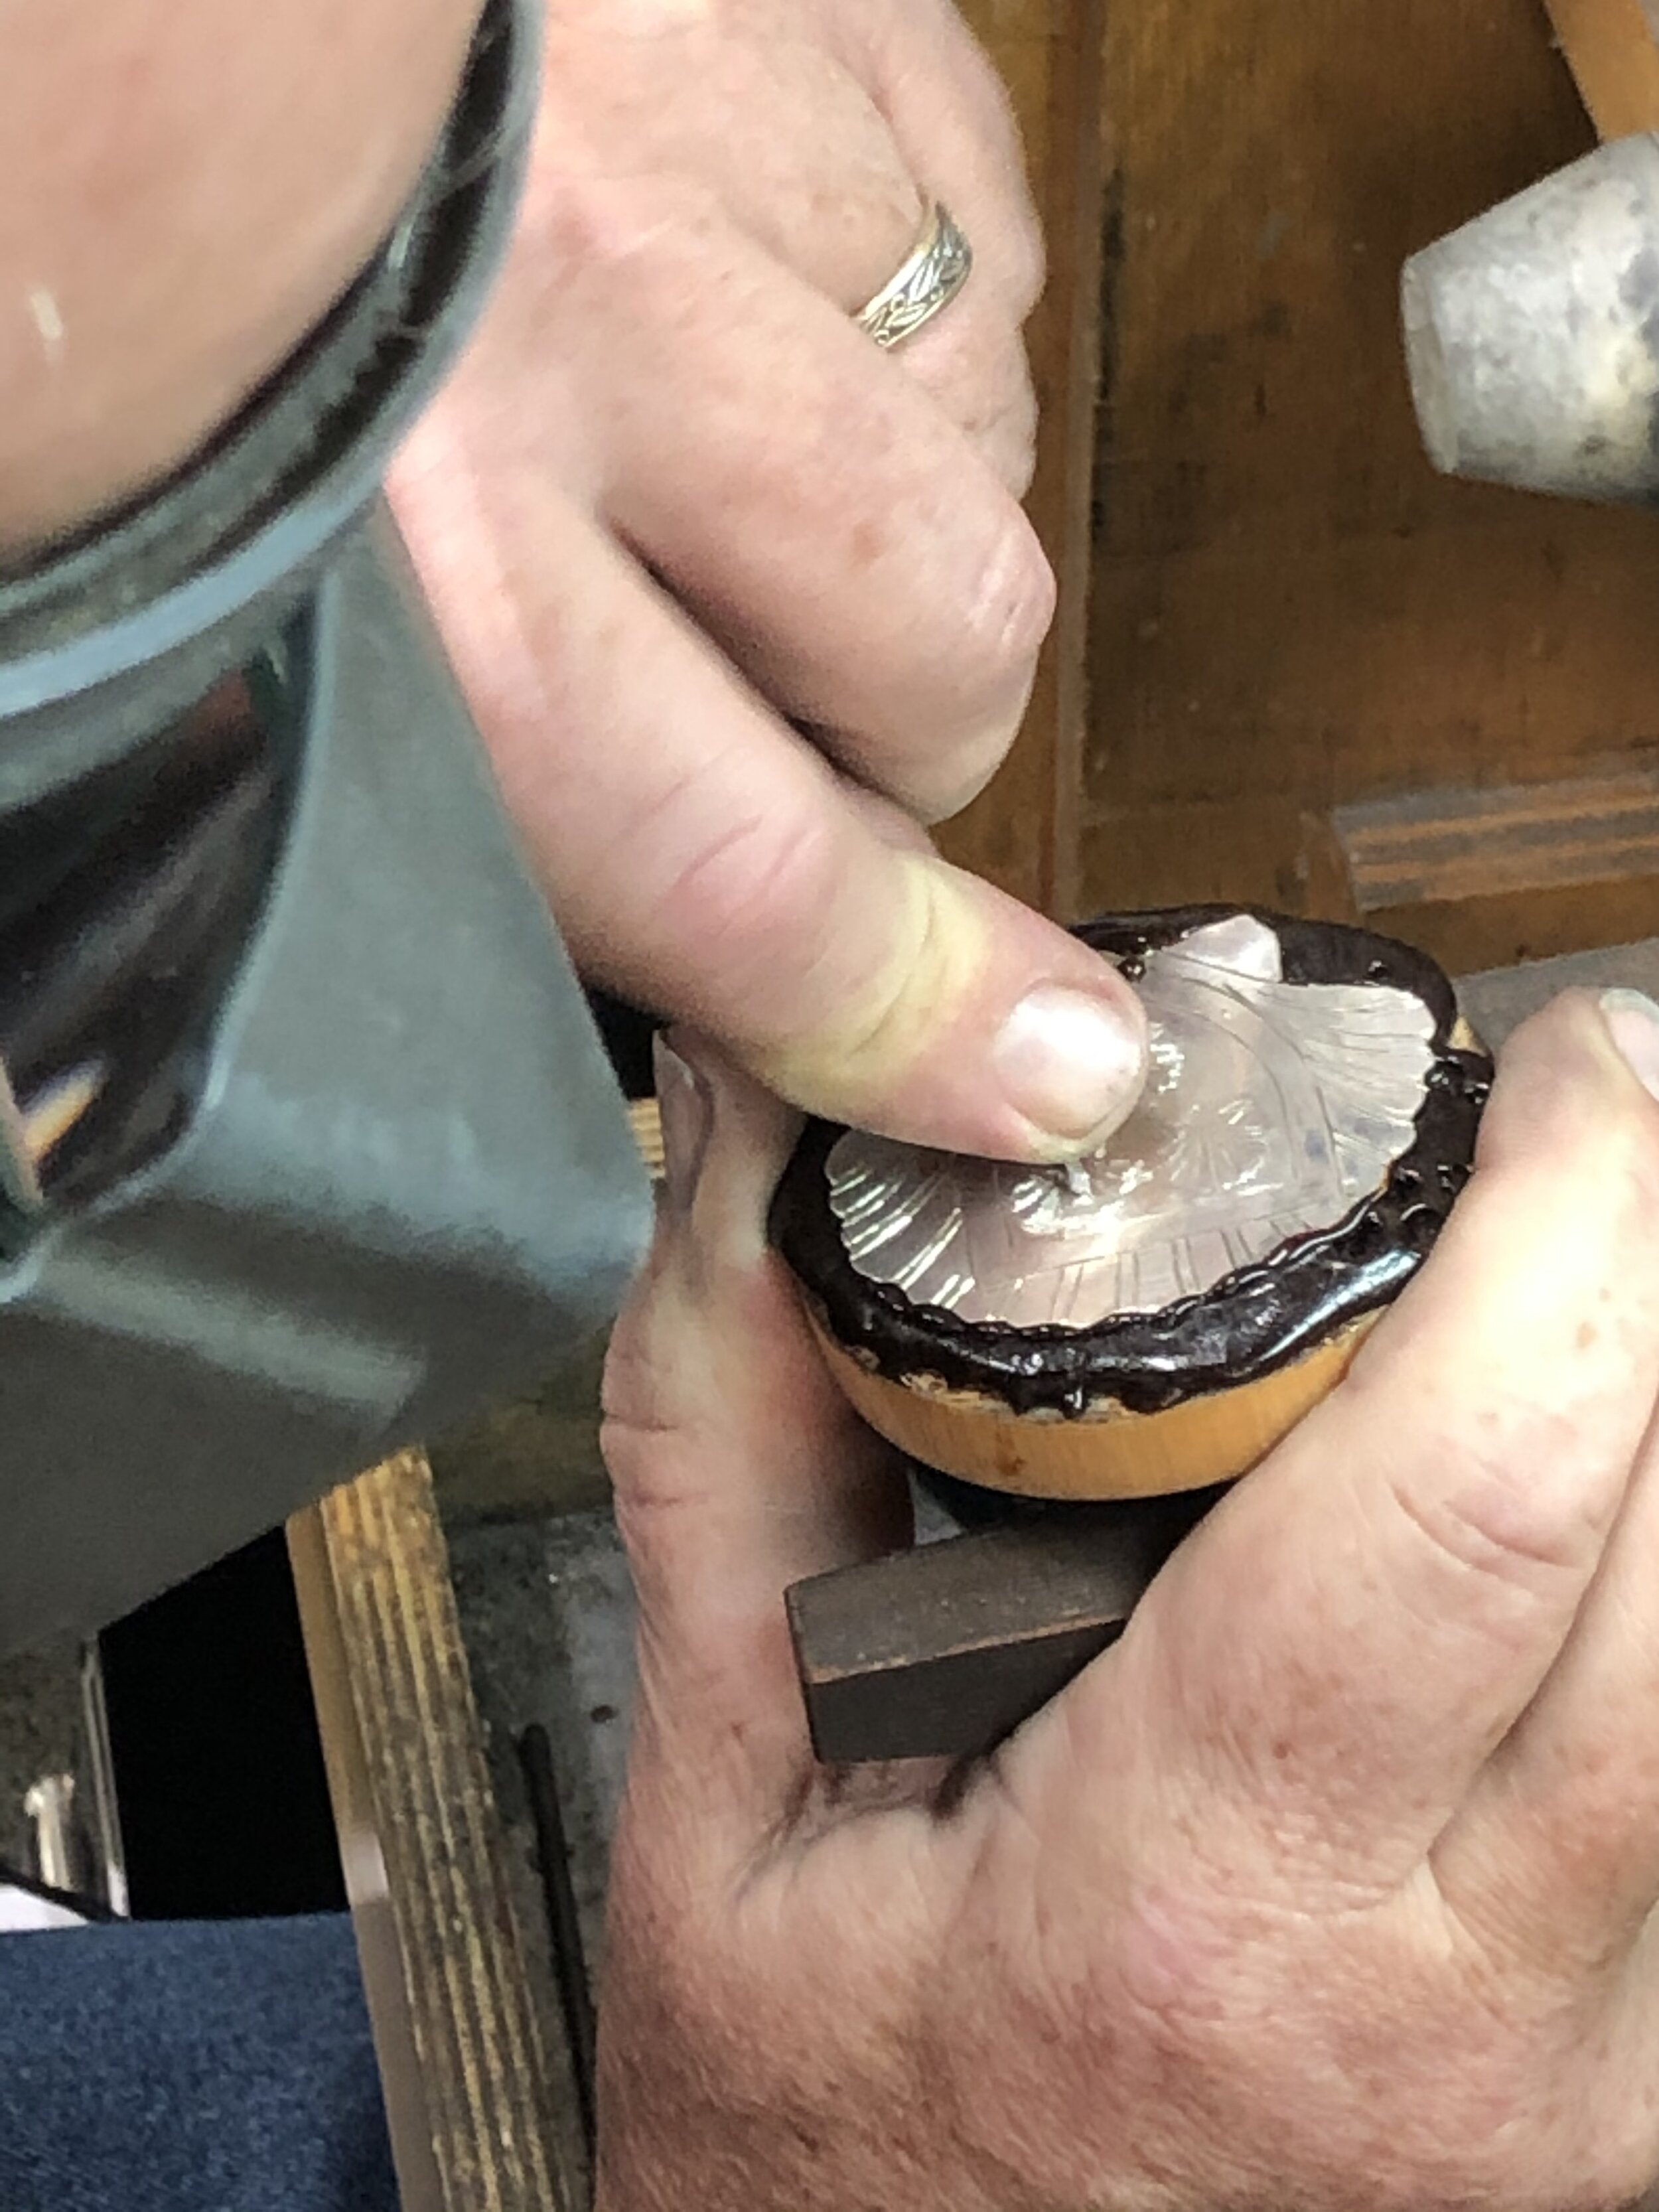
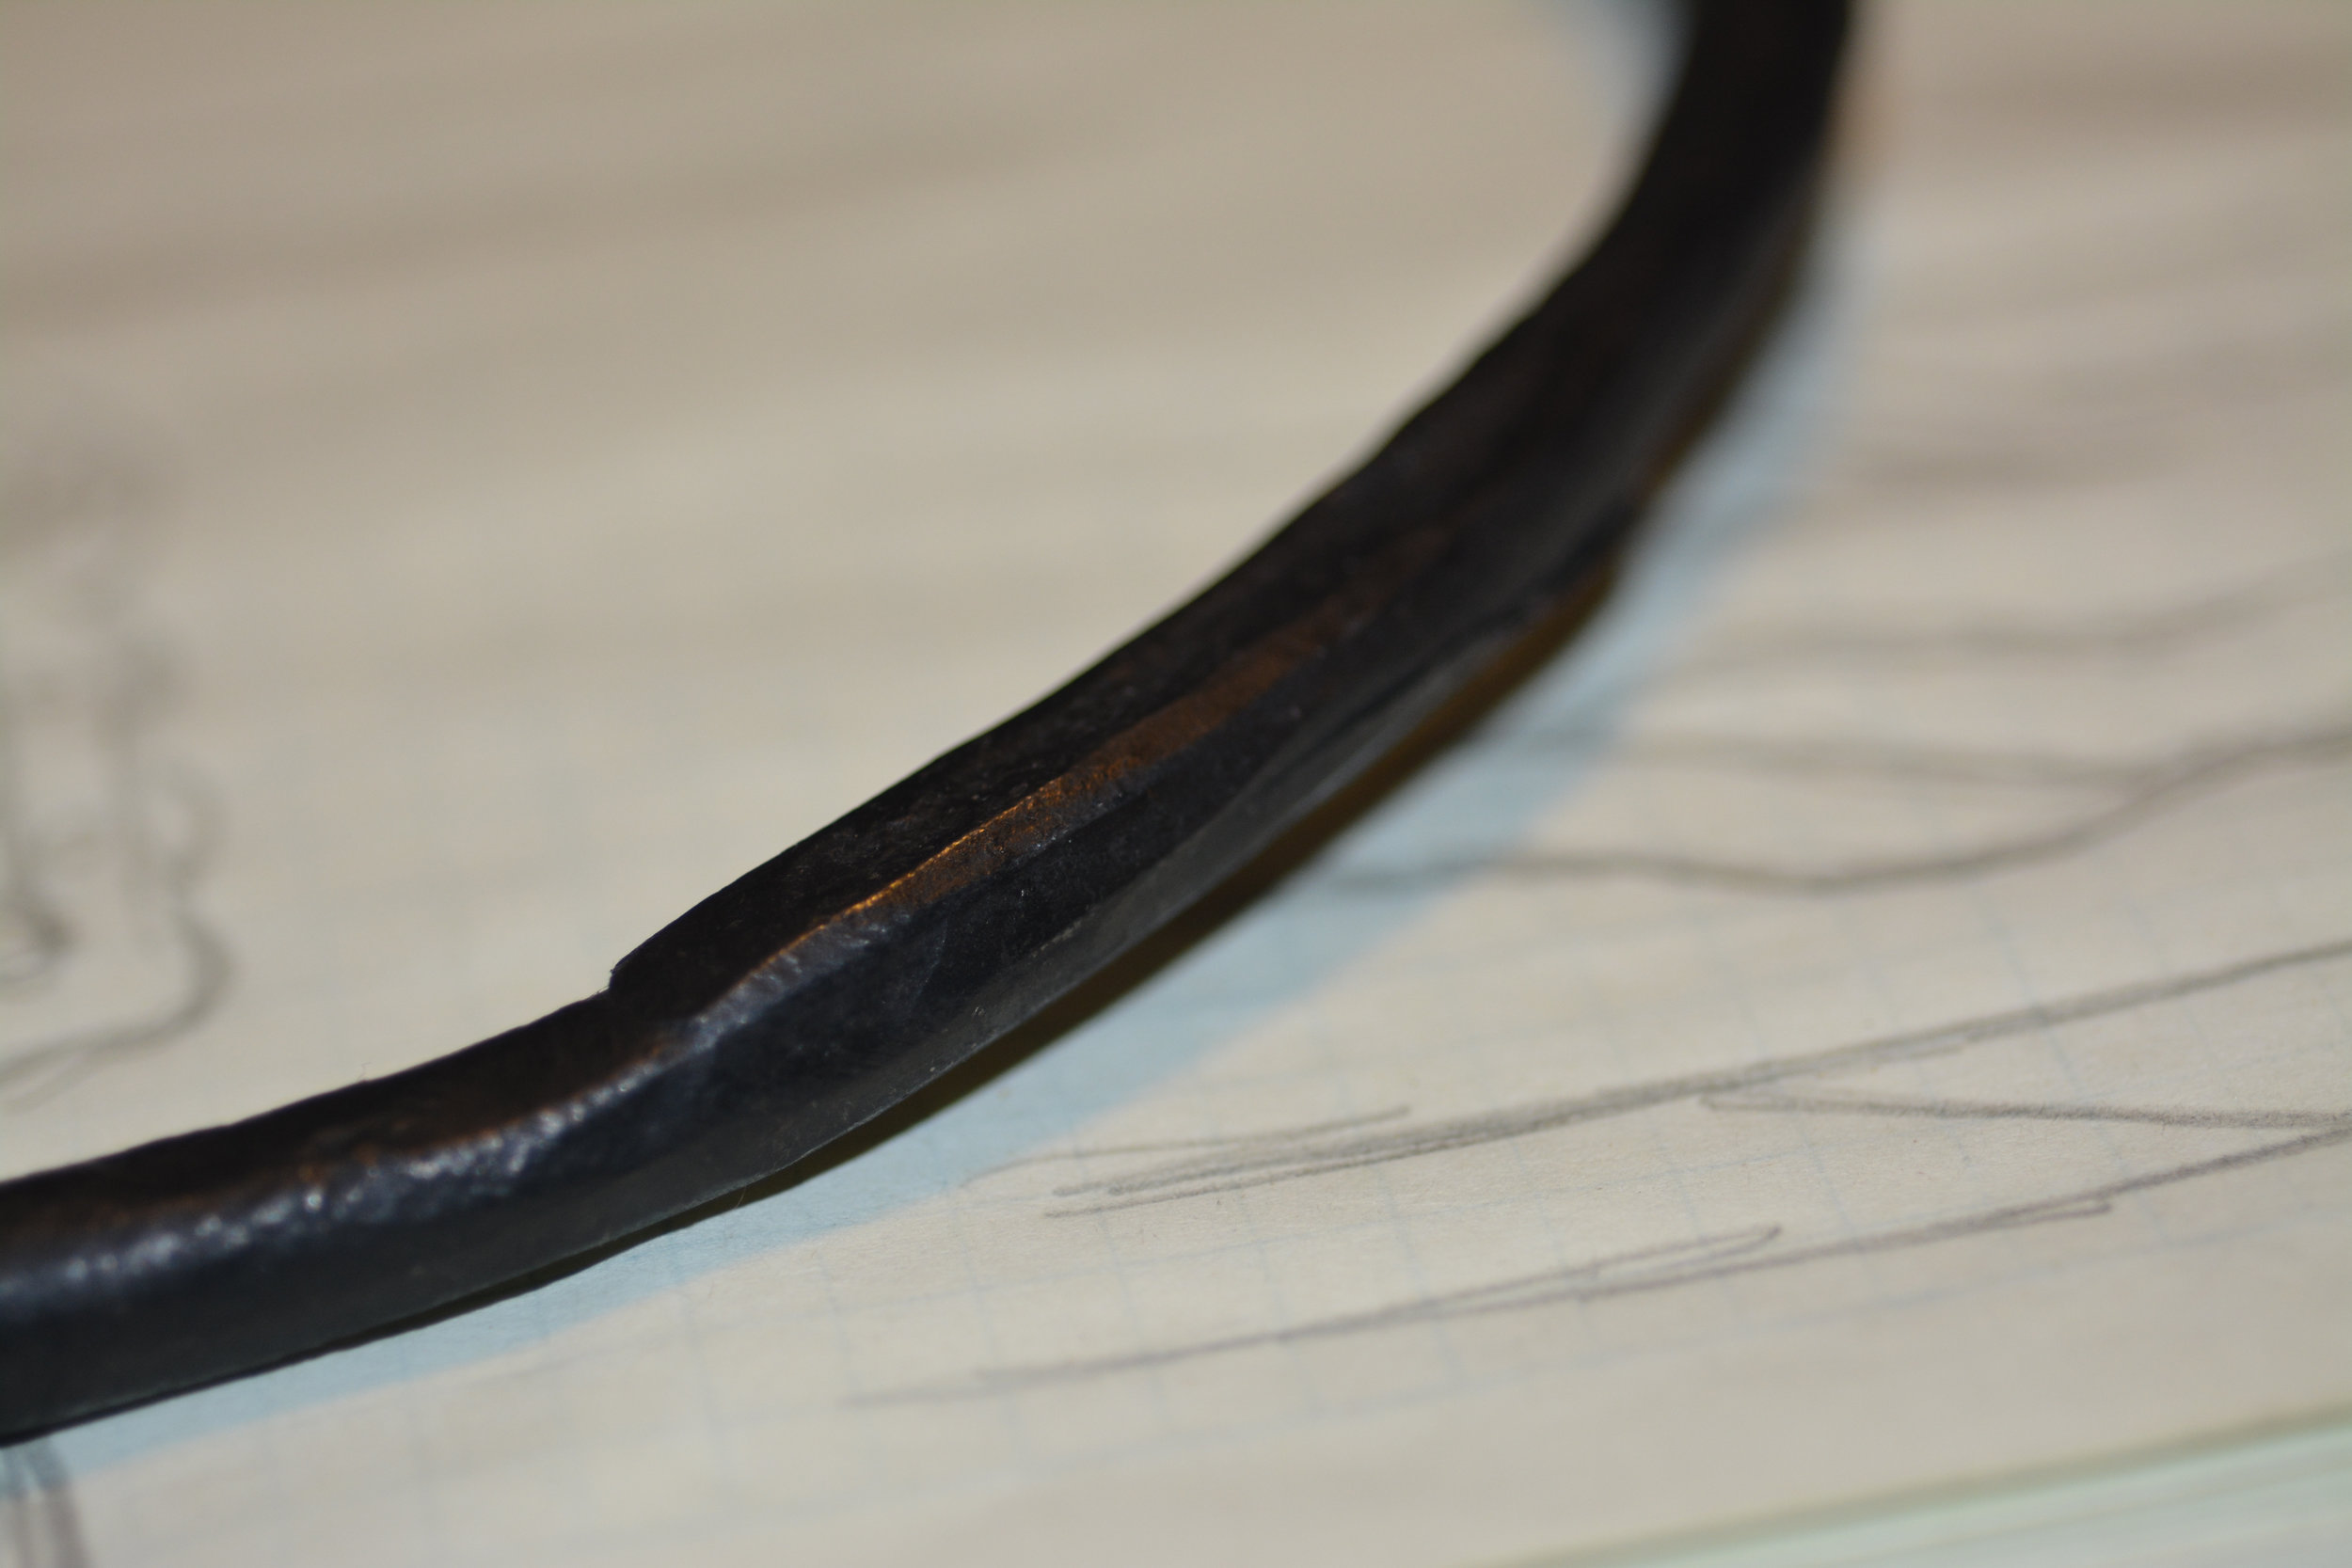
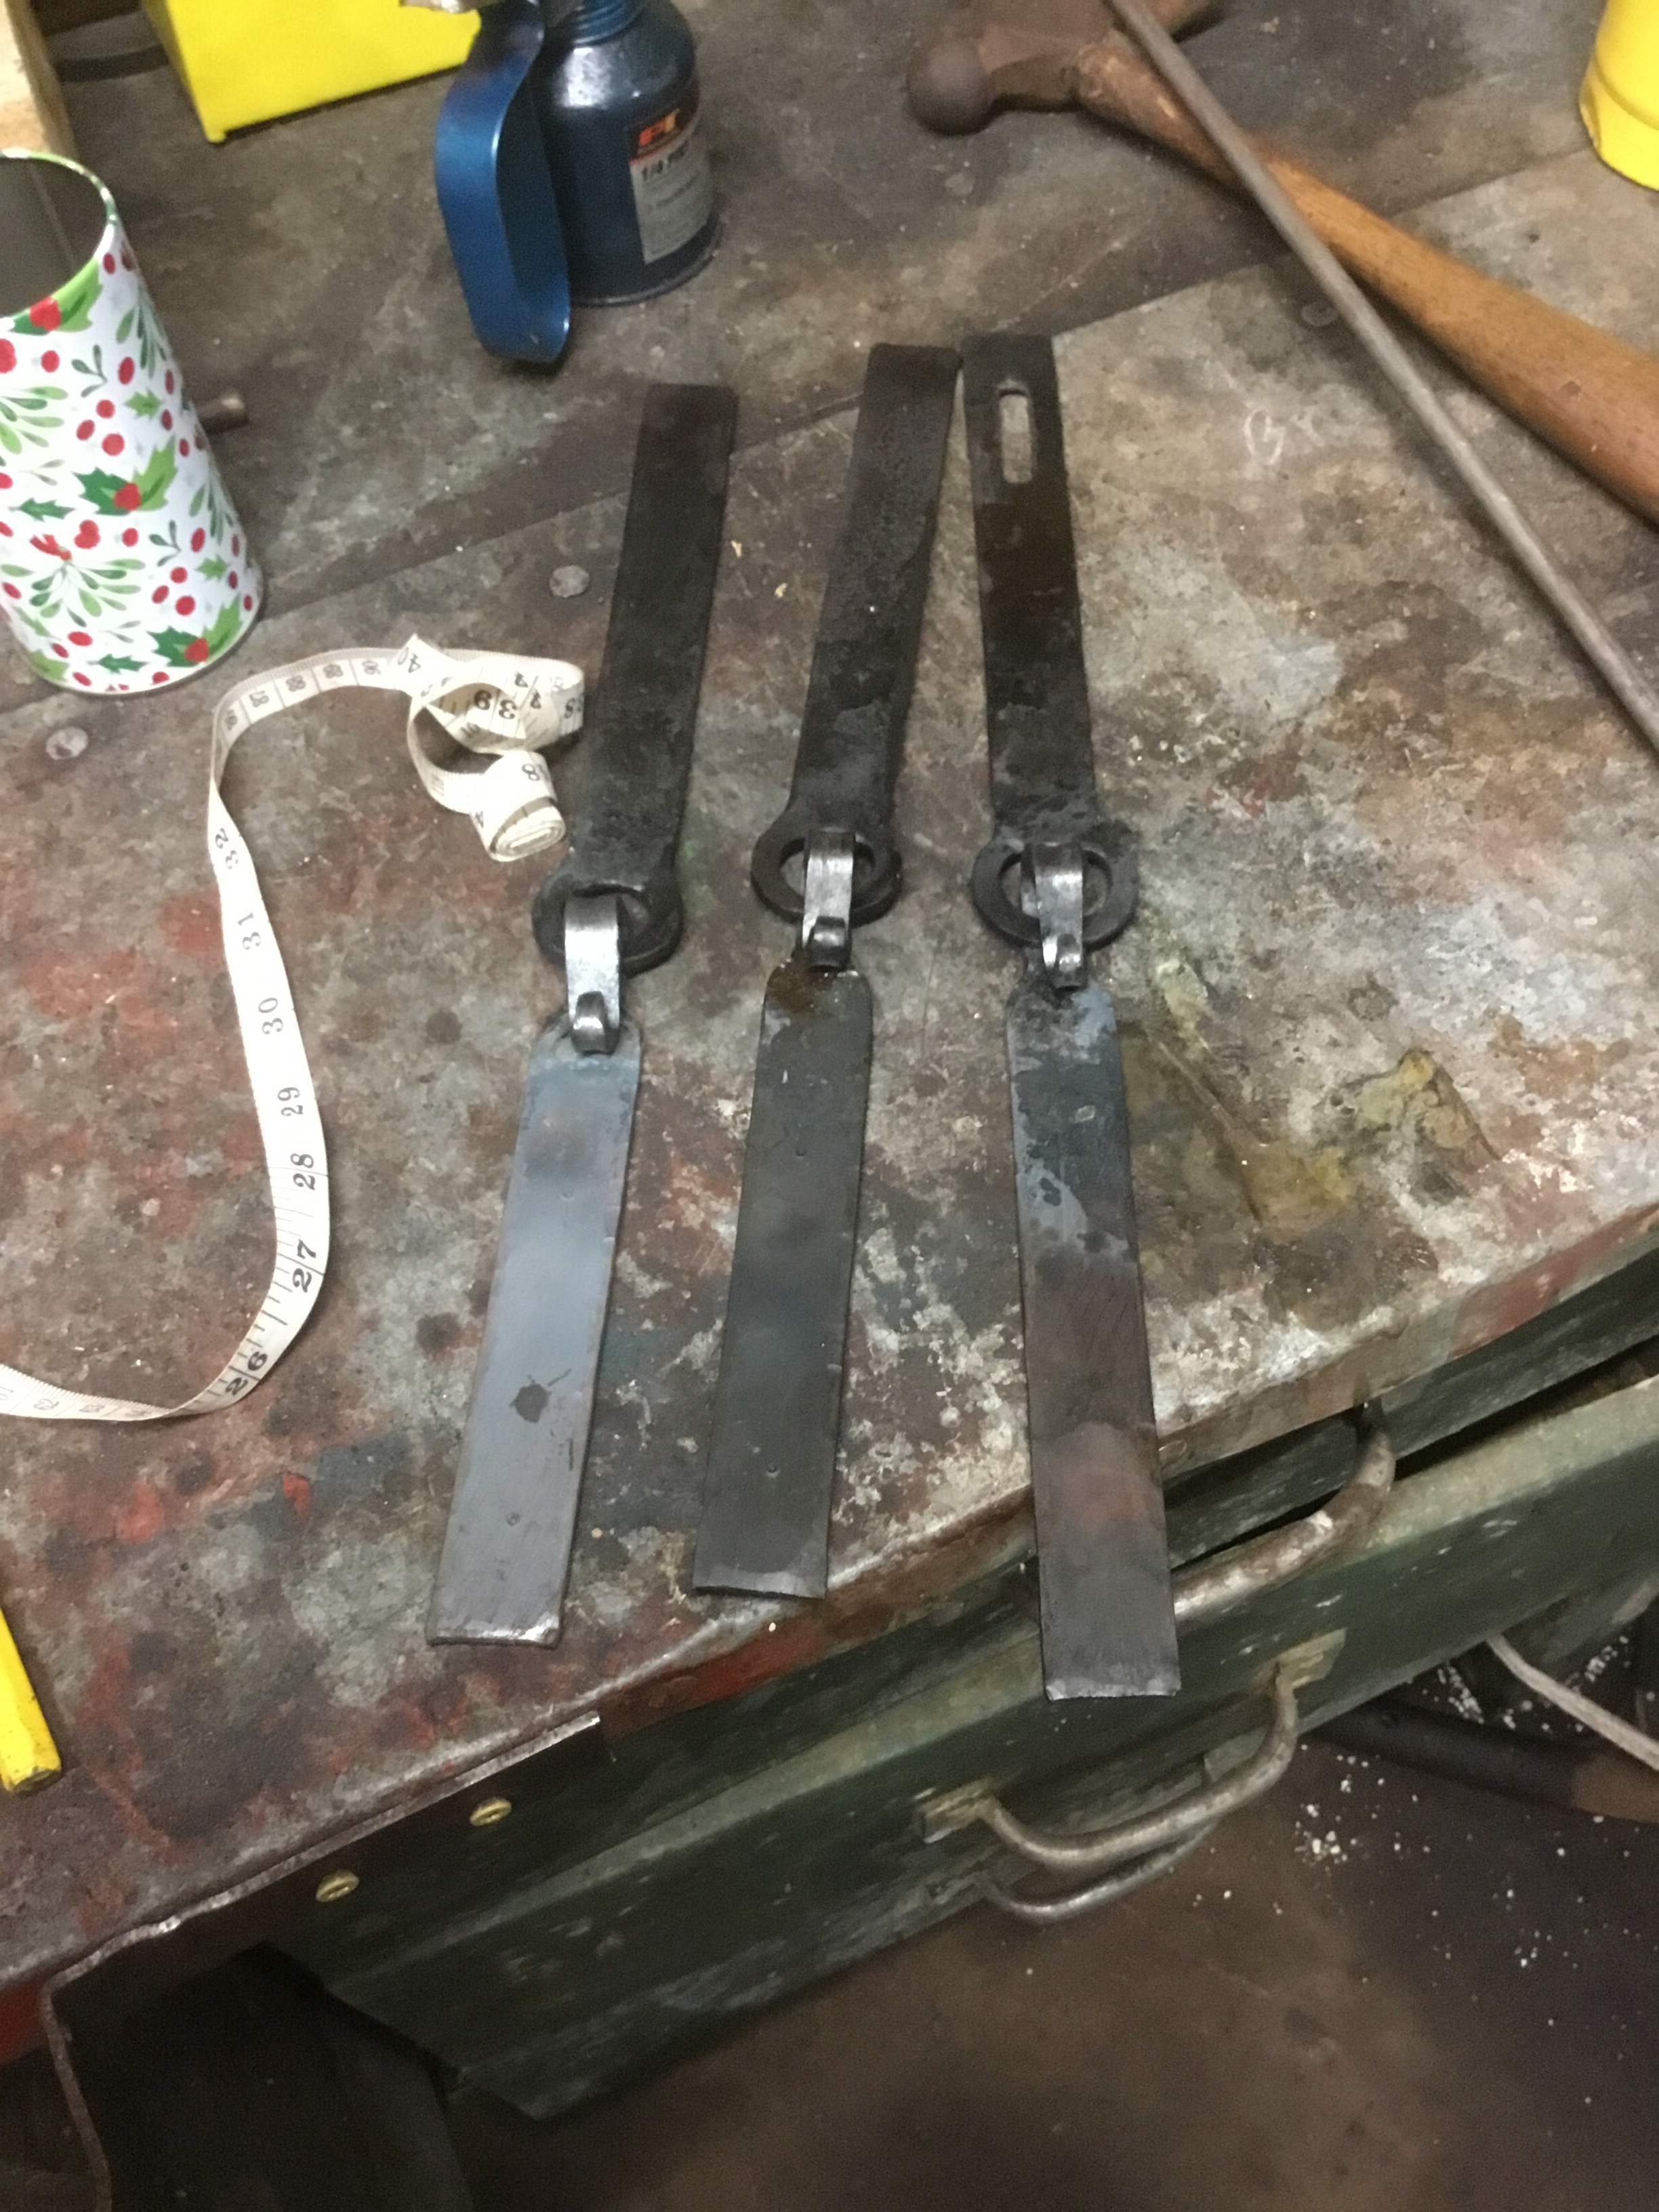
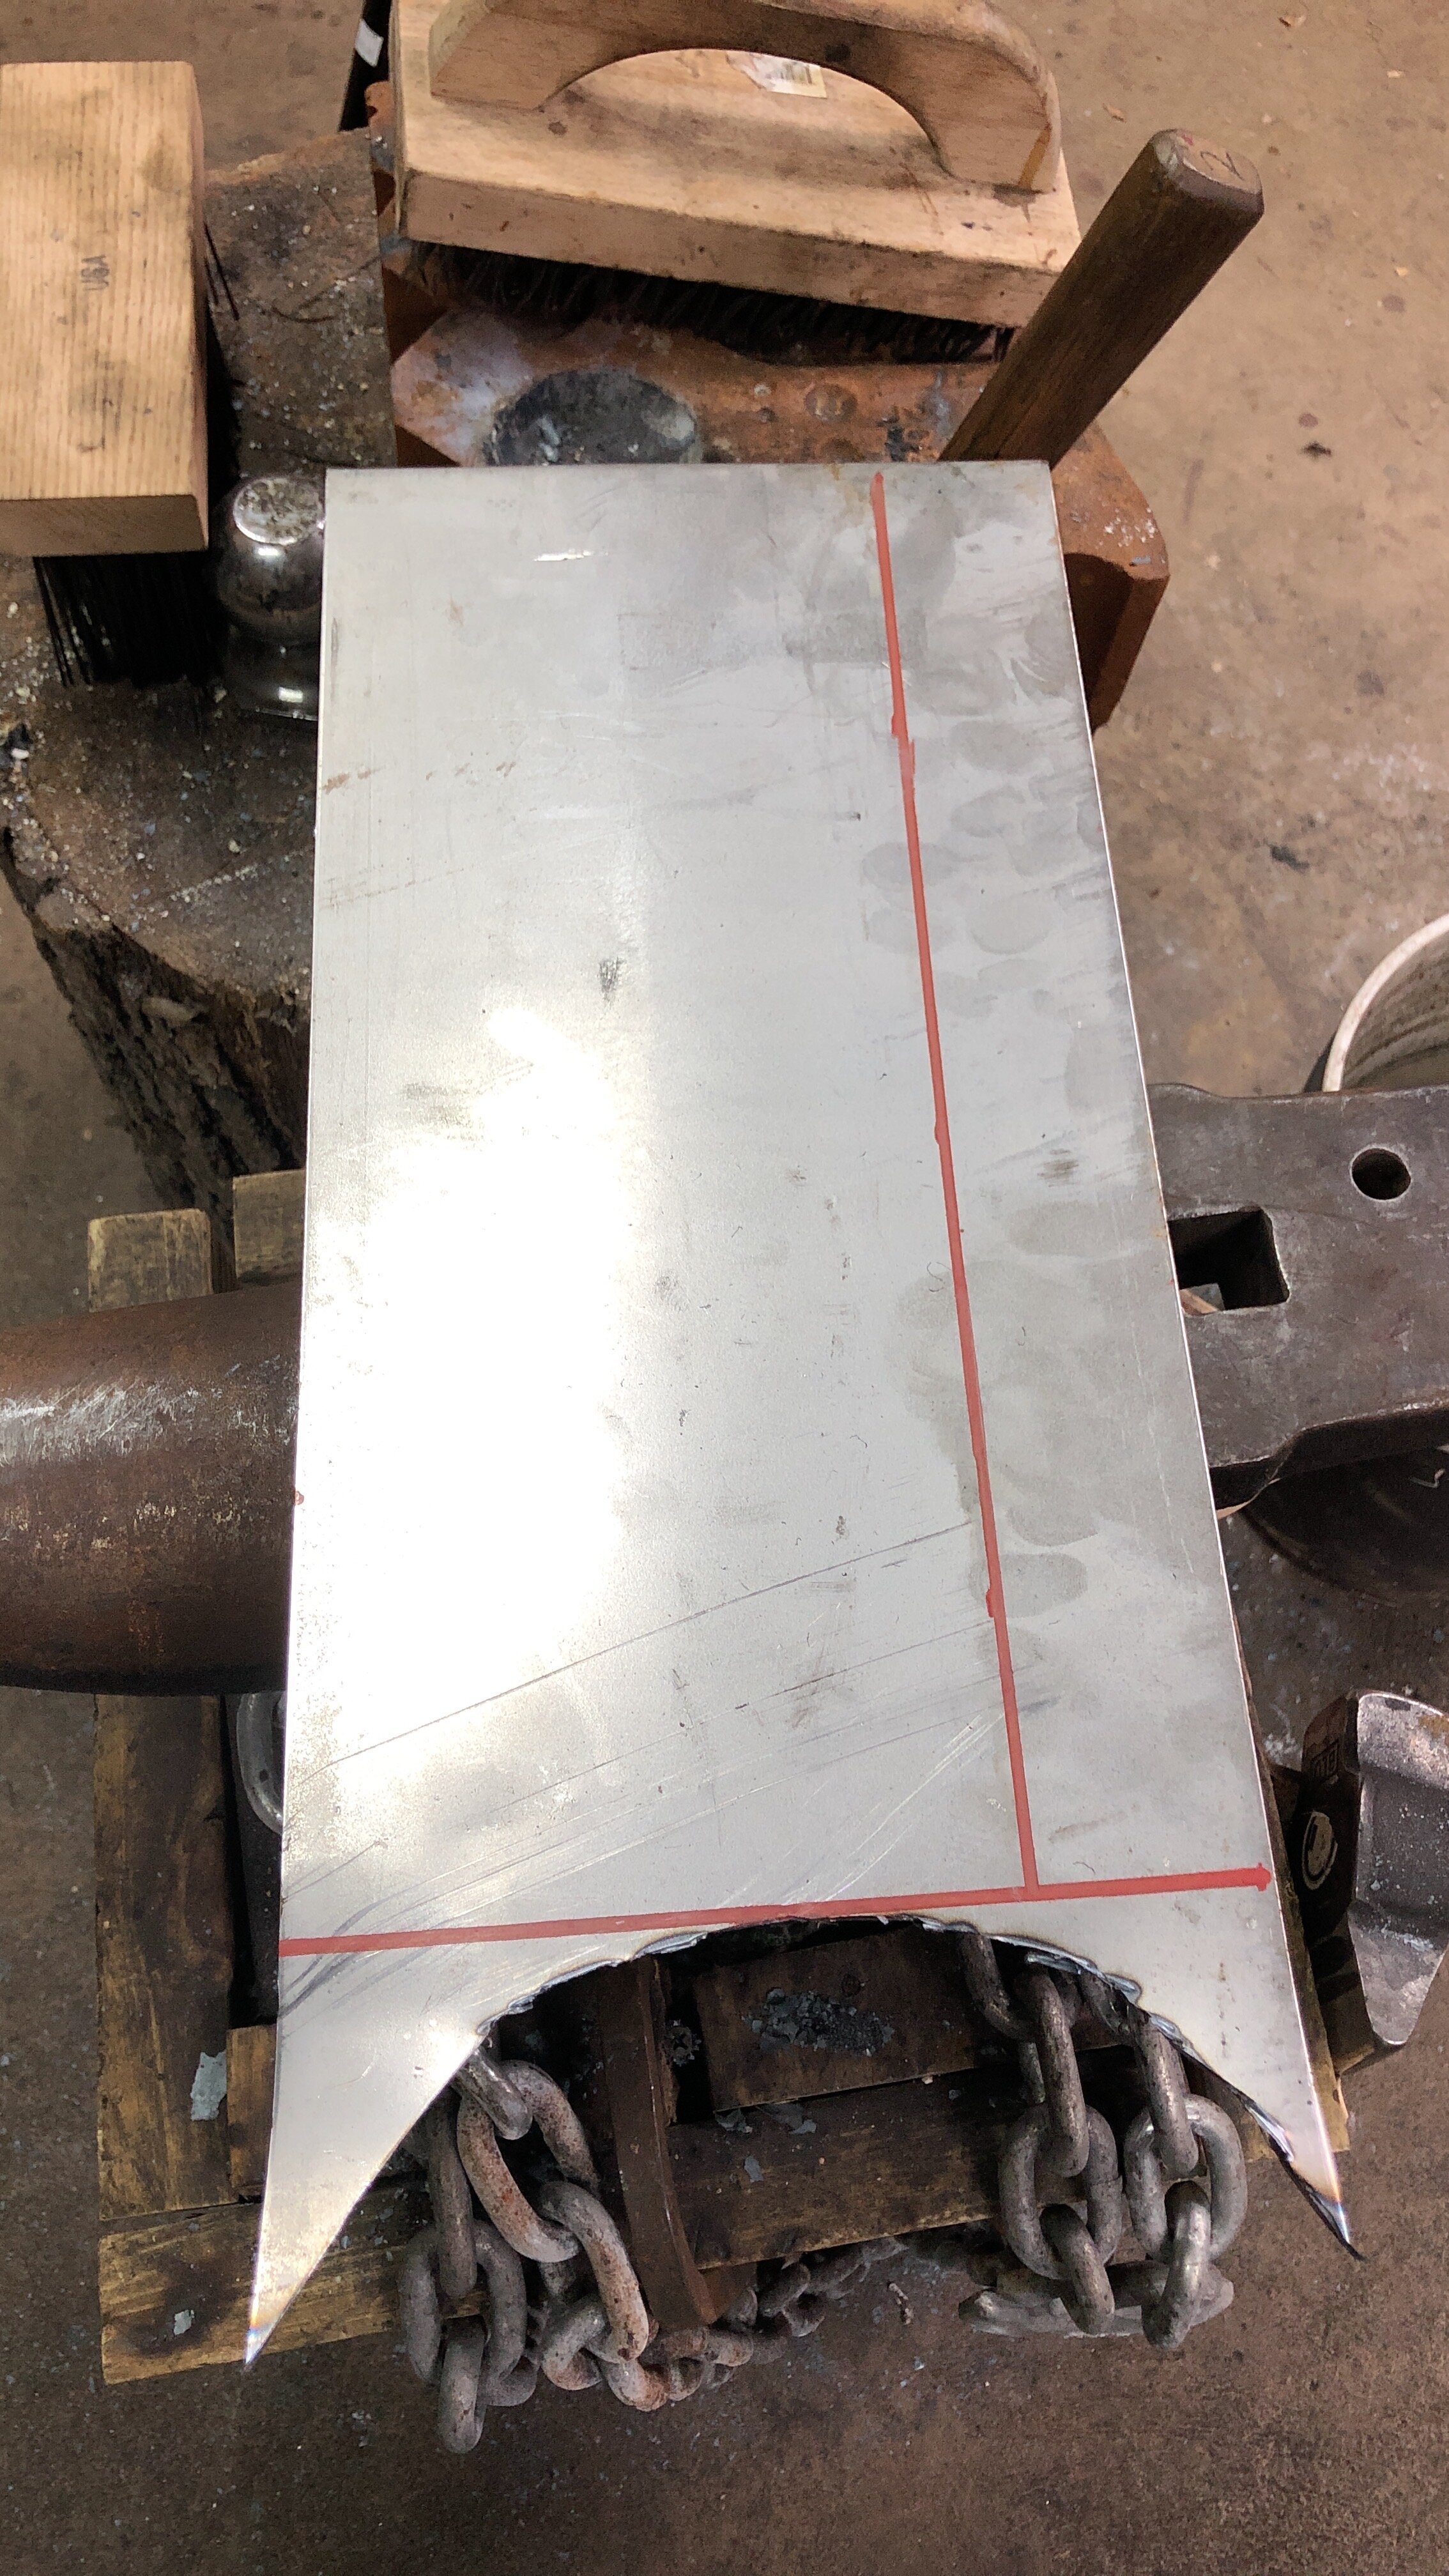
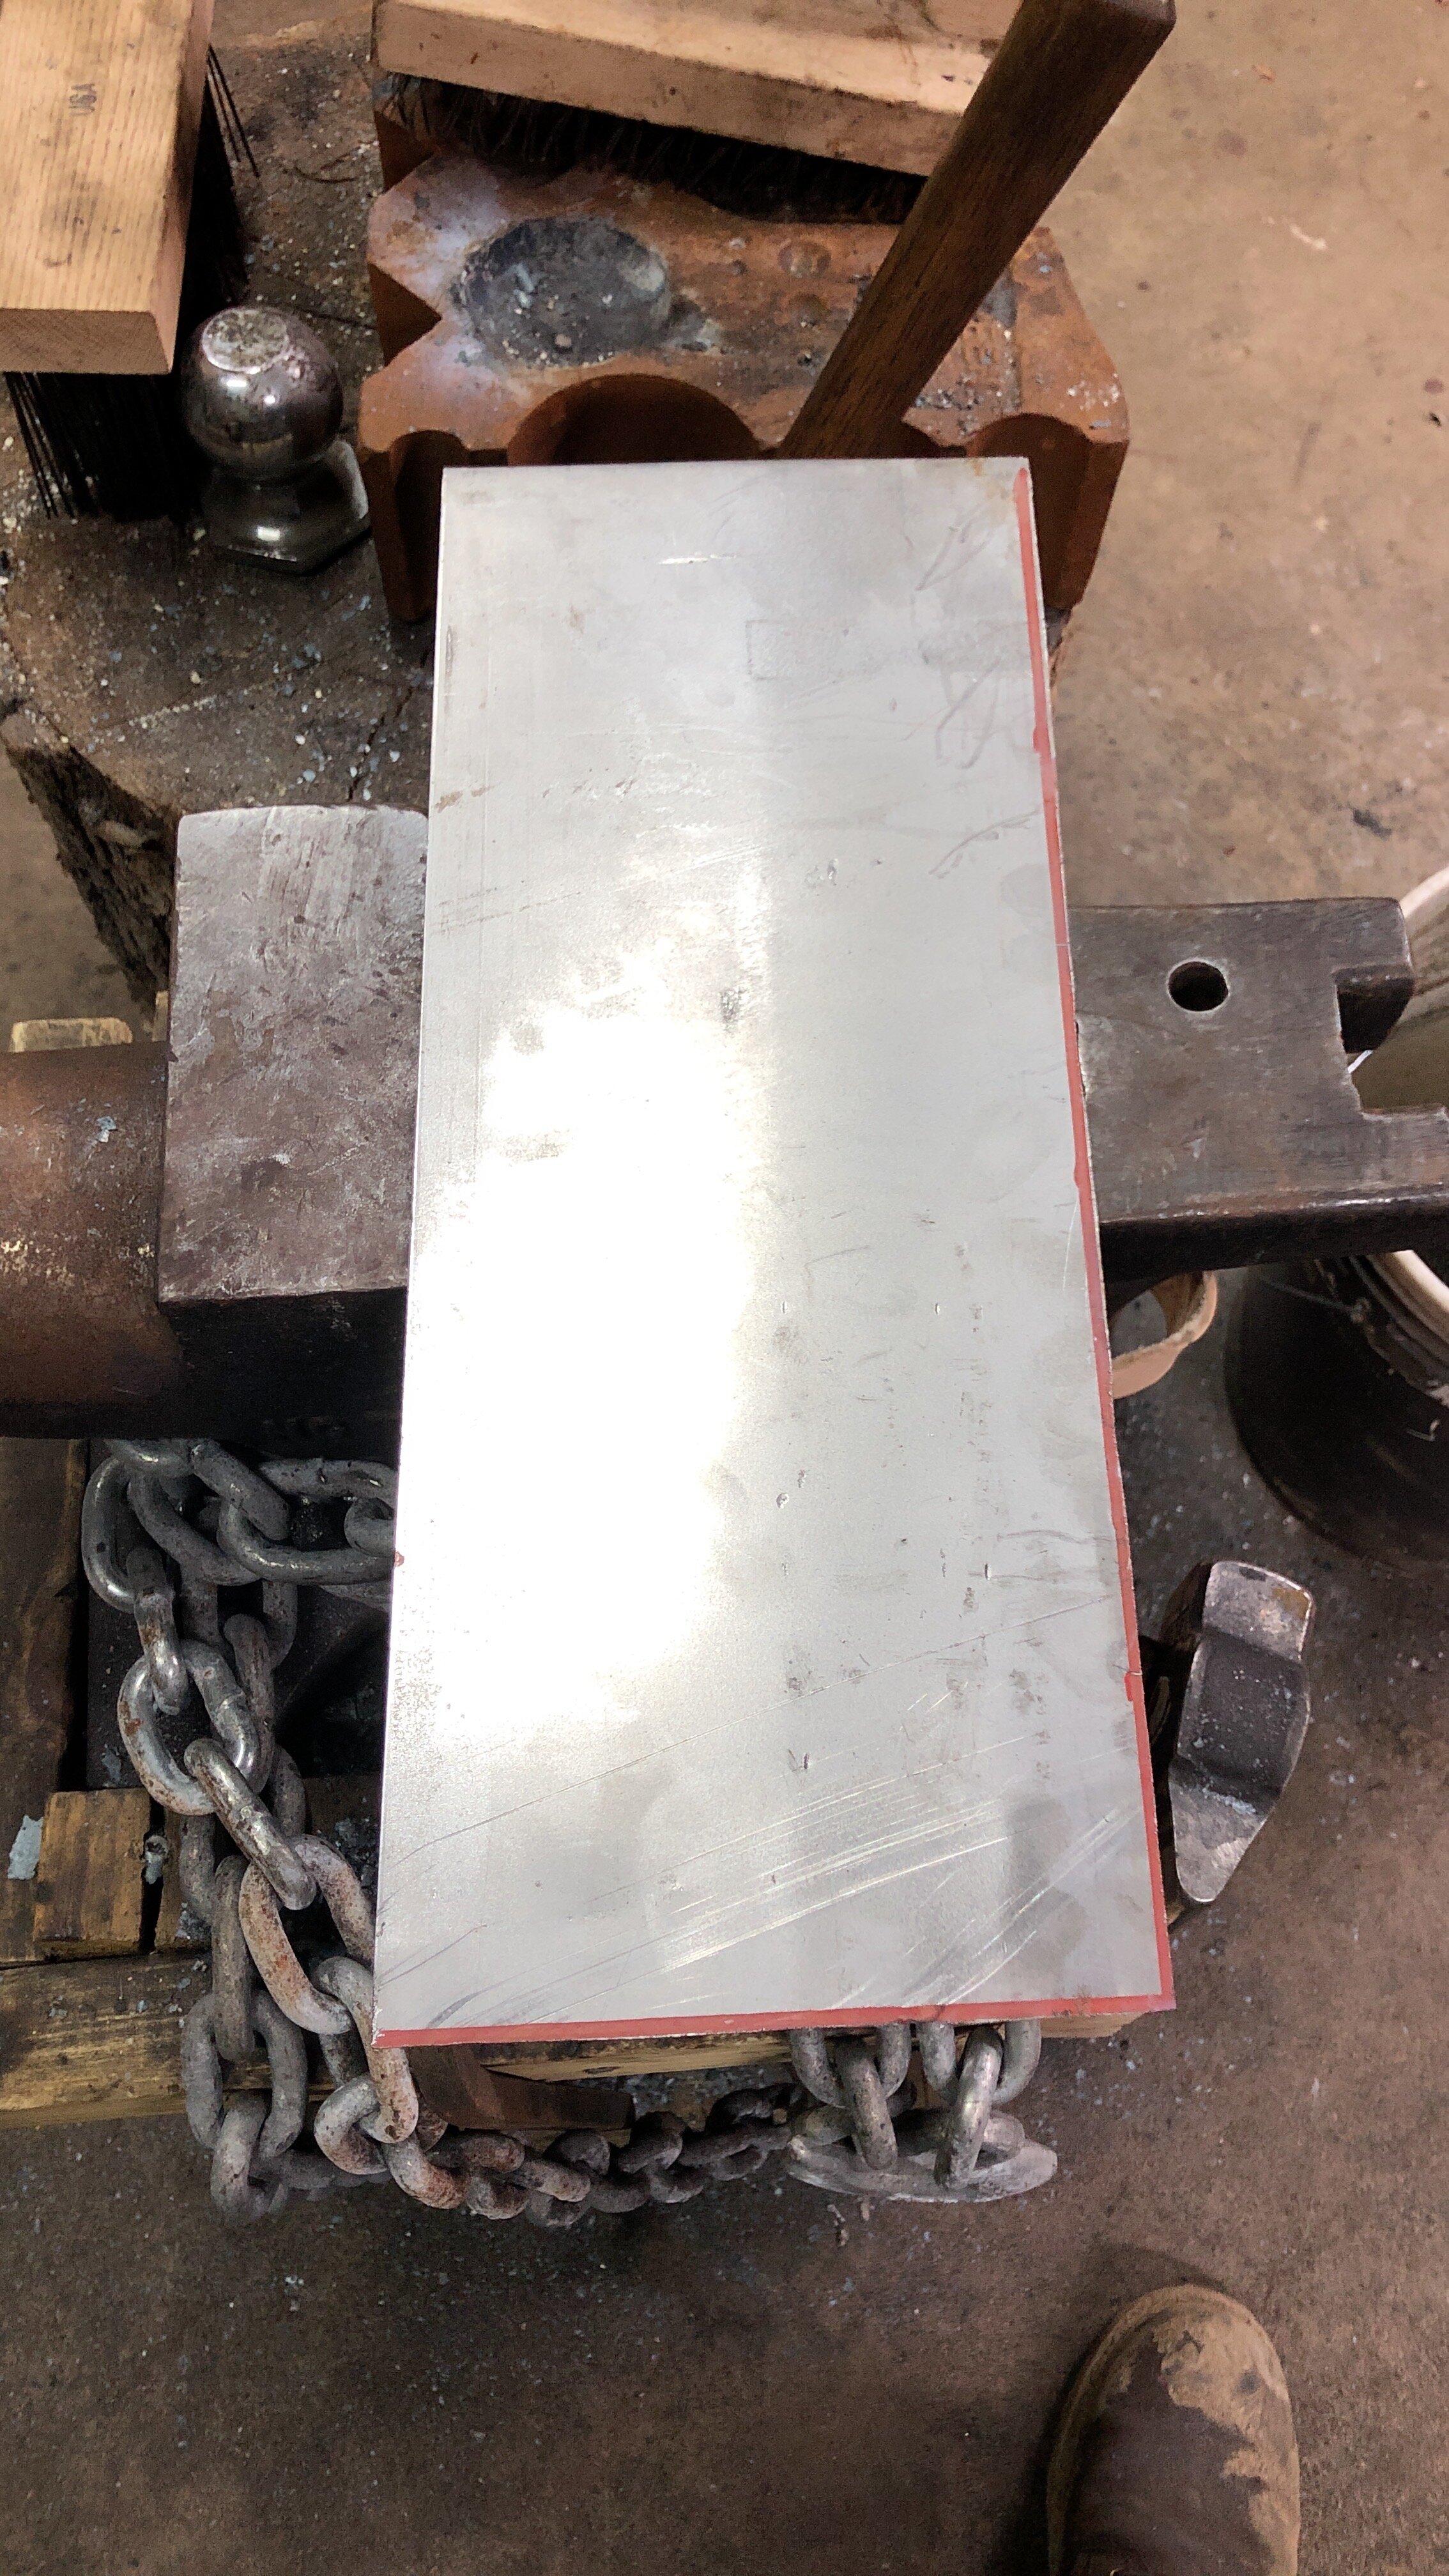
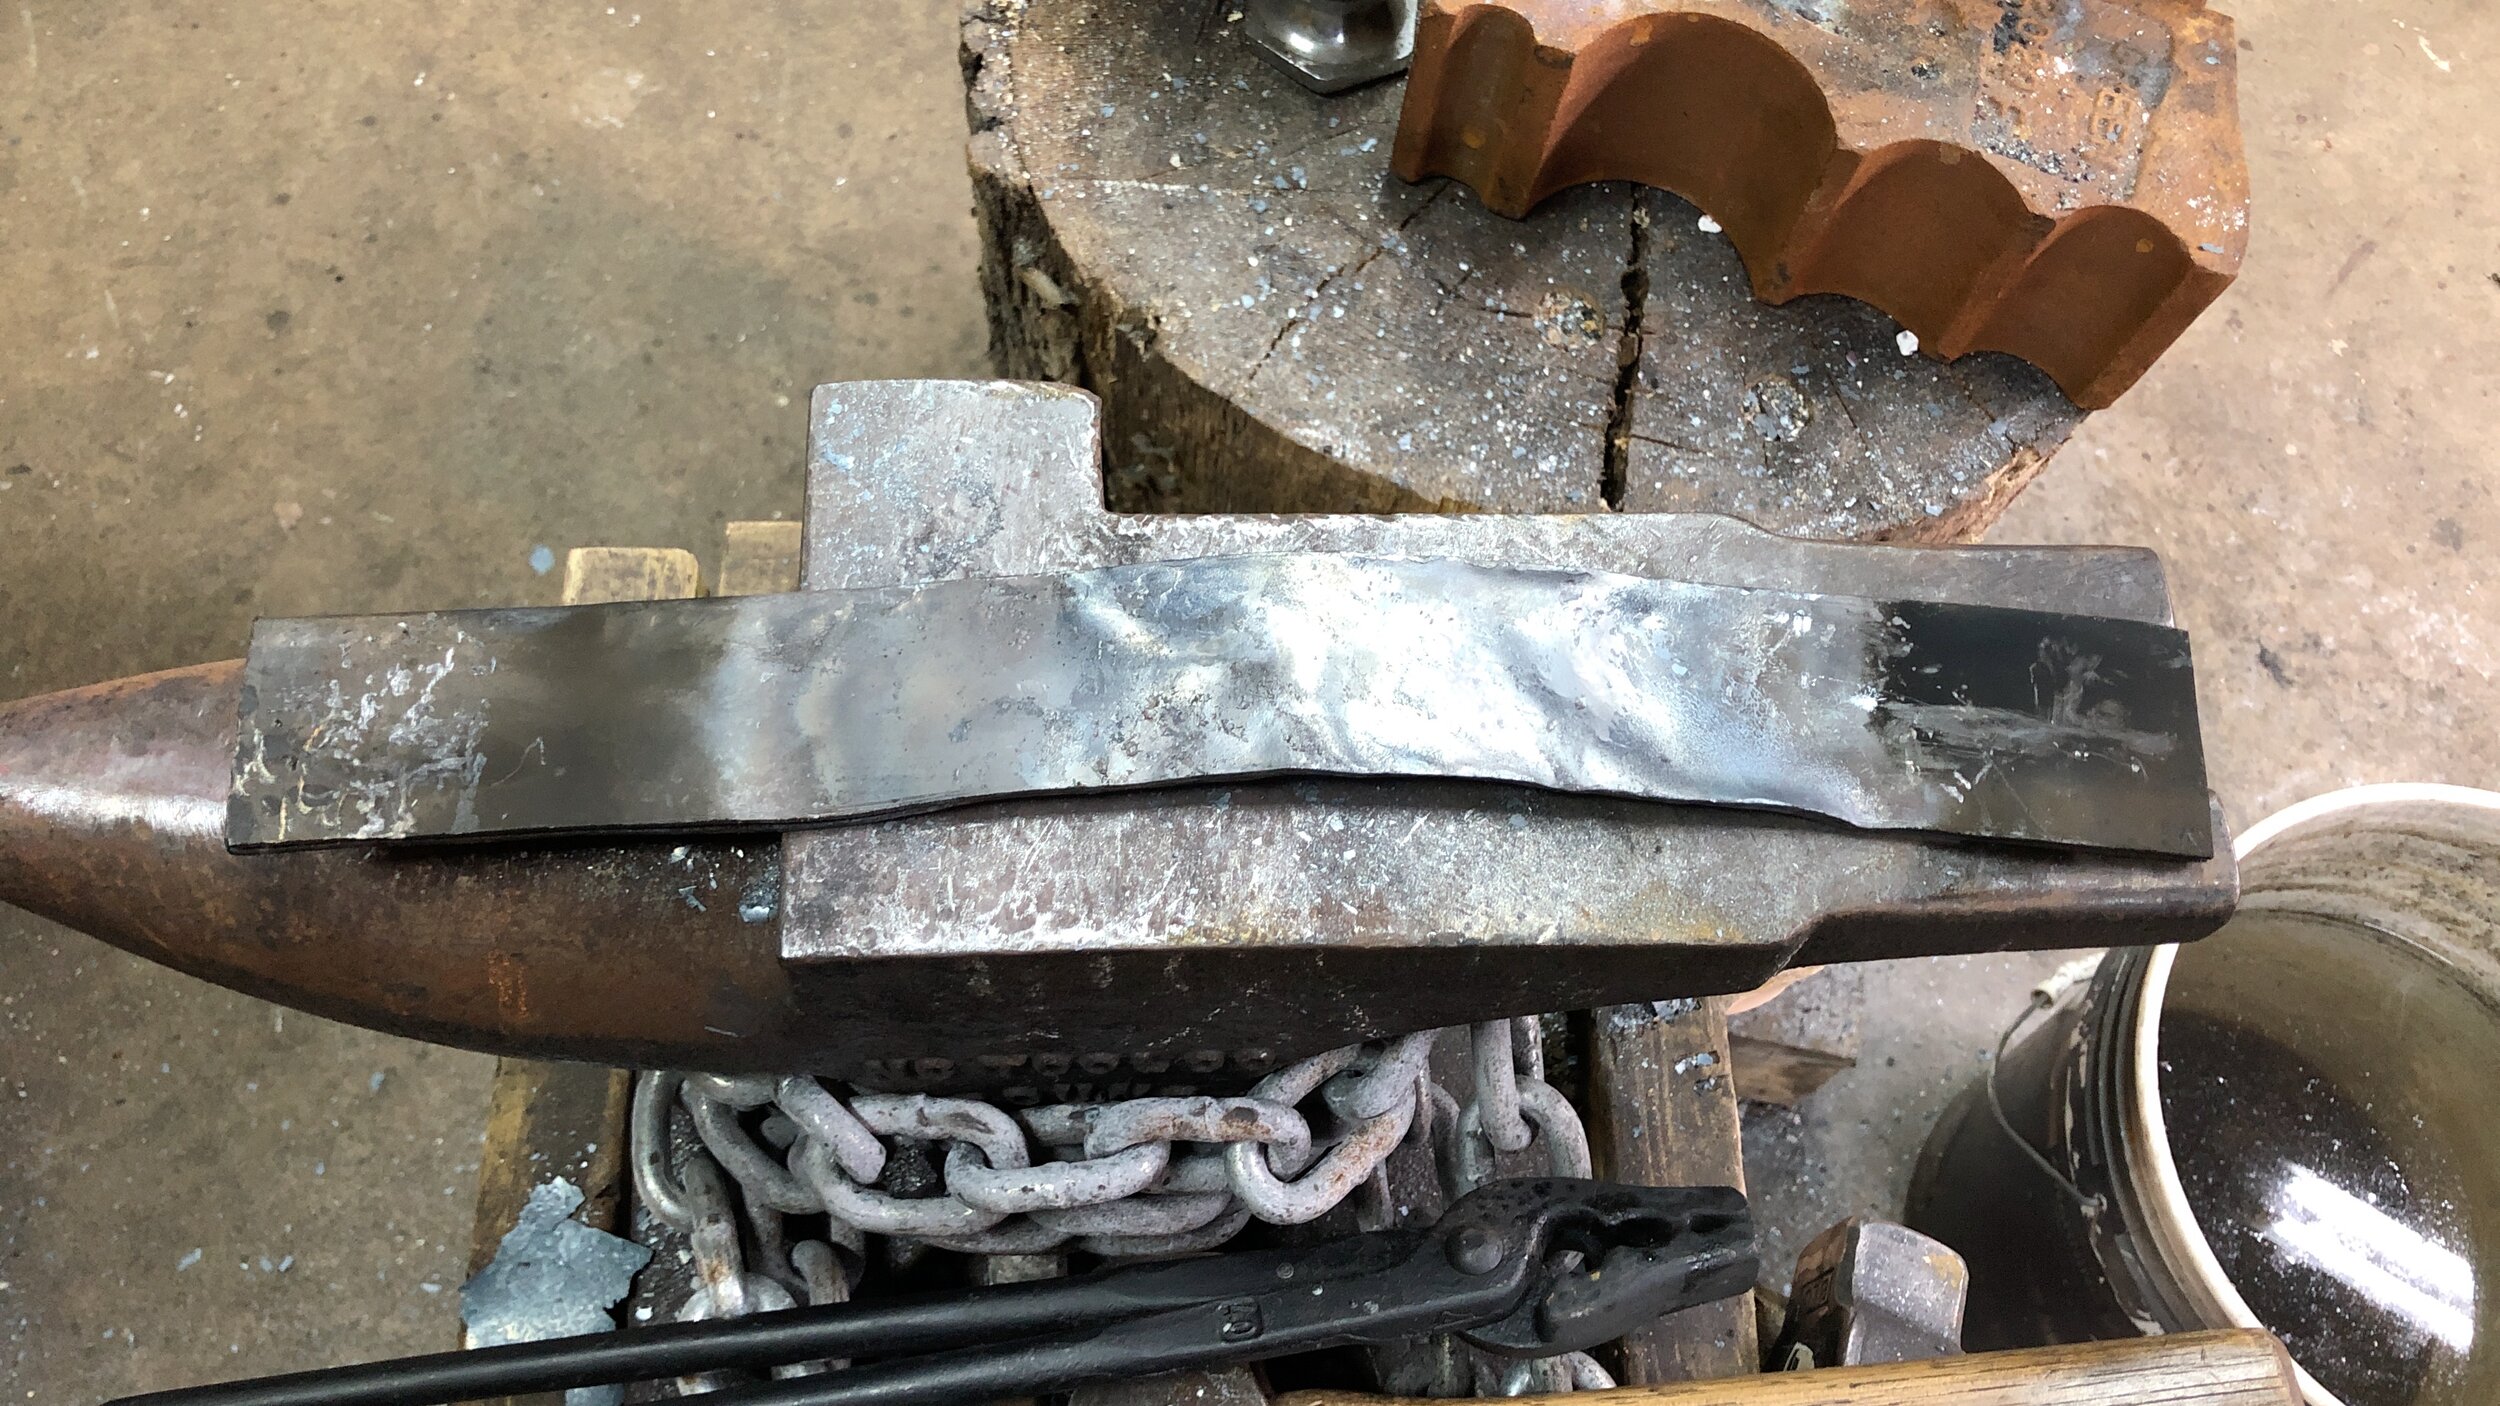
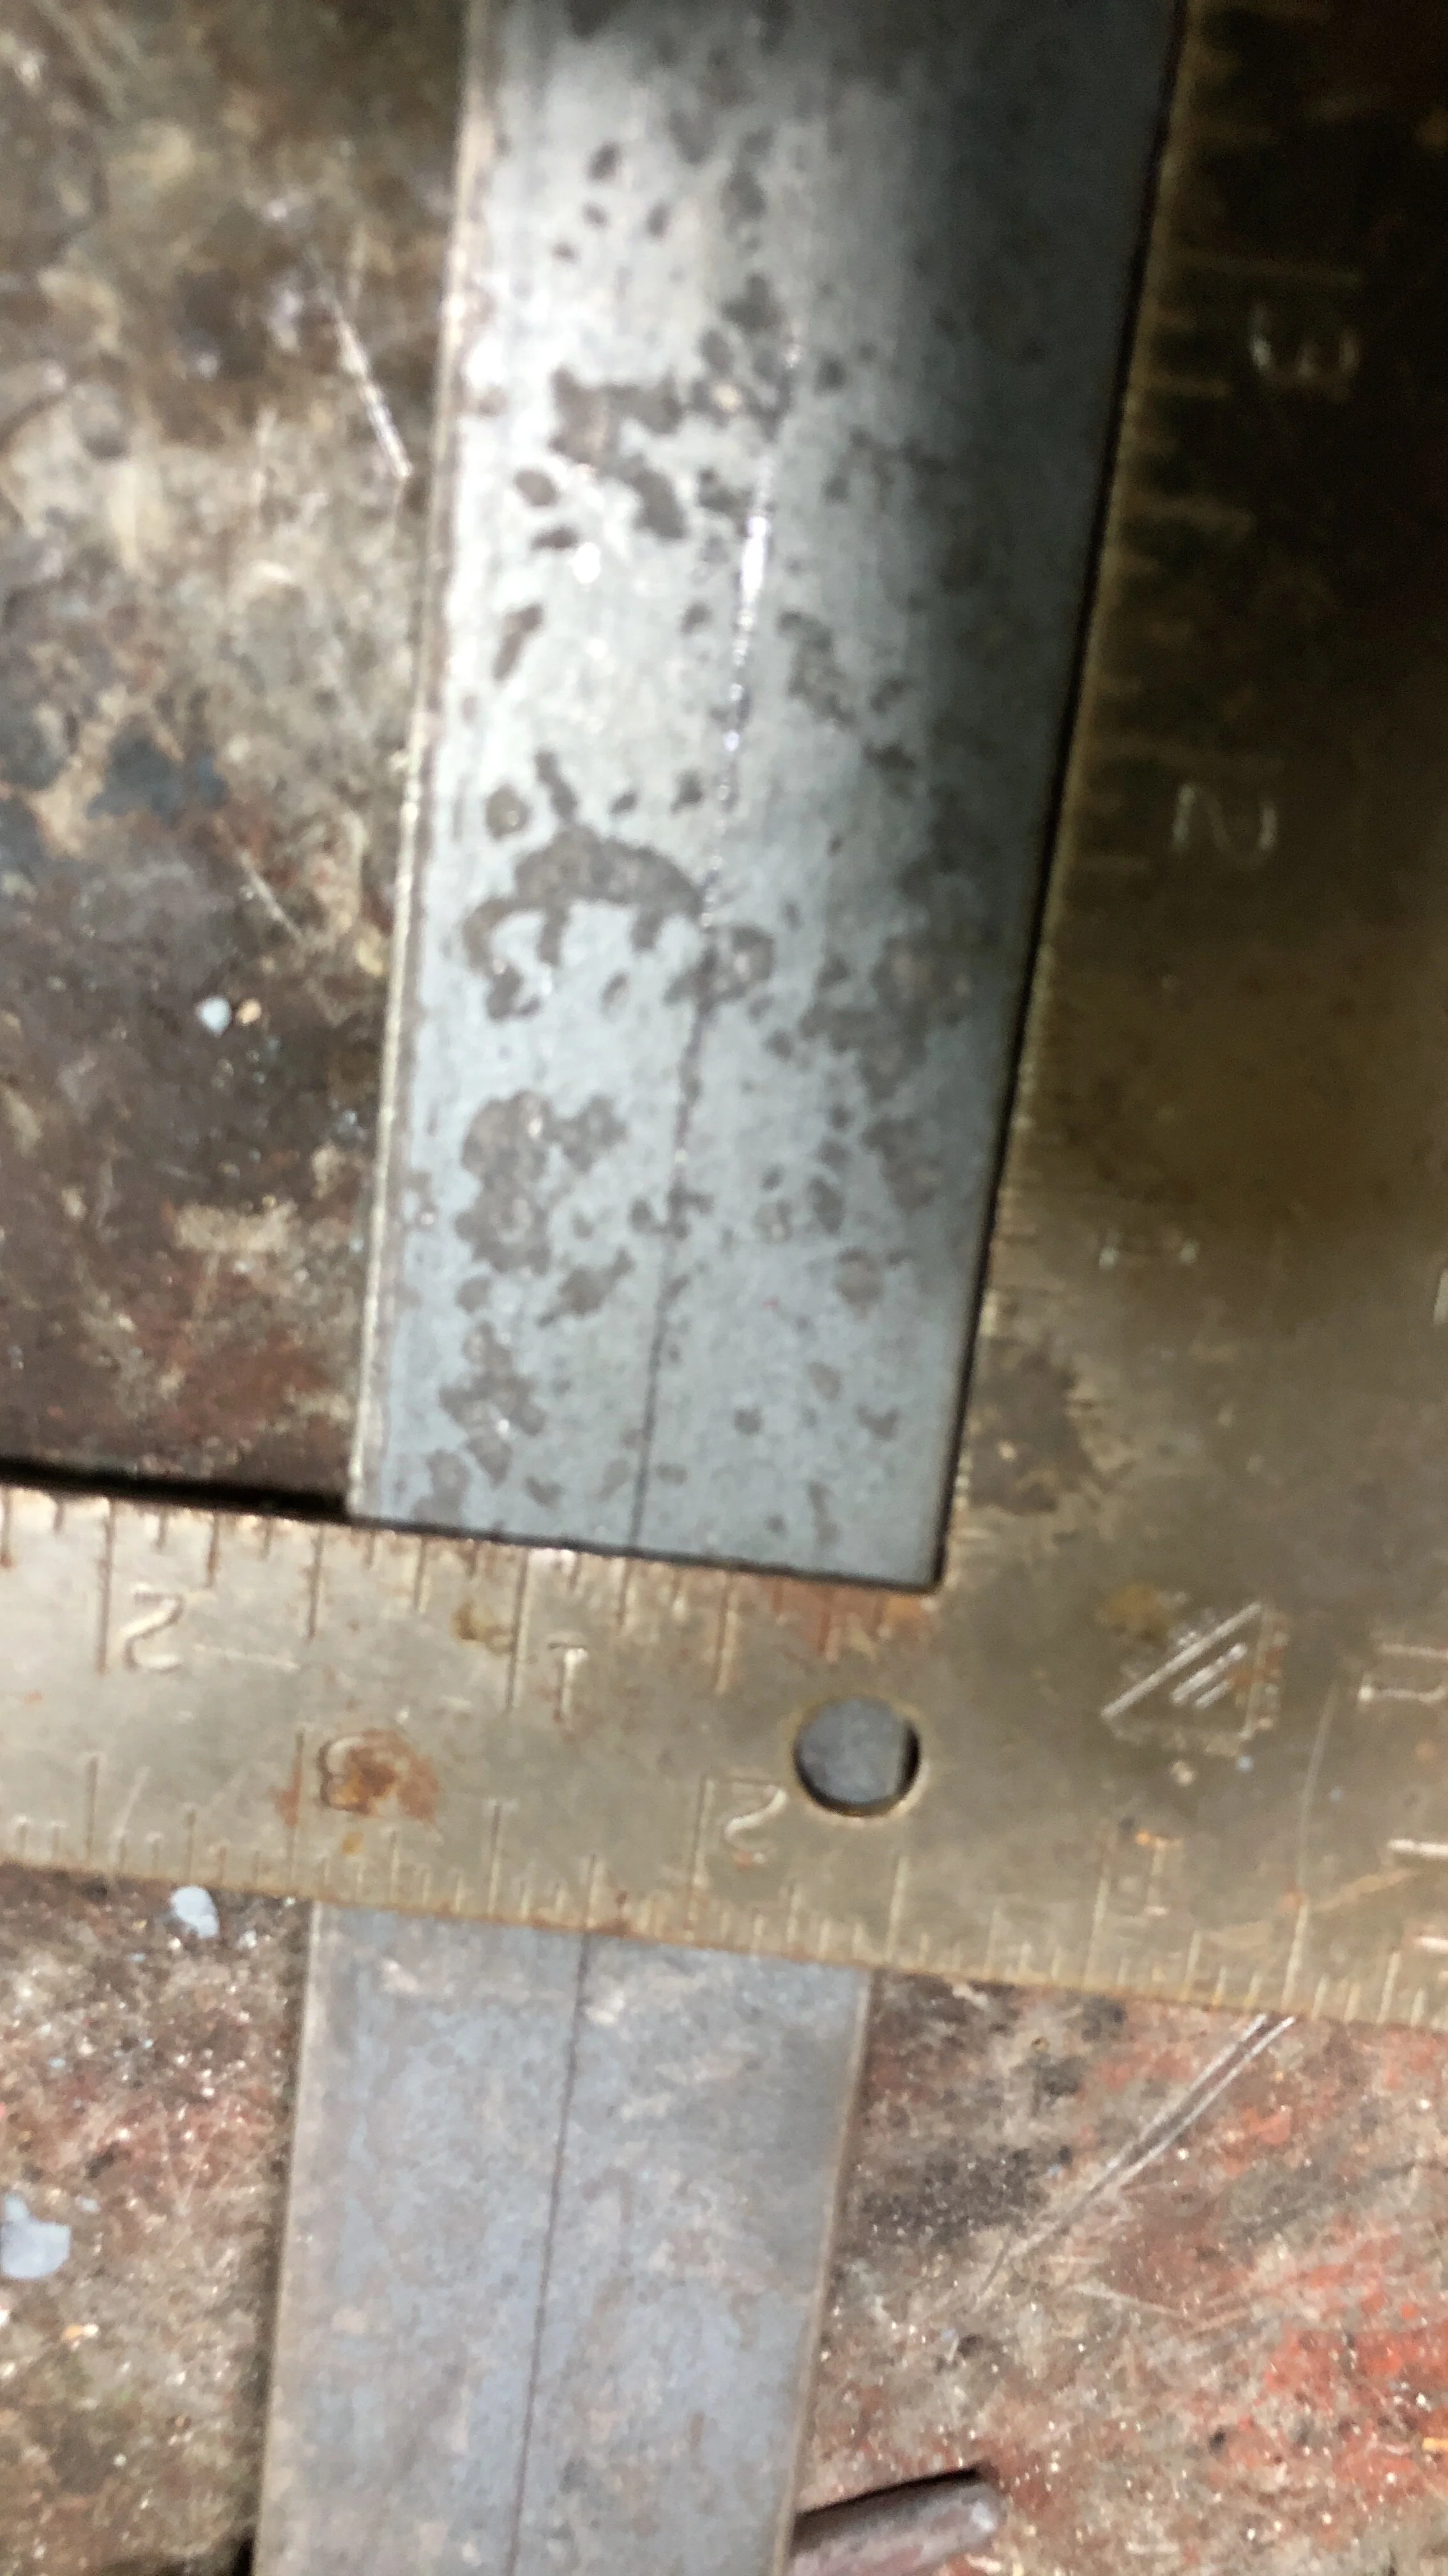
In fact, today (Tuesday) was one of those days. I was able to slip out of work a few hours early, and the wife was off riding. So, Hammer Time! Today was just working on the spade for Lorelei. I was not able to meet my 2 inch draw out goal, but came close to 1 1/2.

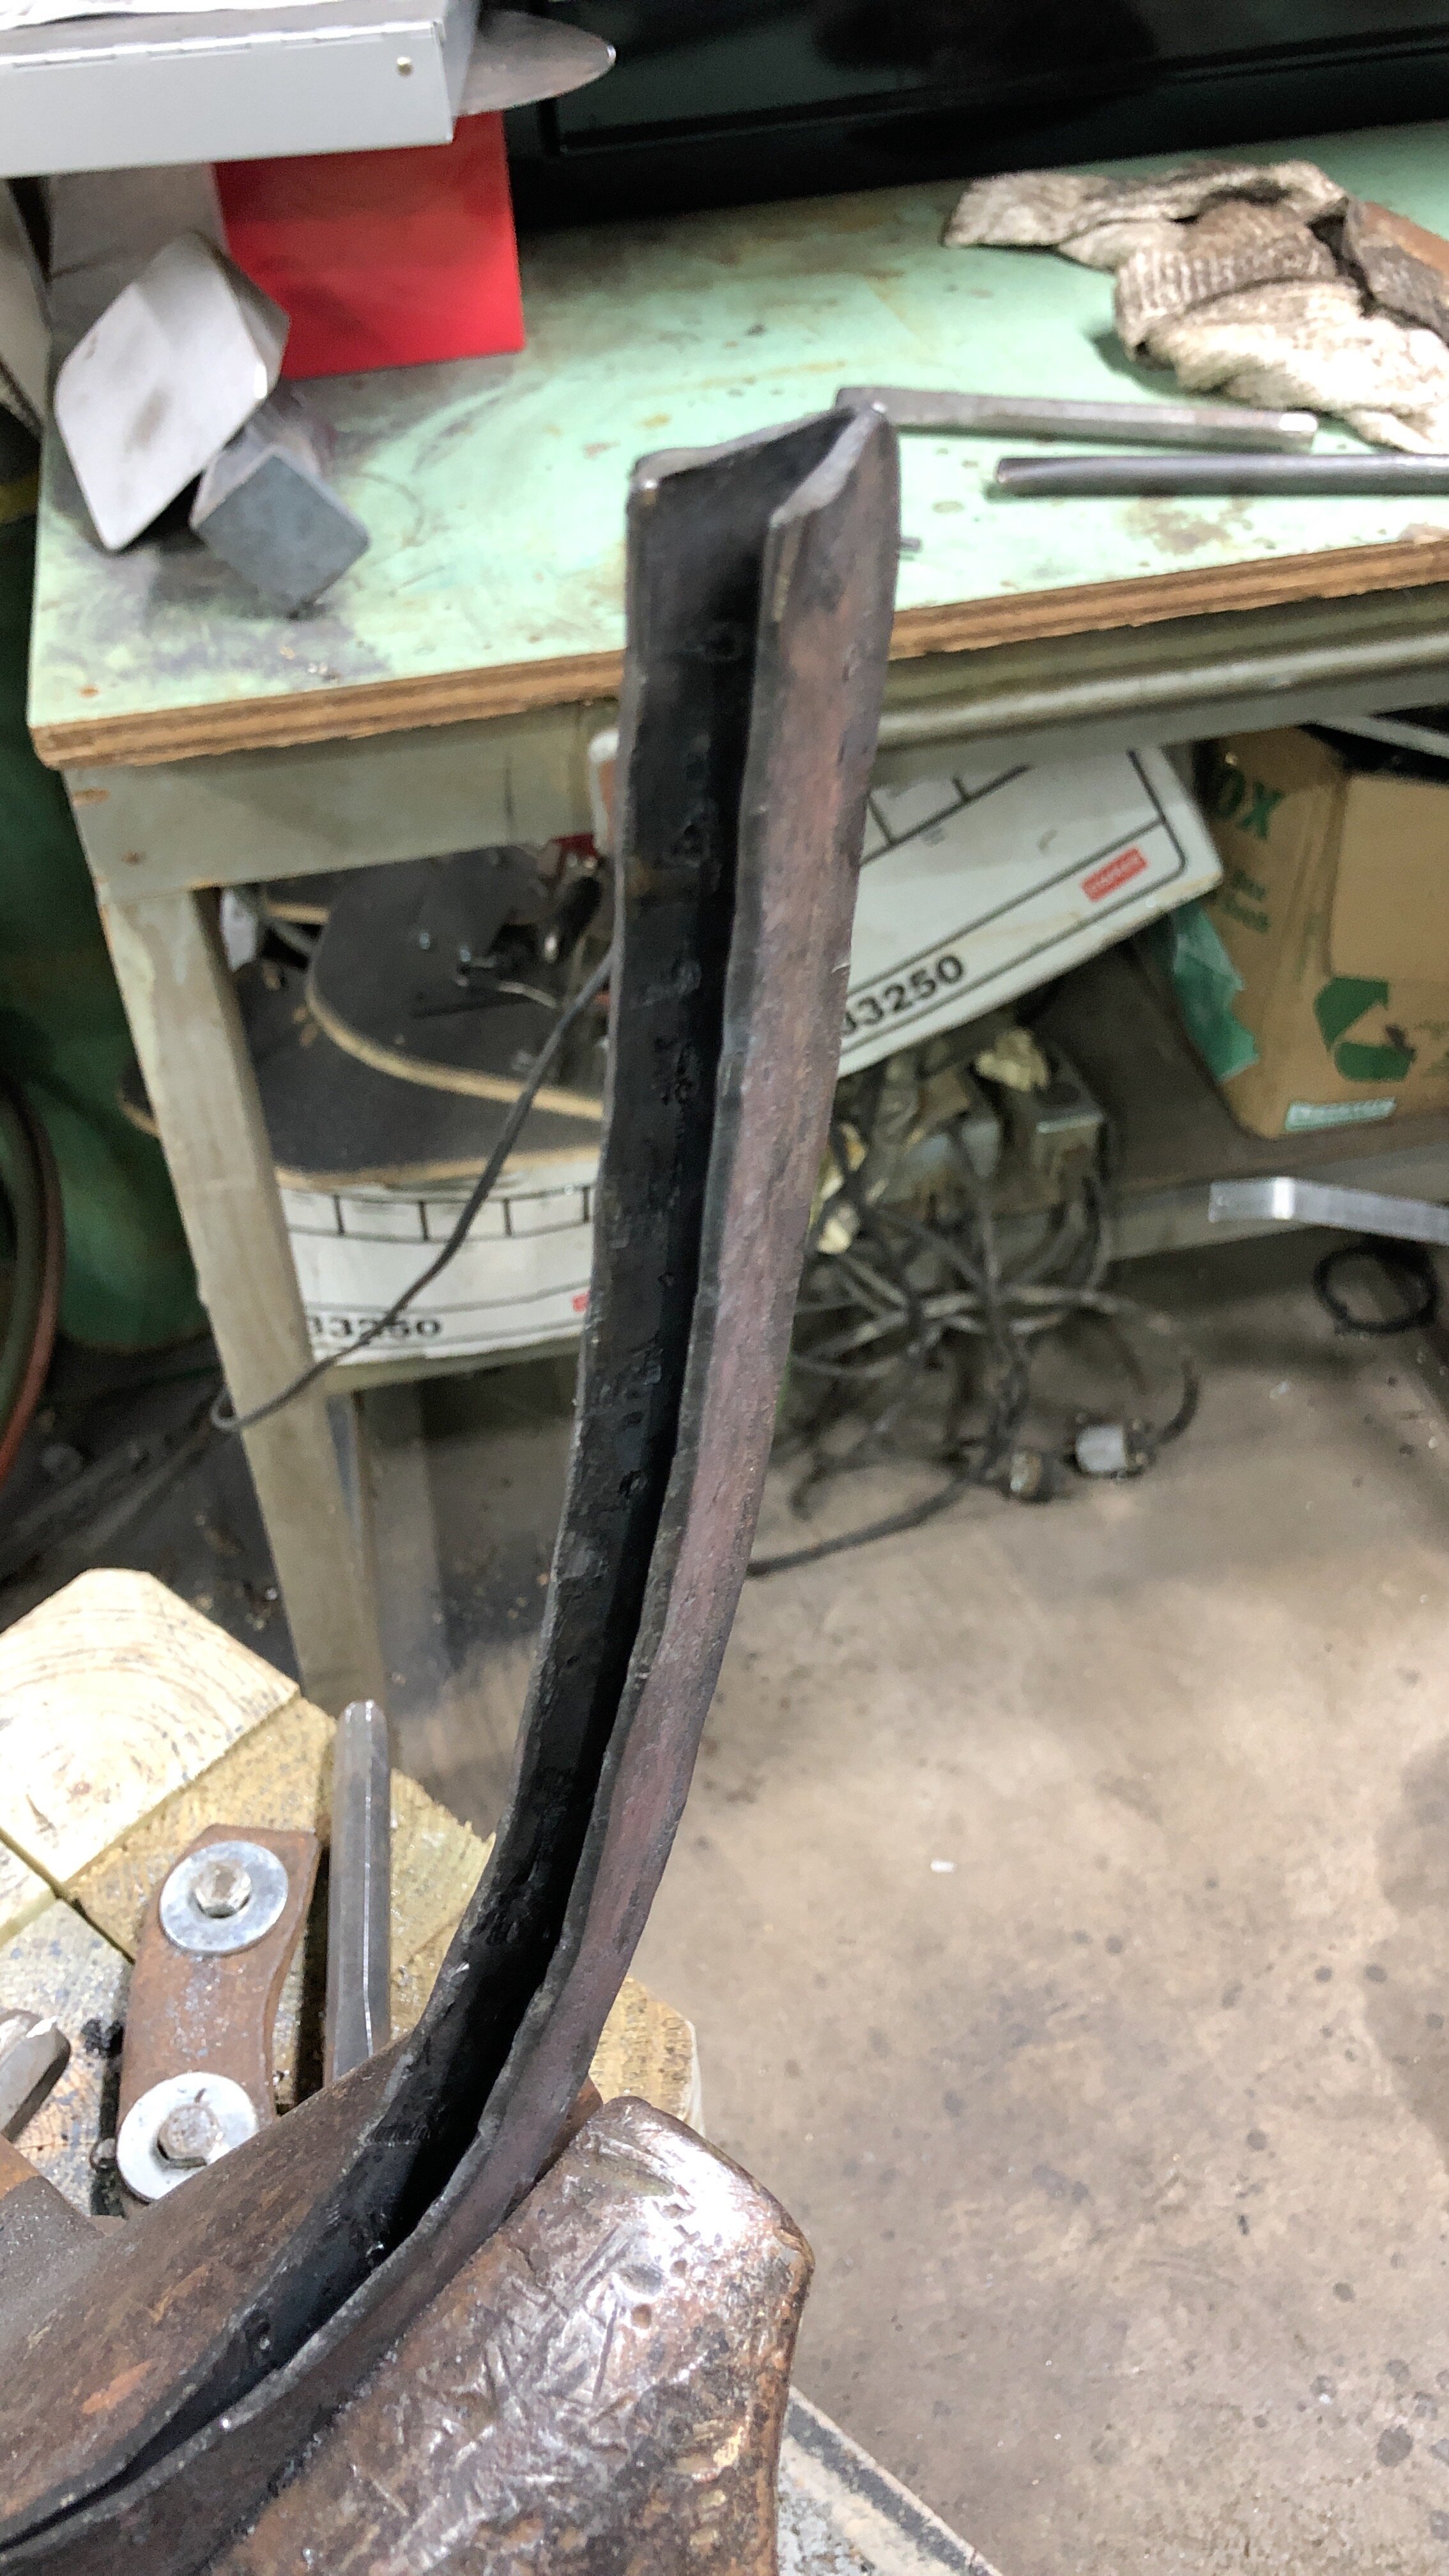
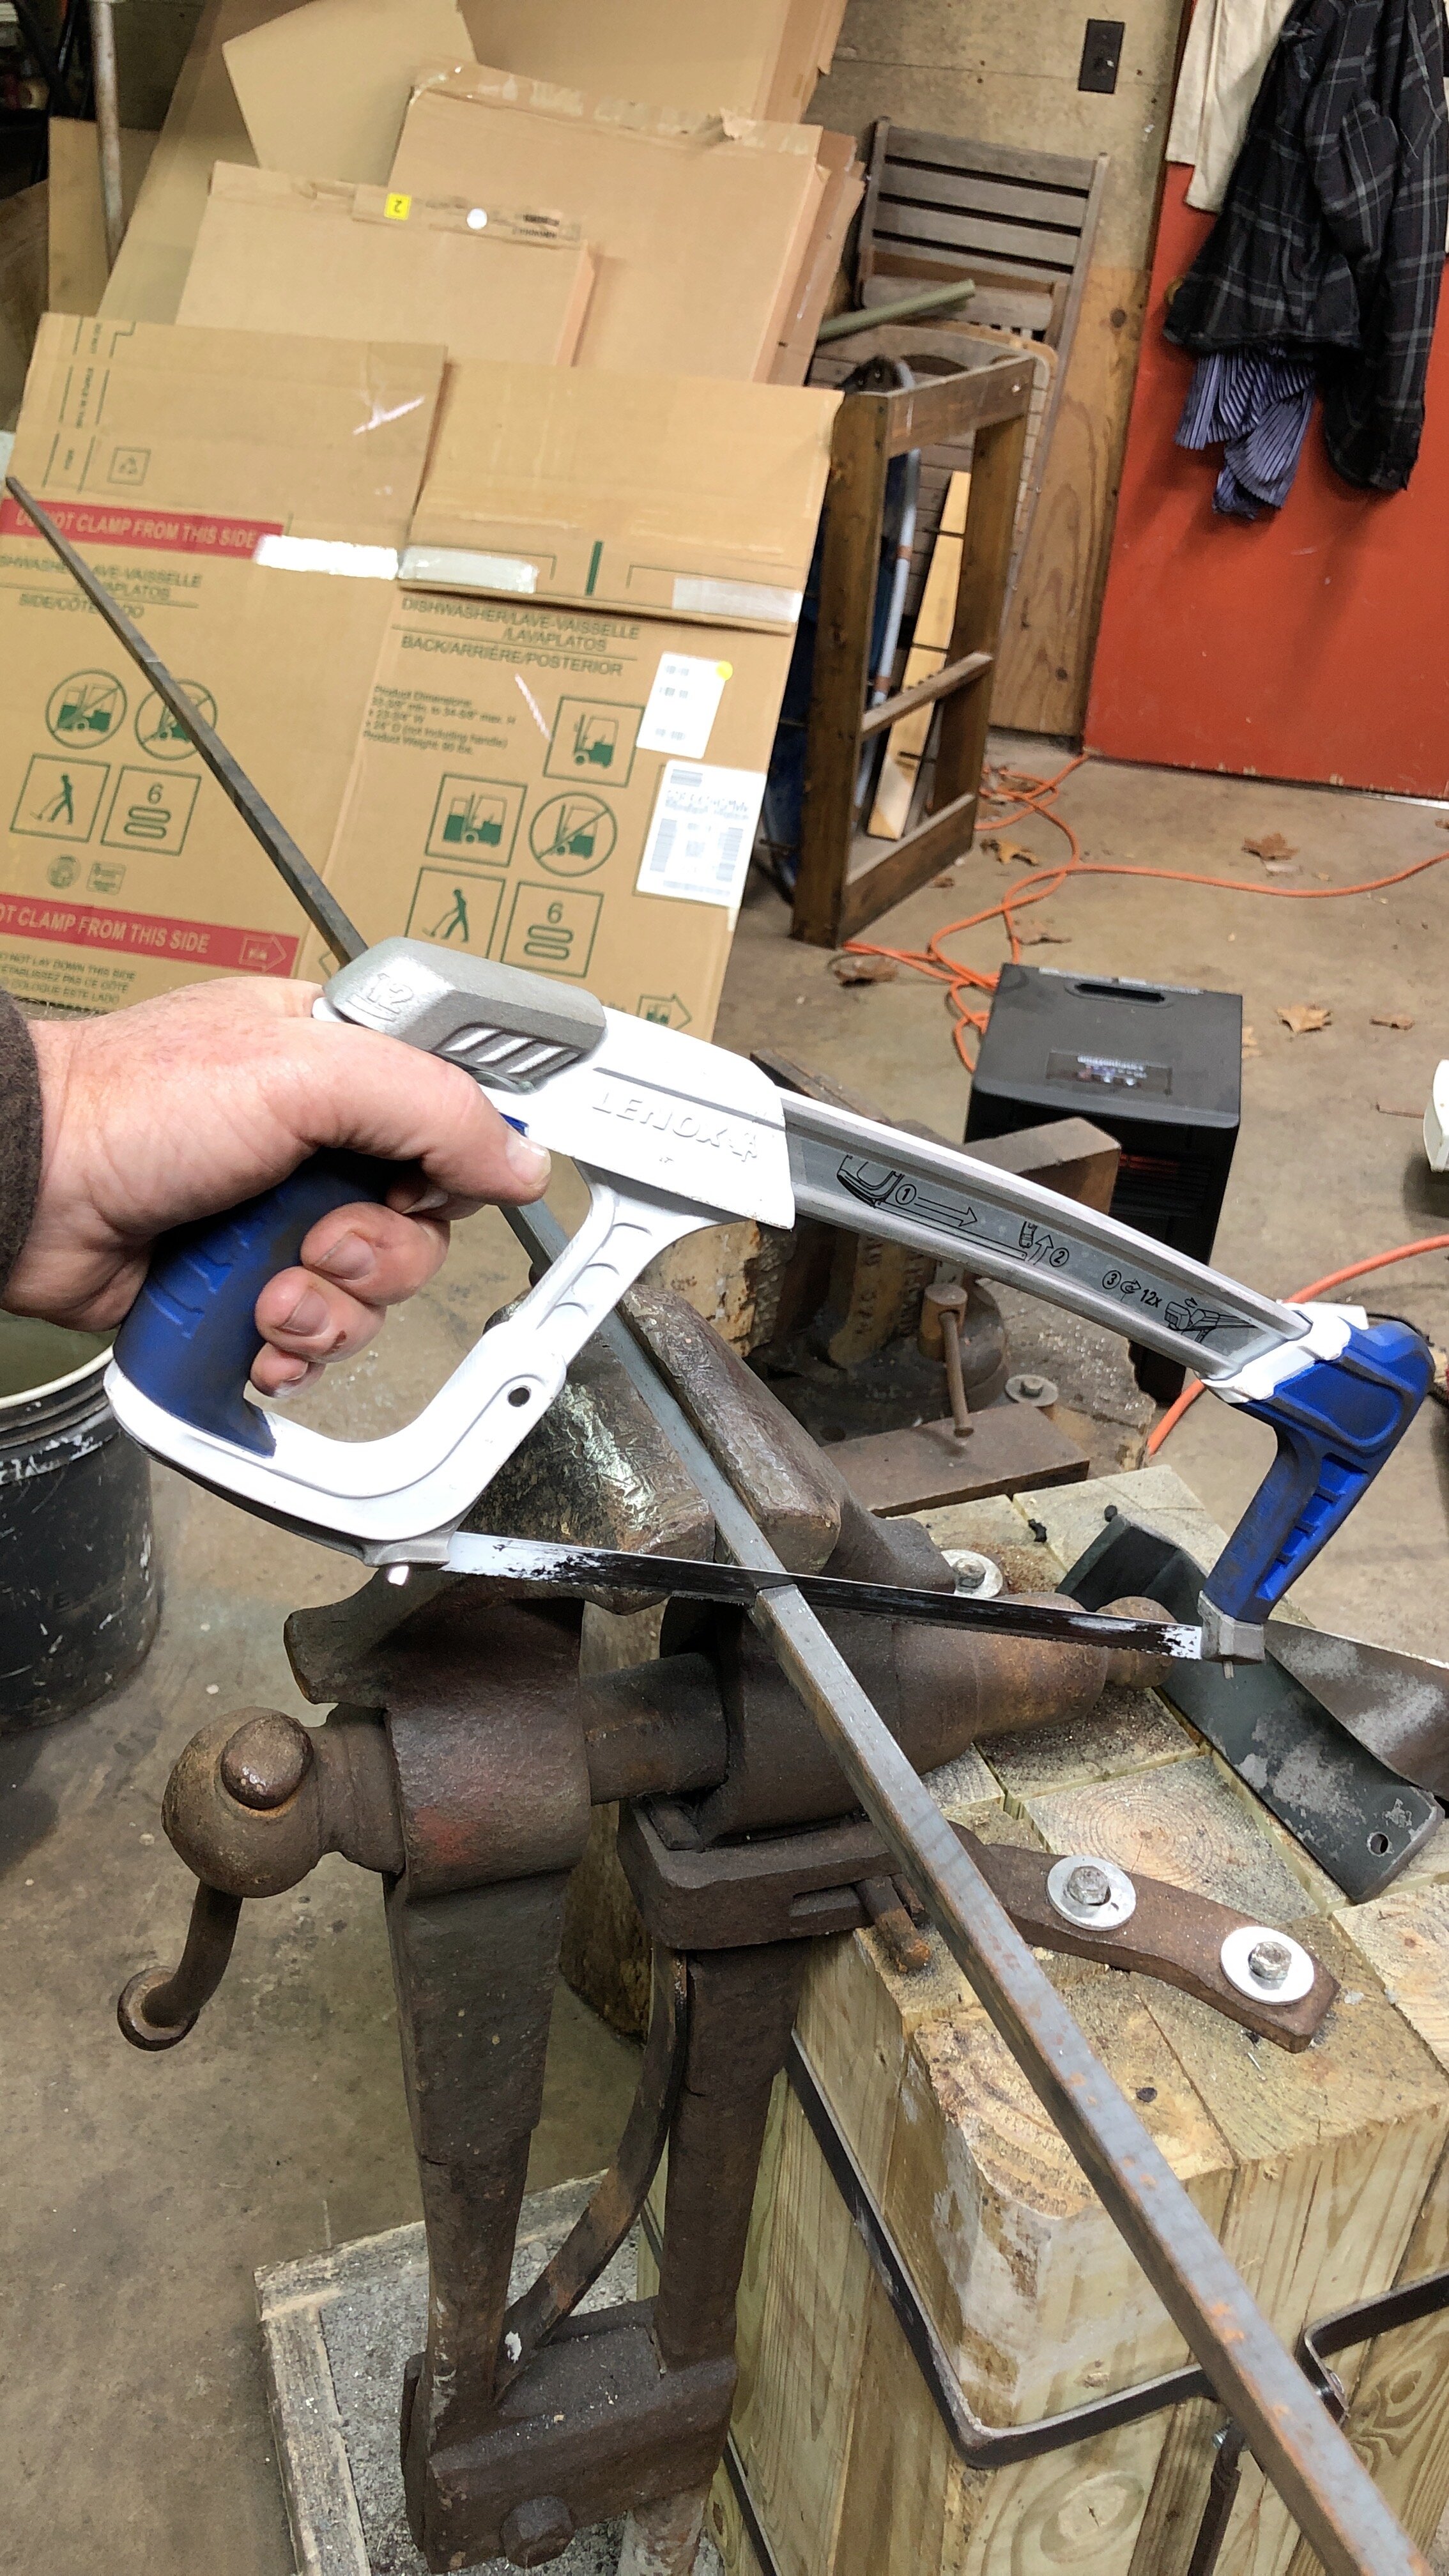
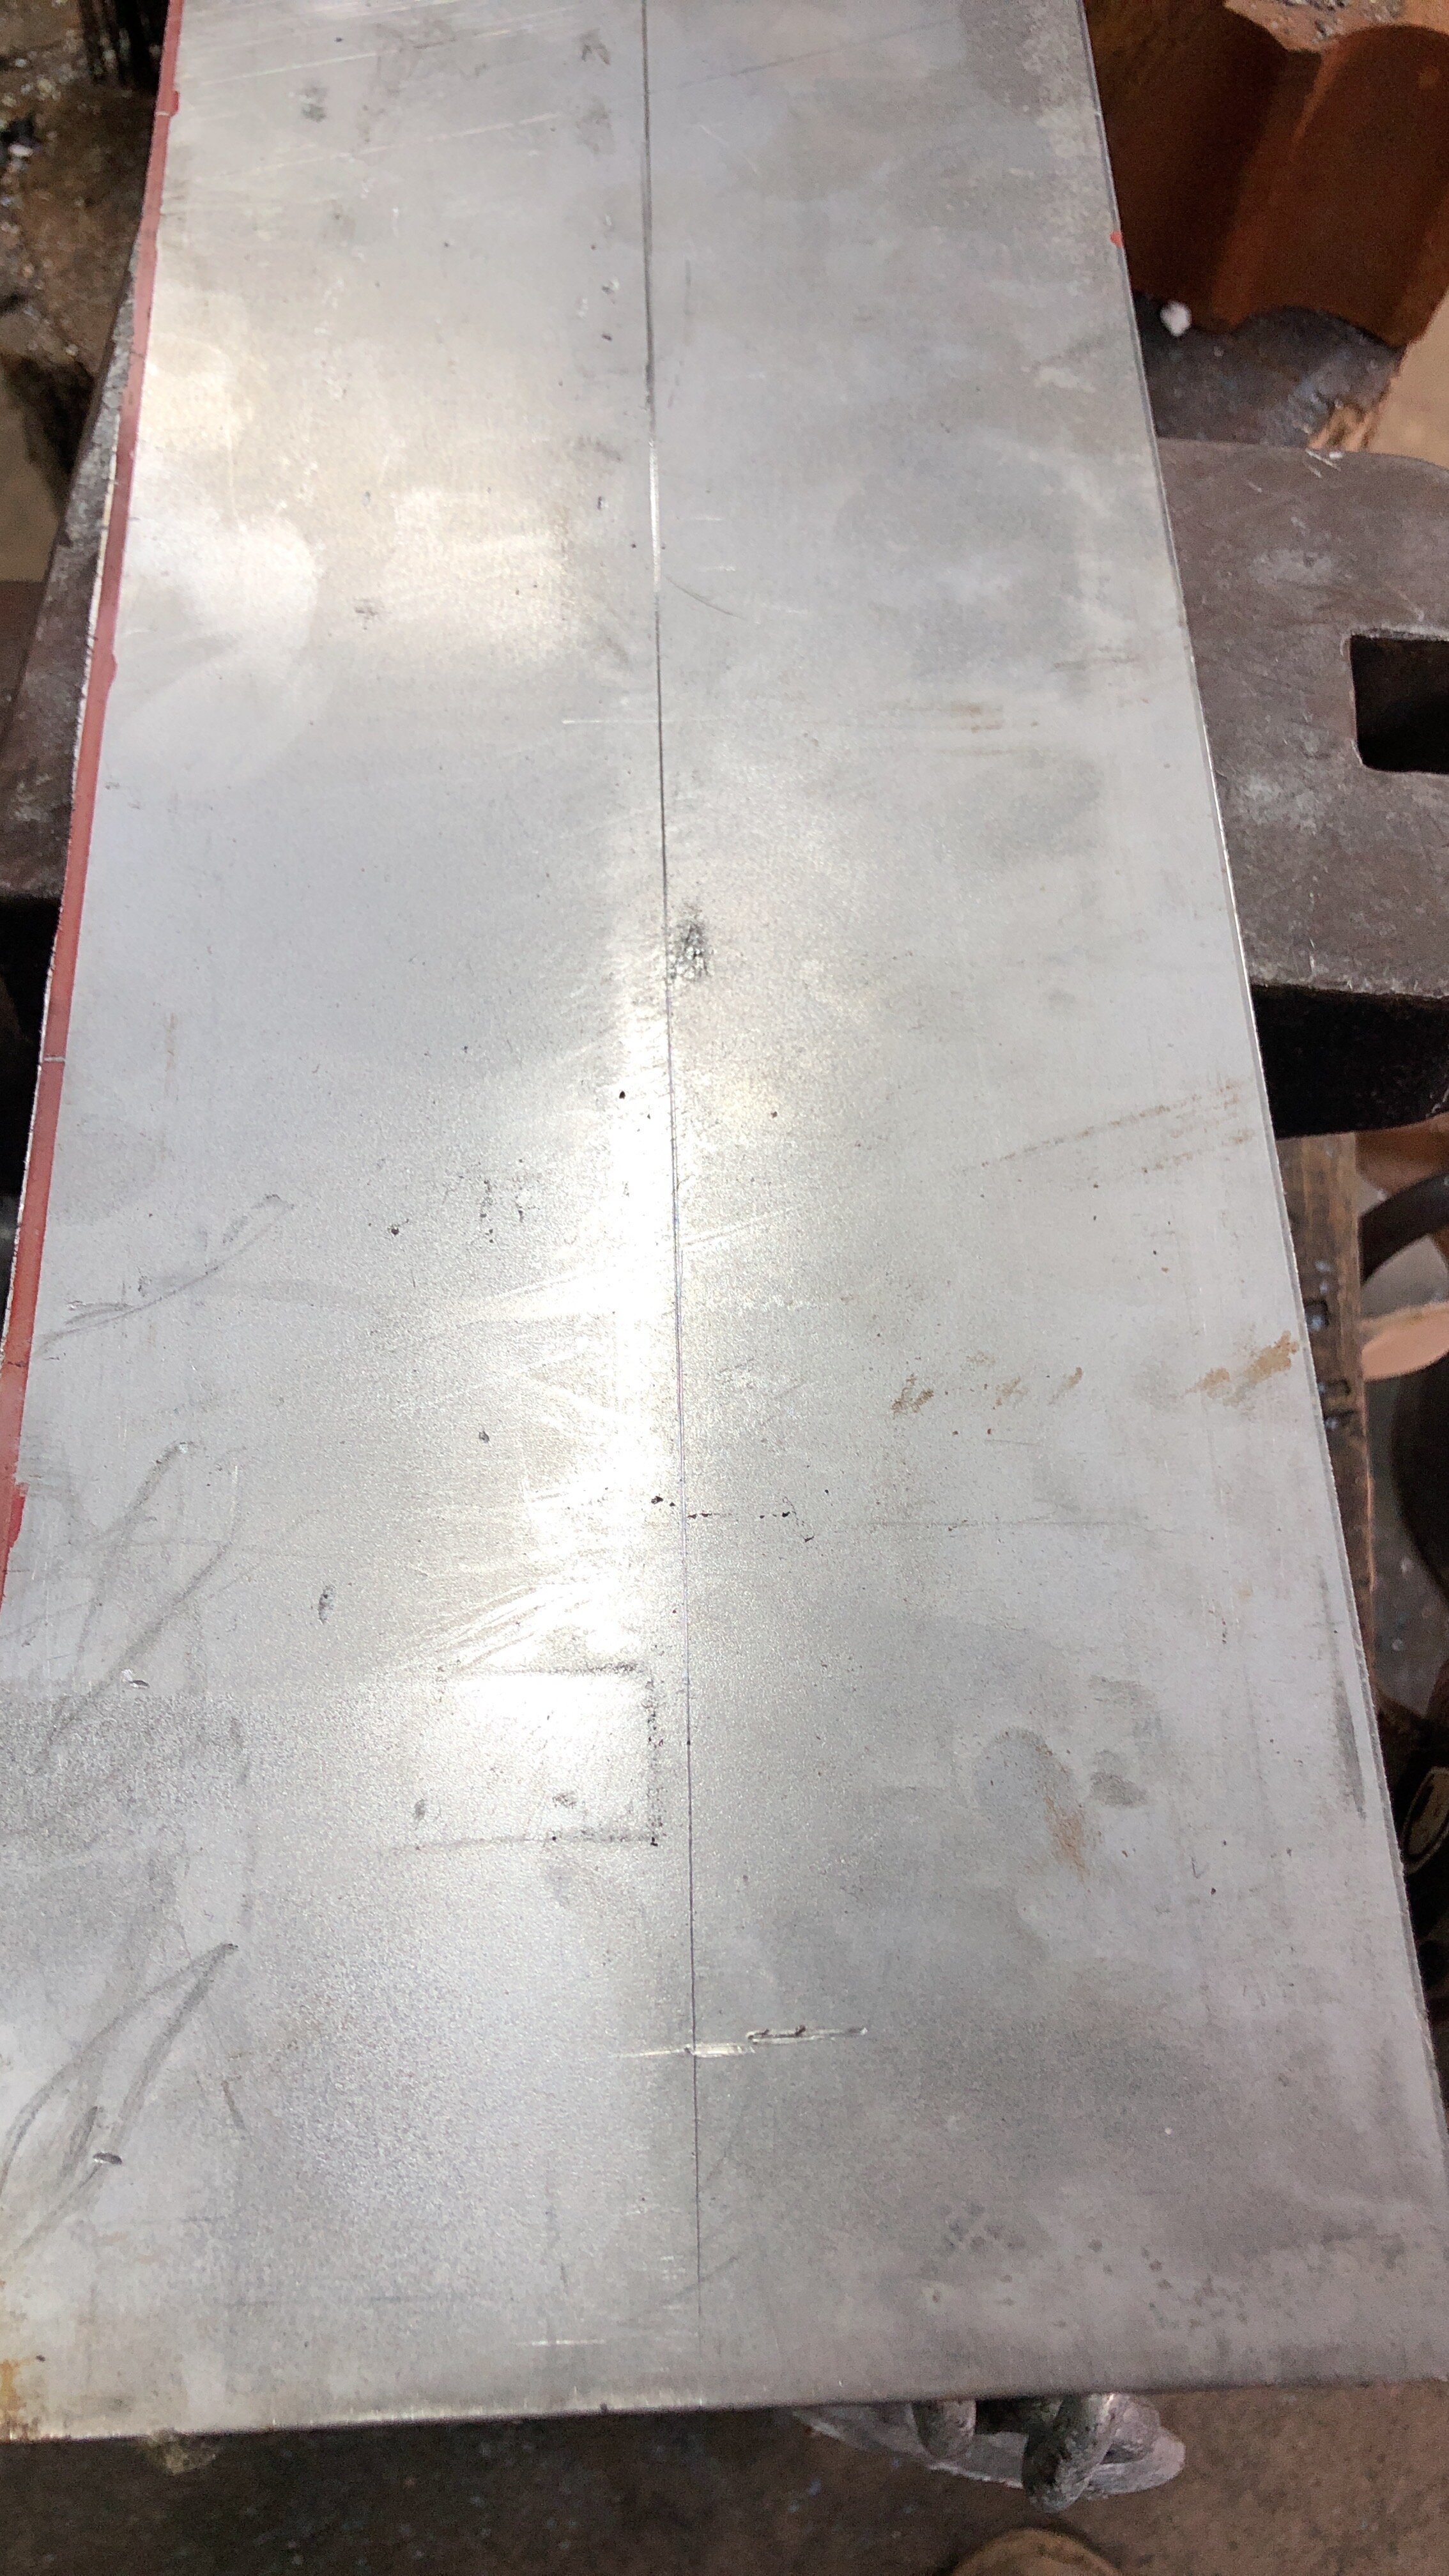
The final step for today was opening up the 2 edges of the shovel. This was done cold with chisels. I hope there is enough material for a shovel to be firmly attached. We will just have to wait and see. if you would like to subscribe to this, please click on the link at the bottom of this page.

From Gold to coal.

My, how the once mighty have fallen. Going from setting diamonds in gold to making repairs in iron. And before this sparks off the whole all work is good and needed, or working with one is just as good as the other, etc., etc., etc., it’s just a joke. I know the value of hand-work is not in the value of the materials, But today’s adventures involve the forge and working mild steel.

Mistress Lorelei, who loves outdoor cooking more than anything, has a fire-pit cooking set, that she loaned out to someone, When it was returned, it was missing a leg and one of the others was bent. She brought the bent leg to me to see if i could fix it and would make her another one. This was a pretty straight forward cooking spit set-up, so i gladly took on this task. I have yet to see how it works, but I figured that if I made it to the same specs as the bent one, it would do as a replacement. At this point, in hindsight, i really hope the missing piece was not a mirror of the bent one. Having not fired up the forge in over a month, I was super glad for the excuse to get back to it.


So, the actual making of the leg is pretty mundane, so here is a photo montage of the work:

While I was at it, I did some more work on the hinged I am making for Lord Christof LeStrange. These are for a viking chest he is making for A&S.

And last but not least, we had a full house at Grimmsfield Monday night, arrow making, leather working and some of the fiber arts.. Just a wonderful artsy/crafty day from sun up to past sundown.

If you have made it this far and would like to receive a e-mail when new postings come out, please send me a note at grimm@grimmsfield.com. And on a final note, I got a kiss on the cheek from the Queen: WOOT!!!!!!!

If you can, please comment below on things you liked, things you did not or just to let me know you looked. Thanks, Grimm

Secret Project Done!!!

As you may have noticed, there has not been much going on with this page. That is for 2 reasons, 1 is that real life had been kicking my butt and the 2nd (the one you care about) is that I was working on a super secret project.

Mistress Martelle von Charlottenburg was to receive her Pelican at 12th night and I was given the honor of making her medallion. That is why i could not post progress pictures. I have 2 much to work on right now to do a full write up. But here is a gallery of work in progress pictures. Included are pictures of my written notes for the project. They contain the thoughts on the work in progress

Some Mundane Forge Work

Well, I seem to be slipping more and more. Almost a month between postings. I have been spending a lot of time on household chores and getting the store ready for Xmas. Re-built the forge area in the garage and tried to make more work room in the garage and basement for A&S. A lot more room in the basement now, years of clutter collecting in the corners has finally been taken care of. On the fun side, my wife picked out som new cabinets for the kitchen at Ikea. This meant I got to assemble them. YEA! I also decided to make them a bit better and forge my own handles.


There was a total of 6 needed for the unit. I decided to forge a test piece first and then see how it turned out. I am glad I did, the test piece was much to large. this led to a re-design and a working prototype was produced. This was then duplicated 5 more times. Notes for the prototype:

Here is the result of the first plans:

This led to a re-design and more calculations. This was way too large and stuck out way too far. Thus a new planning sheet for the cutting and shaping:


The handles are held on with machine screws and bolts. I bought myself a tap and die set, but was afraid to use them on this set with how much work i had put in them. The bolts came zinc coated and I used white vinegar to remove that in order to blacken them in the forge. the process is described below (I hope it is legible):


Grimm goes Eventing

Sorry I did not post last week but, for the first time in a long time, Grimm was able to make it to an event! last week was dedicated to preparing my A&S entry and writing the documentation instead of writing the blog. I made it to Highland Havoc with my Wife and he horse. It was a very good event and I am sorry that there were so many other events up against it. I would have loved to see it better attended. I ended up helping with the equestrian for most of the day and had a good time helping out. I also brought a piece of work to enter in the A&S competition, a hand forged curry comb. And now that the event is over, the backstory:

IMG_2737.jpg

After my wife and I decided that Highland havoc was the next event we would be attending, i quickly turned to the blue sheet to see if there would be an A&S contest. And joy of joys, there was one! and it was one of my favorite types. A direction to work in but no structure to the parameters:

Arts and Sciences Organizer: Baroness Sinn Larensdotter

There are two categories for Arts & Sciences competition entries : Useful Items and Representations

Useful Items

The Useful Items category encompasses any item that would be used by an equestrian, archer, or thrown weapons enthusiast. Examples include quivers, bridles, and targets. Don’t let these examples limit you, though— feel free to think of something useful to one of the martial activities at the event, and let your creativity take hold! Documentation preferred and encouraged.

Representations

The Representations category includes images and other depictions of the martial activities. This could mean illumination, embroidery, pottery— whatever you imagine— showing riders, archers, and thrown weapons. Documentation preferred and encouraged.

To me, and I only speak for myself here, this is the best form of A&S to have at an event. Does not restrict time period, or medium, or method, yet gives you a unifying theme. A contest where I could use it as an excuse to make something from history. And so I did. The object that I choose was a curry comb used in the middle ages. This was something I felt I could get done with the time restraints and still make a good reproduction.

The documentation can be found here: Combe of Curraynge.

The rest of the time sense my last post has been spent getting Grimmsfield ready for A&S nights to begin again. There have been 2 so far and things are going well. we have arrow making, shield painting, Medallion making, spinning and sewing going on this year.

Of Barn-hooks and Broomsticks

Well, this weekend was a bunch of “other”. I was not able, nor did I feel up to working that much. Fortunately, i was able to work on some easier things that just brought joy. I managed to get three projects done. The first is the one I am happiest with. At my wife’s barn there is a young girl (Charlotte) who is 3 who keeps a pony in the same paddock as my wife. In order to keep my wife’s tack clean I made her a fence hook to hang the ropes and bridles from. Well, Charlotte fell in love with it and began hanging her tack on it. Because she loved it so much I decided to make her one for herself. It is just like my wife’s, just in charlotte’s favorite color: PINK.

While I was at the forge, I decided to take care of something that was bothering me. I made the viking frying pan/ griddle last week and put the matching handle for the Pennsic cooking set I was working on. This handle is designed to hang from the tool holder at Pennsic, but not a period design. This kind of bugged me more then I care to admit, so it needed to be remedied.

So…. Time to forge another one:

So now I have 2 griddles. One is going to remain at Pennsic, but what to do with the other one. Hummmmmmmm…… I know, Mistress Lorelei was the inspiration for making them in the first place, so I will go ahead and give it to her to use in her period cooking. I love when my A&S projects get used instead of just being made for A&S. And putting it in the hands of Mistress Lorelei insured that the thing will be used instead of just being carted around to events to be displayed at A&S. This is the perfect idea, and because Lorelei has told me that she reads all of these posts, she will know she can have it when she next comes to visit! All she needs to do is to let me know how happy she would be to own one of these and it is hers. Of course if I do not hear from her, I will assume she does not want it and i will just add it to my finished product pile and it will just travel with me to events to be shown off. The fate of the griddle is now in her hands….we will see.


Because of all my other commitments over last weekend, some of the work time I was able to find was after forging time (i try and be considerate of the neighbors). So it was time to pull out the broom making supplies. I had made a matching broom handle for the Pennsic set, and I had 3 other handles that I had made that were still waiting on broom heads. And so, Broom Time!

One is for the Pennsic set, 1 is for Gunnora’s Mother for Christmas (Shhhhhh…. don’t tell her) and I think the other 2 will be sold at Holiday Faire. Well that was what I have been working on for the past week. I have no idea what comes next, I hope to get into the forge this weekend, but I need to figure out what to work on next.

Forging on a weekday!

Well, I was able to get to the forge on a Tuesday, and it was wonderful I had plans to work on a cooking set (spoon, fork, spatula) for the cooking table, but my heart was not in it. Instead I decided to make something much more period. A viking griddle or frying pan.


While working on that, i also decided to forge another knife blade (also shown in the picture). There have been several frying pand of this design found throughout the viking range. Here are a few examples of finds:

I will be including more in my documentation of this item, but for now, that is what you get. The handle end was changed to match the other pieces in the Pennsic Cook Table set. I hope to make another one with a more period handle. This will be sent to Mistress Lorelei to further her period cooking in the south. I did not take any in progress pictures, so here is the final product:

As far as the knife goes, there is no extant piece that I am trying to duplicate. More of a general concept of a utility knife. The bar on the left of the blade is the blank that it started as.

At this point the blade has been forged, and ground to shape. I will need to harden it and finish the fine grinding before it is a finished blade. That is what I was able to get done last Tuesday. Hopefully, i will be able to get some more work in this weekend.

Back in the shop!

Back in the shop for the weekend. I was planning on going to Ghosts, Gouls and Goblins this weekend, but life decided that i should stay close to home. It ended up not being necessary, but I could not take a chance. In order to relax and chill, I decided to make some nails. These were for replacing the screws that are holding the chest together. I also tried out my new nail header I purchased from Pieh tools. It ended up being much better then the one I had been using. Slowly one by one I began replacing the screws with hand forged nails.

The hinges for chests of this time period were also held on with nails with the ends folded over to make them secure. Picture 4 and 5 show the screws being replaced in the hinge. This was all I was able to get done on Friday.


Saturday saw me finally start on a project that I had been dreading. I feared I had bitten off more then I could chew and I was not going to be able to create what was needed.

Backstory:

For quite a while, I have wanted a bigger leg vice to be able to handle larger jobs. Most of them that I have been able to find online, the shipping made them cost prohibitive. At Pennsic this summer, Rabenwald Metalsmiths had a large post leg vice that was missing a few parts. They wanted a fair price for the condition that it was in, just a question of where or how I would get the parts. After a few days of himming and humming, I decided to take a chance and purchase it. It was transported to Grimmsfield and a suitably dark corner was found that I could ignore it in!. And thus I did. Friday while trying to make a part for the chest, The current leg vice once again reminded me that it was not the optimal tool for the projects that I asked of it. So, having filled myself with false confidence and a bunch of YouTube videos, Saturday was going to be the day I fixed the vice. Two parts were needed for the vice to be operational, a spring and a wedge to hold the spring and vice in the mounting bracket. For the spring, I used the spring on the old vice as a model and began forging one that would fit in the new vice. The bottom retaining lips were relatively east, but the top bend took several tries to get the spring to be the right length. For the wedge, I decided to go with a setup similar to that used on a crossbow for the irons. I forged 2 squares pieces. each slightly tapered from beginning to end. With the spring in place, these were then driven in to the mounting plate slot from opposite ends to form a tight bond. Not only did this work out, but it did so on the first try!!!! The action was smooth, the jaws lined up perfectly, everything was great! The vice is mounted to the vice stand of the older vice, on the opposite side and all I needed to do wa s turn the stand around and I had a new working vice!.

I hate to admit it, but this made me more proud then anything else I have forged. They are not pretty pieces, not something that anyone would ever point to and say, “Wow did you forge that?” But, it was a job that needed an exact part and I was able to make that part! This to me strikes at the heart of blacksmithing. Being able to make a shovel or rake or any other tool does not have any exacting specs. to be able to forge a piece and fix a tool (to me) is making it on a whole other level. This ended the work for Saturday, as it was time for mundane life to interfere.

Sunday saw Lady Gunnora going off to do pony things for most of the day, which left me home to my own devices. So, guess where I was. That’s right, back in the forge. The first chore was to clean up the shop a little bit. This also included hanging new lights, hanging a new power strip, and re-attaching the air feed tube. Man, I had no idea how much air I was loosing through leakage. I was amazes when I fired up the forge how hot I was able to get it and how quickly as well. On to forging!

The first project was using another “what have I done” object. For the fire table, the cooks had requested a shovel for moving coals around. No problem I thought. I have bought several shovel heads (or fireplace kits that I have pulled the shove from). But wait, my brain cried, why would you buy a shovel head for $12.00 when you could buy a swage block for $300.00 and then spend $12.00 to buy a piece of metal to spend hours trying to make it to shape. So naturally I bought the swage block! This was purchased soon after Pennsic and has sat on a stump ever sense. So, last week I purchased a piece of 16 ga. mild steel sheet with enough metal metal to make 2 shovels. This was split in half and the fun began.

I was not sure about forging from flat sheet, as I had never tried it. This was another success story! I left more forging marks in the shovel then I wanted, bit I was able to forge something that 9 out of 10 people would point to and say that is a shovel. While forging the handle, i was able to use my vice for the first time. Yes, it was only to hold the bar for twisting, but it worked perfectly! Because I set it up on the stand made for a smaller vice, I am not sure if it is not set up to high, however. I will need to use it a few more times to see if it is a problem. Inspired by the success of this handle, i decided to forge on and make the handle for the broom that would go with the set.

After all of this, it was time to wind down. Just going to make a few nails. The nails that I made, added to the nails I forged a while ago were just enough to finish the chest. All hinges and hardware on the chest were now hand forged by me. the bending of the nails on the hinges still need some work. the joints are sloppy. I think i can fix this by re-bending with a solid block behind the head.

with the adding of the final nail, I ended my day in the shop. Time to go and spend some quality time with the wife. Enjoying dinner while watching the hockey game (pre-recorded). But, as long as I am just sitting here, lets go ahead and get out the broom making supplies. The handle is done, so time to start thinking about the broom. Once I had dug the supplies out, i figured I had better practice a little first. To that end, i found an old whisk broom handle I had forged a while ago. I made several of these during the great broom making phase I went through.

Unfortunately, I did not take any pictures of this, so you will just have to wait for next post for me to put up pictures. That might be sooner then usual, because I hope to get some work in tomorrow.

3 Weeks.

WOW! Its been 3 weeks since I wrote about my activities. I kept meaning to get around to it, but I kept finding reasons to put it off. No excuses, just the way life has been. So here’s whats up:

  1. Carved a mold and began casting ranking medallions for Atlantia’s Royal Rounds. These have been produced by several people over the years that I have been playing, and I felt it was my turn to add some to the coffers.

They are now just waiting for drilling and painting.

2. Did some work on wrapping the rest of the hardware for the archers bathroom. They are now just waiting on a few coats of varnish and to be mounted.

Finally got back into the workshop (garage) and was able to do some work on Grimmsfield’s outdoor kitchen. At first this did not involve using the forge, which made me sad. But I spent a few days cutting the lumber and roughing up the tool chest for the kitchen.

This was put together and the hardware attached with drywall screws to see how it would all go together. These will be removed one at a time and replaced with hand forged nails. As a nail maker, I SUCK!!!!!!! Not happy with most that I have produced, and those that are usable, I would not give them bore then a C- grade. Once enough nails are made I plan to take the box back apart, stain and varnish it, and then put it back together with the nails.

Last week I finally found some time to blacksmith. The next tool I planned on making was a cinder rake that was requested by the cooks of Grimmsfield. This was to be a tool to remove the old coals and ashes from the sand in order to build a new cooking fire. I had been racking my brains for several weeks trying to figure out how to make a rake head. Cutting a sheet into the proper shape, forging a piece with multiple prongs, or cutting an old cement rake for the tines. All of these went through my mind, but in the end it was luck (and my wife ) who found a metal children’s rake that I then took apart for the rake head.

The rake came in 3 pieces, the wooden shaft, the socket and the rake head. Nocking out the rake head was easy. the socket was held on to the head with 2 bent tabs. when these were ground off, the head came right off leaving me with 2 holes perfect for riveting.

138735.jpg

The next step was to burn off the paint and create a handle for the tool. This was done on a similar way to the water scoop I made earlier, except with a smaller front blade. This was then drilled to match the 2 holes in the rake head. Once the 2 were connected, I was not pleased with how the angles of the tool were, but I had run out of time. Last Monday, before archery, i found myself with enough time to work on something, but not enough time to fire up the forge.

I decided to try forging using an oxy / acetylene torch. I had seen several videos of blacksmith using this as a quick heat source, and I decided to give it a try. And it works. used a lot of fuel, but I was able to isolate the bends behind the rake head and get them to the shape I wanted. Two tools now in the chest, plus the chest! Now to figure out what to work on next. I know I have some arrows in my future, but there is nothing exciting there. Nothing exciting, but time consuming. Hopefully, it will not take me as long to do enough to post again.

Last Weekend at the Forge.

“Grimm, missed you at Battle on the Bay. Whats up?”

I was stuck working once again. But I was able to make it into the forge for a few hours after work and before it got to late to be pounding. I was also able to steal a few hours on both Sunday, Monday and Tuesday. The sad news is that this was not SCA Forging but mundane forging for the house. Having remodeled the Archers bathroom, i felt I should make all the fixtures for it. I had made a TP holder earlier, but messed up the proportions. Now it was time to make the complete set.

My goal was:

  1. Towel Bar

  2. Towel Ring

  3. TP holder

  4. Paper Towel holder

Sketching out my plans, such as they are:

Saturdays Blacksmithing:

The first thing to work on was to be the towel bar. This would not need a hook the way the paper towel and TP racks would, but instead be 2 closed loops. Because of the size of this piece, the 1/4 in round bar that I was using for the rest of the projects looked a little skimpy. Therefore I moved up to 3/8 in round stock. The 2 angle pieces were made first to make them as uniform as possible. After that the eyes were forged on the ends of the towel rod and fitted to the wall mounts. Once the piece was forged, I was faced with a question of suitability of purpose. Iron is not necessarily the best for putting wet towels on. This was not a problem for Tp and paper towel holders, but could

be a problem for a towel rack. There were several solutions to this problem, enamel or Spray paint, clear lacquer, rubber or plastic tubing, or something else. In keeping with the hand made look, i decided on something else. I was going to do a cord wrap and then varnish the cord. This was done on old ships to protect the ship from metal parts. That evening after closing down the forge, I began wrapping the rod with a french hitch. Thus ended my Saturday.

Sunday saw me taking care of chores in the morning, but having the afternoon free to get back in the shop. This would be the day for the towel ring. I was excited to get to this because i would have to forge weld the ring. Something I had never tried before. Making the rest was pretty straightforward, but the ring was a new experience for me. After several attempts, i managed to get the ring welded. Not well, but welded. I attempted a scarf weld and in retrospect, should have built up more material before welding. The ring came out a little thin at the joint. In the end, about 80% of the total length of the weld was solid. I left a bit at each end that would not weld. Having messed with it for quite a while, i decided that this was close enough and I would settle for what I had.

Monday saw me racing around to finish chores and leave myself some forging time before archery. In this I was successful. The forge was fired up once again. Three times in three days! The Gods were smiling on me. This time I was going to work on the paper towel holder and the TP holder. This would be a exercise in controlled forging as I wanted all 4 wall mounts to be as identical as possible. I was very pleased with the consistency I was able to achieve in this. They all matched quite well. Now to do the bars. Here, I am afraid, I became to cocky and forgot to thing about function over design. I made the 2 hooks and they were beautiful, long, perfectly tapered, and with a curl on the tip to show off my skills. What could be better!

Here’s where the problems came in:


A 2 1/2 inch perfectly tapered hook for a 1 1/2 inch paper towel roll. Damn it!!! Right after i figured this out, the archers started showing up for practice. Time to bank the fires and move on to something else.

Tuesday saw me back at work, but pissed off at the stupidity of the hook situation. But, could I get out in time to fire up the forge and quickly address the problem? Yes, yes I could. And so: hooks 2.0. Not as happy with the looks, but they are done.

So, on Tuesday evening, it was time to finish the wrapping of the towel bar and wrap the towel ring and be done with this project. As I sat sown in my easy chair to finish the wrapping, I looked at both the wrapping I had already done and my choice of materials and was not happy with either. I was thinking at first a synthetic cord was the way to go for waterproofing, but the aesthetics of it were just all wrong. So, time to pull out the cotton cordage and start wrapping with that. The spiral knots were also not to my liking. I decided to switch to a single cord cockscombing wrap for both items. First to do the towel ring, then undo the towel bar and redo that. So at the end of Tuesday I had the ring wrapped and the towel bar ready to go for it’s 2nd wrap.

And thus do my adventures in blacksmithing come to an end. Not to figure out what to get into next.

A Day in the Shop.

What Happened today:

  1. Hardy tool rack

  2. Blacksmithing odds & ends

  3. Beginning the tool box build

  4. Bonus sketchbook dump

Hardy Tool Rack

So, Today (actually, yesterday now) I was able to spend a few hours in the shop. I was hoping to make great stride in the work on the cooking table (2,.0). But I realized that there was a problem with my shop. In order to work on some of the projects I had been working on recently. I had acquired several more hardy tools. A hardy tool, for those not familiar with the term, is a tool that fits in the hardy hole of the anvil.

Anvil with Hardy hole and pritchpl hole.

Cut off Hardy

Bending Fork


Scrolling Jig

Guillotine Tool


There are quite a few tools that are designed to work with a hardy hole. Pictured above are just a few. The trouble with hardy tools is that they have a square bar 3 to 4 inches long protruding out the bottom. This make them hard to store. They had been being kept on a shelf with holes drilled in it for the hardy shaft to fit in. Alas, this quickly became full and the rest were just left to clutter up my workspace. Something had to be done! So, instead of working on the table I decided to make a rack for these tools. First came the design:

This would consist of 2 angled brackets mounted on the shop wall and 3 slats of oak between them. This would create 2 grooves to drop the hardy shanks in. Because simple is not quite in my vocabulary, I decided to forge a hook on the ends of the brackets.

Finished Hardy Rack

The brackets

The tools are (Somewhat) organized!

The shop.

Small Forgings.

In order to have accomplished something at the forge today ( the rack doesn’t count, it was purely for function) I went ahead and used the final heat from the forge to create the final piece of the toolbox hardware and try and forge a few nails that will hold the box together:

Start of the tool box

Started finalizing the final size of the toolbox.

After all of this, time to cut some wood:

Sketchbook Dump

I have decided to try and rebuild my sketching skills, so here are some of my noteds and sketches for the shop:

Cooking Table 2.0: Water Dipper

The backstory:

While at Pennsic last year, My wife was using the cooking tabe (1.0) and accidentally allowed the fire to get a little to close to the wooden table supports. This caused a slight charring of the support. When my wife noticed that the fire table was actually on fire, she needed some water to put said blaze out. I had placed a large pot of water next to the cook table, but this proved very cumbersome for her to manage. Eventually she was able to put the table out and also create a fine meal as well. “Husband! we need to talk” she loudly proclaimed. Actually, she did not use the term husband, but a she did advise me to think about the way the table rests on its supports. She also put in a request for a water dipper to be used at the table. This made a lot of sense and would be easy to create. I have a water dipper at the forge that i use constantly. It is one of the first things I made in my blacksmithing class.

The work on the dipper actually began before the chest mentioned in the last update, but i have not gotten around to writing it up. My delay in writing it up came from 2 factors. First, i had not started writing these things up yet and was not sure how it would go. Secondly, because this device was in no way period. Do not get me wrong, I am sure there are several example of water dippers in period illustrations, however, The method of producing mine has a distinct modern approach to construction.


This is a tin can dipper. The forge work was to take a 3/8 in square stock and create a hanging handle on one end and a flat ring on the other. The twists were added purely for decoration. This serves as a source of water for fire control and if the can rusts out (which it will), it can be replaced and we are back in business.

One of the big advantages of having this done early in the Table 2.0 process is that it is one of the longest tools to be made for the cooking table. This means that i can use this as a measurement for the viking chest which i hope to get back to soon.

Cooking Table 2.0: The Journey begins with a Viking Chest

What Journey?

So, at Pennsic this year, I created a cooking table for the cooks of Grimmsfield and beyond to try period cooking on. The table was a success, although I was not happy with the way it came out. Sevweral cooks used it with great success. From them I received quite a bit of feedback on what worked and what did not as far as both the table and the associated fire pit. This made me decide that I needed to rebuild the whole thing and create more and better tools for using on it. In order to create all that I want for the table, I am going to start now on the creation of the tools and new table. I hope to have a kitchen I can be proud of by next Pennsic.

Where to begin?

On looking over the notes from the various cooks and the notes I made, there are several tools and pieces of equipment needed for the kitchen. In order to keep track of all of this, a storage device of some kind was needed. In fitting with the period of the table, i decided to make a chest based on the Mastermyr Find and other chests found in Scandinavia. This would be the place to store all of the tools and hardware when not at Pennsic, plus I wanted to add a rack attachment to hang the tools during use.


Start of the Chest, The Hardware

The first steps in making the chest would be to forge the hardware. This would include the hinges and the lock plate. This started with a 48 inch piece of 1 x 1/8 inch piece of cold rolled steel. This was cut into 6 8 inch pieces.


Each hinge would be made of 2 pieces of this stock and the clasp would also take 2 pieces. These were then marked for all the work that would be done to them. 3 would be made with an open loop on the end that would receive the other half. Two would have a hole drifted in the end a would complete the hinge and 1 would have a hole drifted on one side and a hole for the clasp on the other.


And now to forge!


The only thing left is to drill the holes and then on to the woodworking.

Where we stand.

O.K. so i kinda suck at this. I am not the greatest blogger. I tend to get to wrapped up in what I am doing and forget to write down what has been going on. My last post was from before Highland River Melees. Its now after Pennsic and its time to settle down and get back to organized work. Some notes of what has been going on:

  1. I set up an A&S Display at Pennsic

2. Our Pennsic encampment used my fire Table:

several other tools that I created were also used.

Used my hanging spit and chicken spinner as well:

Finished my Hood for Dougal:

Wool we sheered from his sheep hand spun and woven into a hood for the king and queen of Atlantia.

Plus a bunch of other stuff that I cannot think of right now.

Now its time to get back to working correctly:

The fire table worked o.k., but I was not pleased with it. It was wobbley and missing a bunch of key features. Both because I ran out of time and because I was frustrated with the way it was coming out. It is now time to stare fire table 2.0. For this will be a lot more gear and equipment as well. The outline of what I hope to get done for next pennsic can be found here: https://www.grimmsfield.org/blacksmithing-notes . As I delve further down each rabbit hole on this page I will be creating a separate page that will go into detail of that part. Some of my blog posts might just be the link to that new page.

Better late than never post:

My latest work has included working on prizes for Highland River Melees. I volunteered to make prizes for both archery and equestrian. For Archery, I made a set of period Arrows and for equestrian I made 3 hoof picks with various ends. Here are the pictures:


I also found some new images for further research:

Work from the last few days…..

Well, I was hoping to write down each step as I worked on it, but that apparently is not going to happen. Then I thought , maybe once a week. Not even close. So here is what I have been working on sense the last post:

Working on the new cooking grate for the cooking table

Forging my first knife

Processing the White wool for the hood

More Work done on the Dark wool for the hood

Working the wool.

So on Sunday I proceeded to the next step in making the hood. This involved taking the now dry dark wool and making it spin-able. most of my projects in recent times have been done with viking combs to get the best of the wool and leave behind the inferior wool. Because of the limited amount of wool available, I elected to go back to standard combs. This would not create as nice of a yarn, but it allowed me to keep more of the roving. This will be the main activity of making the hood until most of the roving has been processed. The yarn will be stored on spools till a better estimation can be made of the amount. I hope to be able to ply the yarn into 2 ply for strength and uniformity, but that will depend on how much is produced.

Processing the wool from the Elchenburg Castle sheep

The plan for the wool from the 3 new sheep at Elchenburg castle is to clean spin and weave them into a hood. The hood will be woven in hopefully a plan or gigham pattern depending on the amount of wool i can get from these 3 sheep.

The first sheep to be started on processing is Mareep.

Although the sheep (Jacob) seem to have 4 possible distant colors, Black, Brown, Tan & White, I will concentrate this weaving on making a 2 color hood, Dark and light. the wool is being devided before washing and will be wash and picked by color. Here is Mareep decided bt color:

The other sheep to be processed is Fluffy.

This wool was also decided into dark and light

These were then combined together and washed by color

The dark wool was processed first and was done it 2 batches. Each batch was done using the following steps:

  1. Initial hot water rinse. The wool is soaked in hot water for approximately 30 minuteds to help soak off most of the grossest impurities in the wool. This removes a lot of the dust, dander foreign matter, poo and pee.

  2. The 2nd bath is done with hot water and dishwashing detergent. This is used to remove a lot, but not all of the lanolin. With each bath great care is taken not to stir the wool which would cause it to begin felting.

  3. The 3rd and 4th baths are hot water baths to remove the soap and the rest of the dirt.


The next step is to dry the wool:

  1. the wool is wrung dry and spread out on a towel.

  2. This is then rolled as tight as possible to squeeze out as much water as possible. This method is used to avoid felting.

  3. the wool is then removed from the towel and spread on drying racks.

  4. The wool is allowed to air dry with will take between 1 and 3 days. With the racks full, I am at a stopping point until i can clear the racks and wash some more wool. This is the dark wool from 2 of the 3 sheep used for this project.

A bit of the white wool was washed in the batch and here it is next to some unwashed wool:

Shearing the sheep

Last weekend I received a wonderful gift from a man I am happy to call friend. I was invited to shear the sheep. There is a long standing joke about this, but i will not go into it yet. Either way,, I was able to sheer 2 sheep for myself and help shear 3 others for a special project. The next couple of blog entries should be documenting the story of the fleeces of the 3 new sheep at Elchenburg castle.

Lady of the Rose, Pelican, & Laurel Medallion

So, in honor of our previous Queens reign I wanted to make her a thank you gift. This was given to her after her reign. Silver, 14 kt gold and bone.